math at the helm by Katherine Hajer

Years ago at a craft fair, I learned a great technique from Eugene of The Philosopher's Wool Company. I'd bought a kit from him which called for “random stripes”, and I was worried my stripes would either be not random enough, or so random as to be sloppy and erratic.

He told me to keep a six-sided die in my knitting bag, and to roll it to determine how many rows to do for a single stripe. Ta da! No-stress randomness with an aesthetically-pleasing frequency.

The conversion of aesthetic work to simple mechanical action is great for all sorts of stash-busting projects. You get the satisfaction of a good-looking finished object without having to check every stitch for how it's affecting the overall look.

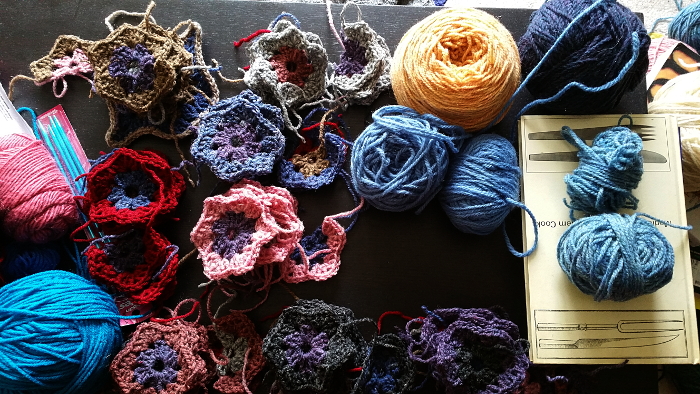
Recently I heaped all my Briggs & Little yarn on my living room floor, took out the skeins that didn't go with the majority, and figured out which colours I needed to buy to complete a usable combination for a blanket (4 skeins).

Then I categorised my 18 colours into 13 groups, and let the math kick in.

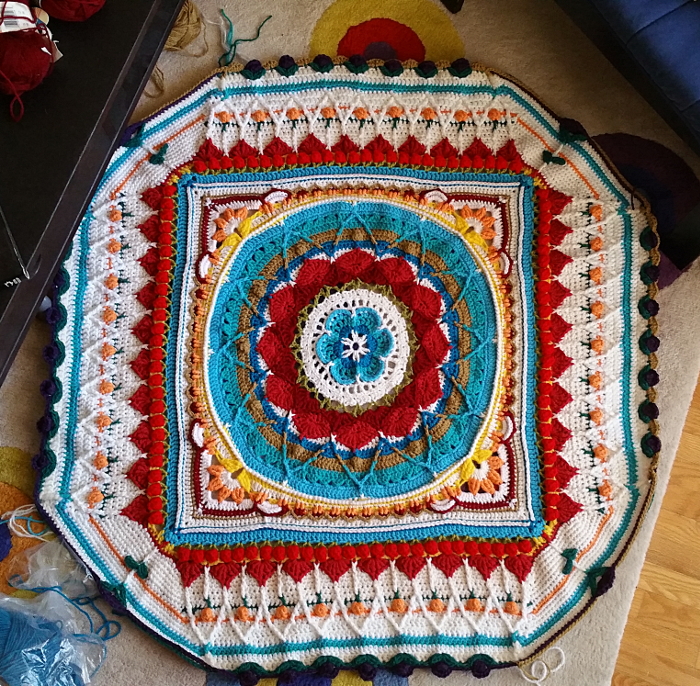
The first step was to complete a single motif so I could figure out how many motifs I needed to make a blanket. Is it just me, or are most blanket patterns too small to actually use as blankets for anyone who's not baby-sized? Maybe it's because I'm stash-busting, but I like blankets to be at least as long as I am (175cm) and at least as wide as my sofa is deep, since that's where I usually use them. This particular blanket I planned to be about the same dimensions as my bed (202x152cm).

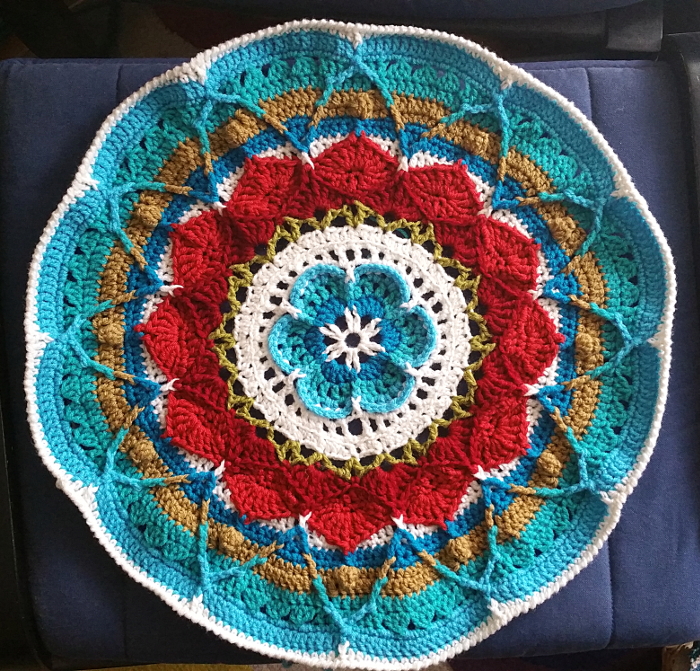
The motif I was using (the ogee granny from Mystical Lanterns) is both oblong and tessellated. I had to work out the number of half-motifs I'd need at the edges to have a straight border.

Conveniently, the overall area was 12x12 motifs, 144 total. I had 13 colour groups, and 11x13 would get me to 143 motifs. One block extra and I was there.

I love it when little coincidences like that happen. They usually mean you're on the right track.

The first two rounds of the motifs and half-motifs were pretty mechanical — just make versions of all possible colour combinations. Not having to think through each set made the work go quickly. After a week I had 13 stacks of half-done motifs sitting on my coffee table, grouped by the colour of the second round.

And then next... as of this writing I've finished the third round for all of the motifs, and have started adding in the fourth round and darning in the ends. More progress photos next week.

daft, artsy & la boca by Katherine Hajer

One of the cool things that happens in my neighbourhood every winter is the Winter Stations installation on the boardwalk. The installations (using the summer lifeguard chairs as bases) are all different every year, and every year they draw big crowds. I just think it's fantastic that people are happy to wander up and down a Canadian lakeside beach in the middle of winter enjoying interactive architecture.

This year there was an extra twist. The local business association decided to hold a Winter Stations shop window contest. Bonnie, the office manager at the Beaches Wellness Centre, had already arranged for a mini-sized lifeguard station to be built, but hadn't decided how to adorn it yet when I showed up for my Saturday appointment. Brainstorming happened with her, chiropractor/owner Johanna, myself, and whoever else was in the waiting room at the time. By the time I left, I had a mission: to yarn bomb the mini-station with interactive knitted faces.

The mouths of the faces have knitted tubes attached to the back, which lead to a knitted bag. The bag is full of treats: candy, coupons, whatever else Bonnie and Jo decide to put in there. The fun part is that people reaching inside can't see what they're going to get.

The sides are relatively open so that people can see from the outside how it all works.

Here's the official artists' statement from the window:

La Boca
Beaches Wellness Centre Winter Station Design 2017
La Boca takes reference from the colourful, vibrant houses of La Boca barrio, a neighbourhood in Buenos Aires, where immigrant migrates from various places landed.
La Boca means "Mouth" in Spanish and invites passersby to explore the secret treasures by putting their hand in the mouth.
This "Winter Station" represents the colours, sensory and hot temperatures of Buenos Aires to warm up the winter of the Beaches in Toronto.
Creative Team:
Katherine Hajer - Textile Artist in Residence
Godfrey Construction - Ed Godfrey/Chief Nail Gun Operator
Bonnie Menard - Curator of receptive spaces
Johanna Carlo - Head Honcho and Ideator

The Creative Team part is the coolest thing about this entire project. It really was a collaboration. I did the knitting, but what I was knitting were ideas from other team members. Bonnie created the environmental space around the installation (and yes folks, that's real sand she hauled down from a local garden centre, and real tree branches forming the "trees" around the station). She also created the "dripping" yarn strands hanging from the ceiling and arranged the balls of leftover yarn on the top of the station, which I like because it looks like the sculpture is forming from the ceiling.

Ed made the lifeguard mini-chair, and Johanna sponsored the whole thing, came up with a lot of the executable ideas (the interactivity, the importance of the mouths, the colour scheme, and the La Boca connection, not to mention the wonderfully over-the-top titles for all of us).

The different shop stations win by being voted on. If you want to vote for this station (you can, once a day until the contest closes!), follow this link and vote for "Beaches Wellness Centre". A randomly-drawn vote will also win a prize from the Beaches BIA!

the knitting

The yarn was picked up the Saturday the whole idea came together, and then for the rest of the day I planned out how I was going to get all the knitting done in a week.

The most obvious way to take care of the big, rectangular facial planes (90x60cm) was with my knitting machine. Problem: I hadn't used my knitting machine since I moved house 8 years ago. One of the table clamps had been lost during the move, and while my stepfather had given me a replacement clamp, its diameter was a little larger than what the knitting machine was built for.

So before anything else was done, I had to take a drill to my knitting machine and gently scrape out one of the table clamp holes until it was big enough to accommodate the replacement clamp. Surprisingly, given my history with power tools, this was achieved in very little time with no damage to knitting machine, drill, furniture, or myself.

Knitting machines distort worked fabric both widthwise and lengthwise, so you have to knit a swatch and then let it rest for 24 hours to let the fabric relax into its final state. The photo at the top of this section shows my swatch, the yarn for the project, and my machine setup. Yes, it takes over the entire dining room table.

Once the swatch had relaxed, I could measure it and determine from its gauge how many stitches and rows I needed to make rectangles the right size. Each rectangle worked out to 90 stitches x 198 rows — thank goodness the machine came with a row counter! Machine knitting is hard on one's shoulders, so I made one rectangle per evening and then stopped for the night.

Wednesday I hand-knitted the orange treats bag, just starting with 8 stitches and working a basic beret shape until it was wide enough, working a few rounds even until it was high enough, then decreasing until the top of the bag matched the size of the mouths I was going to put on the faces.

Thursday and Friday I made the eyes, noses, and mouths. The mouths were measured and then unraveled, then the raw stitches were picked up and knitted for a few rounds to make lips. The mouth tubes were picked up from the wrong side and knitted until they were just over half the depth of the mini-chair.

The eyes got more complicated as I worked on them. At first they were going to be flat, cartoon-animal eyes, but then I remembered that crochet sphere calculator I used to make the Om Nom dolls for the nieces. The final eyes were made from half a white sphere, then part of an iris-coloured sphere, and then finally a flat black circle for the pupils. I didn't want the eyes to be too staring, so I made upper and lower eyelids for them (and yes the upper and lower lids are different shapes). Each eye was lightly stuffed to keep it from being crushed during travel and installation.

The nose, on the other hand, is just a folded triangle shaped to fit the gap between eyes and mouth.

There are a lot of great things about this project — the collaboration, the artists' statement, just the way it all fell together — but mostly I think it's a fabulous example of what happens when everyone pitches in over a short amount of time. It was an intense seven days working on it, but it was only seven days. We all did what we said we were going to do, and the results are exactly what we aimed for.

It was fun the following Saturday to sit in the waiting room and watch people going by on the sidewalk. A lot of people were catching sight of the installation, pausing, taking a good look at it, then glancing surprised at the office storefront sign to figure out what sort of place had such a thing in the window. It will be interesting to see how the reactions evolve over the course of the installation.

random hats by Katherine Hajer

Hats can be great for needlework experiments. You only cast on about half a sweater's worth of stitches, play around with stitches and colours, bring the top to some sort of logical conclusion, and there it is — a hat. They're also great for stash-busting, because you only need to make one of them, and so long as they are in reasonably wearable colours, no-one is too concerned if they don't matchy-match one's coat and gloves perfectly.

Okay, that's true for Canada. Perhaps in more temperate climates people are pickier. Here the prevailing attitude is, "It's warm, it's clean, it fits, it doesn't look too awful and I gotta go out. Done." It's not unusual to see someone otherwise dressed in rather nice business attire sporting a toque in the colours and logo of their kid's hockey team.

The hat at the top of this post is the infamous Shedir pattern Knitty published a few years ago, and which is now part of their free download supporting breast cancer awareness. Shedir was designed as a chemo cap, but it's also a very stretchy design, so it will fit on the head of someone with hair.

I've made Shedir before; an effort that was originally made for me but wound up going to my friend Cathy. My face is too square/round to wear toque-style hats successfully, whereas hers is thinner and looks great in them.

It was fun working through the pattern again. Shedir is an absolute joy to knit, especially if you enjoy Bavarian/"baby" cables. The instructions are flawless and the finishing at the top transforms the mini braided cables of the sides into a nice flat star shape.

I used a stashed ball of Cascade 220 100% superwash wool, but if you are making it as a chemo cap, use the recommended Rowan Calmer. It's smooth, very soft, and super stretchy. It will feel good on a bare scalp not used to being bare, and if they like, the recipient can keep using it as a hat after their hair grows back.

The brown hat with the star colourwork is the Basic Hat pattern from Ravelry, plus a colour chart from the Norwegian Star earflap hat. Both are free patterns, and both happen to have the same stitch multiple, so they go well together (the Basic Hat author recommended the earflap chart). The version I made uses up some more yarn from the nieces' kitties playset. A lot of things are coming back to the kitties playset right now.

The last hat to show, but actually the first I made of these three, is the Windschief-ish hat I made from the same brown yarn as the Basic Hat. This is a beanie with a twisted-rib border, where a quarter of the stitches stay in twisted rib while the rest of the hat switches to stockinette. The ribbed section biases to one side by decreasing before and increasing after the section, until it's time to decrease for the crown. At that point, you decrease before and after the ribbed section, plus at two other equidistant points. Because there are only four decrease points instead of the traditional eight or twelve, you have to decrease every round instead of the usual every other. That means that the "camera iris" effect at the top of the hat shifts twice as fast, and the ever-narrowing ribbed portion swirls around the crown in a pleasing spiral effect.

At least, that's how this hat went. The pattern is for sale, for $6 USD. That's nearly $8 Canadian at the time of this writing, and for a hat I can guess so much about just by looking at photos... I just can't. There's instructions for a cowl included, but the cowl just seems to be the same as the hat, except you never do the crown shaping, and you put a twisted-rib border at the top as well as the bottom. The cowl "fits closely", which tells me it's the same circumference as the hat. I'm actually planning on making another hat and a cowl to match it, just because the pattern seems show off to take variegated yarns well, and I have several hundred grams of variegated to get out of stash.

In the meantime, I found... most of another skein of brown buried in a basket of red and blue yarns I had set aside for the giant stripey blanket. It's actually visible just left of centre in the first photo of that link. I'll have to figure out what to do with it, but I suspect it will be turned into another hat.


poké-woolies by Katherine Hajer

Niece the Elder's birthday is on New Year's Eve, which gives you an idea of how far behind on blogging I am right now.

Ahem. Let's start again.

Niece the Elder's birthday is on New Year's Eve. Besides dooming her to a life of birthdays where there's always a party, it means that she tends to get gifts a little late from me. It's hard to come up with distinctive Yule and birthday gifts when the birthday happens only a week later.

Niece the Younger, meanwhile, is not quite old enough to see her sister get a gift without her getting the same. Her birthday is at the end of March, so I told them I would get them both little gifts for each one's birthday, so they both got things both times.

Right now they are both into all things Pokémon, especially the trading cards. My mum found them some commercially-made Poké knits, and suggested I make them hats and matching mittens.

There are a lot of patterns on-line for Pokémon, of varying degrees of aesthetic success. My hat and mitts are based on this free pattern, though I followed the advice of other people and crocheted the circle motif instead of duplicate stitching it. The other mod I made was to only cast on 80 sts for the hat, instead of the recommended 100 — a lot of posters commented 100 sts was too big for their kids. I got 80 sts by remembering that Elizabeth Zimmermann calculated a hat to be the right size if it were half the circumference of a sweater, and looking up how many stitches at the same gauge I would need to knit the nieces sweaters.

The mittens are the same basic two-needle pattern from a free Paton's leaflet I've been making since I was twelve years old. It's so basic, in fact, that it's very easy to adapt to specific colour patterns, as done here.

Here's Niece the Younger modelling a hat while her big sister attends hockey practice:

I gave them a booster pack of trading cards to go with the knits, plus some lenticular bookmarks with wildlife scenes on them. I think the cards and especially the bookmarks were a bigger hit, but they liked the knits. Niece the Younger pointed out it meant she would always have three Pokéballs on her in case she found some monsters to catch.

The best part (for me) is that the black, silver, and white yarn were already in stash because of the kitties I made them, so I only had to buy the red. So I managed to work some stash-busting in too.

a palpable kit by Katherine Hajer

Usually this blog comprises notes on things I've made. What doesn't get reported is that often I receive things other people have made, because I know a lot of very talented and artsy DIY people. Most of them have their own blogs (those that want them), but this one I wanted to highlight because I was given something DIY... so I could DIY with it.

My friends Tara and Rob, in addition to being better at sewing and cooking than I'll ever be, are also very good at creating meta-level, big-picture projects where everyone does a little bit and gets a lot out of it. This year, they made some of their friends — the ones they knew would go in for this sort of thing — preserving jar carryalls, complete with preserving jars. The idea is that over the harvest season we will all make some sort of preserve to go into the jars, then gather for a swap meet when everyone is ready. Make one recipe, get six different types of preserves back. How cool is that?

Tara claims making these carryalls (and she had to make several) wasn't that big a deal. It would take me several evenings just to wrestle one through the sewing machine, so I am totally impressed. Not only do they have individual pockets for each jar, but they have side pockets as well. They might be good for slipping tasting notes/recipes/serving suggestions into.

Now I've got to figure out what to make with them. I've flipped through several ideas already, and will probably go through more before it's actually time to get preserving.

DIY spontaneity by Katherine Hajer

cloche finished.jpg

One of the myriad benefits of being proficient in some sort of DIY is that you always have gifts on hand — they just probably require some assembly.

I recalled that when Tara and I went to some local street festivals over the summer she was looking for a cloche hat. There were plenty of options around — it's a shape that's back in style again — but for something so recognisable, there are infinite variations. 

There are plain cloches, and then there are ones with fantastic spiral sculptures wandering all over the standard cloche shape. There are cloches adorned with ribbons, feathers, silk flowers, sequins. 

I found a free pattern on reliable Knitty, and dug through my stash for suitable yarn that would match Tara's winter coat. My stash being what it is, it did not take much digging. 

(I only blocked the brim because the crown's shaping was good as-is.)

The pattern is one of those ones which seems daunting at the outset (240 sts for a worsted-weight hat, whaaaaat?), but which resolves to a reasonable and easy bit of work in short order. Half of those 240 sts make up the spiral, and they get decreased away to nothing in very few rows. The remaining stitches get decreased by 20% and then form the crown.

I gave the hat the hair-conditioner treatment prior to blocking, since the hat sits low enough to touch the skin at the forehead and back of the neck. This had the added benefit of making the fabric quite a bit more limp than it was during knitting, and flattened out the curl at the cast-on edge. 

I'd like to make this again in different colours. It's super-retro but classic at the same time, with the benefit of being practical for Canadian winters. 


better knitting through chemistry by Katherine Hajer

Several years ago, a group of my knitting friends and I decided we were all going to try out dyeing wool with Kool Aid. None of us had ever tried it before, and it sounded like an easy, fun thing to do. It was my turn to host a knit night, so on the appointed evening I set several large pans of water ready on my stove, and people showed up with Kool Aid, yarn, and snacks.

It was a lot of fun, and a bit scary. By the time the process is completed, the water used to dye the yarn is completely clear again. The yarn gets rinsed after dyeing just to make sure everything is colourfast and... yeah, everything was. The yarn got washed twice afterwards (more on that below), and no dye came out of it at all.

Just regular Kool Aid, water, and some vinegar if I remember right. It really makes me regret all those "juice crystal" drinks and popsicles I had as a kid.

I dyed 100g of Briggs & Little Regal with a large packet of orange Kool Aid, because nothing says "chemistry experiment" than taking a hank of natural yarn spun at a mill that's been around for 150 years, and turning it a soft orange with drink crystals.

The yarn sat in stash for a long time. I was so eager to see what the dyeing would do to the wool that I didn't think about what I was going to knit with it. I finally decided to make Cathy a hat and a pair of mittens for Yule.

The hat and mittens pattern both come from The Shape of Knitting, the Tilda hat and the Mer mittens respectively. The hat reminded me of a whale's tail for some reason, and the Mer mittens' cuffs have a ripple based on those of sea anemones.

They're both great designs for the knitting and for wearability. The hat is like a slouch hat, but without the excess fabric those usually have. Instead, it curves over the crown of the head while leaving the underside with just enough fabric to meet up gracefully. The joining-up of the front and back involves some fun 3D shaping which is not too hard to work so long as you put faith in the instructions.

The Mer mittens are mostly double knitted. Why do more knitting patterns not take advantage of this technique? It makes things so much more comfortable and easy to knit. The mittens were also the first time I used the technique the book's author calls a speed increase, and it's a great one to add to the general repetoire. A knitter can use the increase to easily double the number of stitches for an entire row or part of a row, quickly and with no stitch distortion. I like how the cuff ruffle gives them a little bit of flare without being ridiculous or overly girly. I also like how the ruffle is only on the back of the mitten, so it won't get in the way.

I love Regal yarn for its minimal processing, but sometimes people find it scratchy (feh!). Therefore, I found this project a good excuse to try some more home chemistry. After washing the finished items in Soak, I worked a generous amount of hair conditioner into them and let them sit for several minutes. Then I rinsed out the hair conditioner and let things air dry on a rack per usual.

Wool haters will still find them scratchy, but they really are much softer than they were before. It was definitely worth using the hair conditioner! I did notice the ribbing of the hat had a more "limp" hand than it did before, but since the rib is for fabric design (it keeps the short rows and the finishing neat) and not stretchiness, that works. The mittens are more flexible now, which is a bonus.

kitties! by Katherine Hajer

As with any human endeavour, there's a certain amount of misconceptions and just plain head-messing with needlework. Non-DIYers will often assume you are a) poor and b) trying to save money, whereas in truth making things by hand is often at least as expensive as buying ready-made (though of course with the bonuses that you have far more control over factors like colours, sizes, and fibre content).

Crafters play head games with themselves too. I have a bad habit of under-estimating projects which require making lots of small things. Sure, each small thing may be very quick to work up, but the finishing can equal or surpass the work necessary for a much larger thing.

The nieces requested me to knit them kitties back in mid-October. Niece the Younger wanted blue, Niece the Elder grey with a black face. The kitties also had to stand up on their own and have toy mice to play with. Got that? The kitties needed toys.

The kitties. Uh huh.

Fortunately, I like to keep track of what knitting books have been published for just such occasions, and knew that Osborne and Muir of Princess Diana sheep jumper fame had written a book called Knit Your Own Cat (among many other books). Both the blue cat and the Siamese (they didn't have the right shades of grey and black at the yarn shop, so I made do) are knitted from the British Shorthair pattern, which was the most, er, "catlike" of all the cat patterns. The rest of the patterns tended to give the cats very narrow bodies and pointed faces, which made them look rather rodent-like.

I did originally intend to also make the nieces Bengal cats in their preferred colours, but once I'd stuffed the first one I realised I didn't like the body proportions. Do you see what I mean? The hind legs are too thick, the forelegs too thin, the neck is too long, and although I did mod the head a little so it would be looking straight ahead instead of down like the original, it's just not right. To me it looks more like a bird's head. It's lovely shaping and all, but it's just not a cat.

Someday I will borrow the book from the library again and plot out the fur pattern on a graph, so that I can expand it and make it to cover the shape of the British Shorthair. I just ran out of time.

In the meantime, I knit the kitties some mice from this great (and free!) 20 Minute Mouse pattern, and crocheted each of the kitties a bed, a dangle toy, some collars, and a food bowl. I also got some Goldfish crackers for the food bowl because, let's face it, those things look like pet kibble to begin with.

The collars were made last, and were finished around midnight Christmas Eve. Like everything else for this project, they weren't difficult, but they were fussy. Foundation single crochet for the collar strap. A single star or moon (circle) medallion. Then sewing the strap together and sewing the medallion to the strap, burying four separate ends into a finished piece made up of not-very-many stitches. It was all very fiddly, as was everything else in the play set. Altogether there are two finished cats, two beds, two food bowls, two dangle toys, four toy mice, and eight collars. It all took much longer than expected.

Niece the Elder has already named her Siamese Fluffball. Niece the Younger's kitty went through several names Christmas afternoon, ranging from Fluff to Fartball. We'll have to see what she settles on.

spirals, stretch, physics by Katherine Hajer

Niece the Elder requested a thin, warm hat to wear under her hockey helmet, so I headed to the internet and found this free Swirl Hat pattern by Mandie Harrington.

This is one of those great free patterns one finds sometimes. The directions are written for a wide range of sizes, from preemie to adult. The writing-up is very clear, and includes colour coding so you can easily keep track of the numbers for the size you are making. I'm not surprised at all that as of this blog post the pattern is available in eight different languages. In itself it's a great example of the internet glomming onto a truly cool thing someone's done and running with it.

The spiral rib design means that the fabric will stretch comfortably to fit lots of different heads. When I was making it I kept calling it the "Jiffy Pop" hat — the swirl is similar to the aluminum foil top of the Jiffy Pop pan before the popcorn puffs it out. I like that it was written for fingering weight yarn instead of the usual worsted or chunky — not everyone wants or needs a thick hat for all winter occasions! The nieces do play a lot outside during the winter, but they also spend a lot of time sitting in cars in full winter gear. It makes sense for them to have thinner hats for when they might be cold but not necessarily braving the elements.

This hat is a great example of a project that is fun to knit up, but also very quick. The regular rib at the lower border bothered me more than usual. Nothing to do with the pattern — I just wasn't into it. The first few rounds of the spiral rib were confusing, but once I learned how to read the fabric it was very easy to do. The rhythm's a little different from the sorts of texture and lace I'm used to. One thing to watch out for: the spiral lace means that the start of round is not obvious after the work gains some height. As always, I'm reluctant to use stitch markers, so I noted where the yarn tail from the cast-on was, and traced that rib up to where I was working to determine where I was in the actual round. I was using dpns instead of a circular needle anyhow, so I had a backup indicator.

The top of the hat is completed via a stitch pattern modification which decreases the stitches over several rounds, bringing the hat's swirl to a graceful close with a flat, non-lumpy finish.

The bubblegum pink sock yarn was originally bought as embroidery yarn for the Hello Kitty-style boot cuffs I made Niece the Elder back in 2012. That only took a miniscule amount, so most of the skein has been sitting in my stash ever since, making me wonder what on earth I was going to make with bubblegum pink sock yarn. Turns out the remainder of the 100g ball will make at least two, possibly three hats. The nieces are prone to lose hats, so I'm going to keep making bubblegum pink ones until I run out of yarn.

cowl crazy by Katherine Hajer

I got an interesting knitting book from Book City a while ago called The Shape of Knitting. At the time I thought, okay, this could be good for stash-busting, and then I put it on my shelf and sort of forgot about it.

Something clicked a couple of weeks ago, and it came down from the shelf. This time I pulled several different balls of orphaned chunky-weight skeins of yarn from my stash and tried out this cowl pattern.

Here's the cowl laid flat and without its buttons sewn on yet, making a lovely scimitar shape:

If you know anything about knit or crochet, but don't know the pattern or book themselves, you might still make an educated guess as to its construction. Start one of the buttonhole tabs, join new yarn for a few rows to make the vertical buttonhole, then merge the halves. Make a second buttonhole tab the same way, then knit across the two. Make the cable twist, which is several rows high and overlays the other half of the cowl, so... oops, must need to start and stop the yarn a few times in there too, right?

Nope. The entire thing, dear reader, is made in one continuous piece. There is one tail from the initial cast-on, and one from the final cast-off, and that is it. Sew on the buttons (which go in nice logical places, so are not hard to locate), and you are done.

Plus 85% of it is done on 9mm needles. Each one takes maybe three and a half hours to make, especially once you get comfortable with the tabs/cable part. Is it any surprise I made four of the things?

The two shown above went to my chiropractor and her office manager as Yule gifts. The one below (and another one I didn't photograph) got donated to charity. Mostly I had to make myself stop because the button costs were starting to add up.

But if you can lay your hands on the book and have about 120m of chunky-weight yarn handy, I strongly recommend this pattern. It's quick, it's unorthodox, it's fashionable, and it's fun.

the stash-busting power of entrelac by Katherine Hajer

Entrelac has long had a reputation as a stash-buster. Gather up some yarn in complementary colours and the same weight, have at it, and come out the other side with a Harlequin-style sweater. Nothing easier, right?

I've been trying to make myself something in entrelac since high school and never come up with anything. Never.

What's up with that? For one, I'm usually trying to work without a pattern, and never seem to make a gauge swatch big enough to calculate sweater circumference correctly. Entrelac tilts the stitches on their sides, which means entrelac doesn't fit into one's preconceived notions of rows and stitches.

For another, I think I've always been overly ambitious in my entrelac experiments.

I had some fun over the holidays, just randomly pulling yarn out of the stash and turning into useful things without much worry about who it was for or what size it was supposed to be (so long as it would reasonably fit a wide variety of human beings). Mostly I followed patterns from my own books, but I did get a book out of the library on entrelac and made a few things from it. The one lonely ball of worsted-weight Noro I've had lying around for years got turned into a hat with an entrelac circle at its top (top photo). It was fun watching the yarn's long runs of colour work within the pattern.

The hat fit my head, but was a little too stretched-out to be attractive. It would work well for a child — or just someone smaller-framed than I am.

I also made a jabot-style scarf out of some odd balls of Rowan Calmer. The end triangles are entrelac, and then the scarf is just a ribbon of ribbed fabric connecting the two together.

It'll make a nice light-but-snug scarf for someone. The ribbed entrelac and scarf body have a extra benefit that they look good from both sides of the fabric. I hate scarves that have a right and wrong side.

This "just small wearable things" challenge is turning out to be fun! I can play around with shape and colour, but still finish quickly. It also means I don't have to spend a lot of time sorting through stash to amass a colourway with enough yardage to make anything big. Small and quick wins the stash-busting race.

the universe is complete by Katherine Hajer

hardwood 01.jpg

The last time I blogged about Sophie's Universe was back in May, when I was about to start the outer border. The top photo there shows it nearly complete, with just half of the final round to go. The nieces were nice enough to sit on it while I had it draped over my brother and SIL's sofa, which gives you a sense of scale. Apparently jumping on something Auntie Kat made is super-fun!

The final size of the blanket was about 170cm along each side. By area it's probably the biggest thing I've ever made, which led to a new challenge: how to photograph the thing so that the entire pattern was visible? I got this shot (still at my brother's, still with the last round to finish) by standing on a stepladder:

I wish it was straight-on instead of at an angle, but you get the idea. My cousins, who are a few centimetres taller than I am, offered to take a photo, but I figured I'd hijacked enough of the family gathering by that point.

So. This is stash-busting on a grand scale. I only bought one ball of white yarn for the entire blanket — it's used for the background of the last border pattern (the one with the red crisscrosses on it). I had more white yarn. I even had lots of white yarn, but not enough to make it around the perimeter without switching yarns, which would have made the blanket look a bit too raggedy and patchy. I was already playing with a certain amount of fire by using different shades and textures of white and cream throughout the blanket. It was worth the $8 in new yarn to finish it without making it look any shabbier.

I haven't blogged about the blanket being finished because it was finished in terms of crocheting, but not destination. The whole plan all along was to transform the stash into something useful and, with any luck, aesthetically pleasing to someone, and then give it away. I've had various suggestions (my initial idea was a women's shelter), but in the end gave it to Pegasus on Kingston Road here in Toronto. It will make a nice bright bed-topper for someone. Here's one final shot of it on my bed — which, again, for scale has a 150cm x 200cm mattress:

The pattern isn't my style since I'm more of a modernist, but anyone who's into folky/bohemian things should like it. I would definitely make something else by the same designer again. In fact, I already have my eye on something, if only I can collect the right yarns from my stash together in the right amounts.

busted! by Katherine Hajer

2016-11-14 11.31.02.jpg

Stash busting gets interesting when you have a limited amount of textured yarn. In this case, I had exactly enough lavender bouclé yarn to make this child's jacket (size 8-ish).

The yarn is chunky and the needles were 8mm, so the knitting was mostly straightforward. Because bouclé lacks stitch definition (duh), I tended to only work on it when I knew I could have a good session of it and wouldn't have to make detailed "where was I again?" notes.

Alteration: the only I changed (besides not using the called-for smooth yarn) was to add a narrow garter-stitch edge to the fronts instead of adding a row of single crochet during finishing. And, um, I'm pretty sure I changed the collar too, but at that point I was trying to get the thing done with the yarn I had left and not following the pattern so much. 

In the end I had a ball of yarn the size of a tennis ball, which of course at this thickness yarn is not a lot.  

The original pattern called for the jacket to be closed with a kilt pin. Yeahhhh, giving a kid a giant sharp pin is maybe not such a good idea in today's parenting climate. Instead I improvised an I-cord button and frog closure, which should please most health-and-safety concerns. Besides, it used up a few more metres of that stash white acrylic worsted I can never quite free myself of. 

I was going to donate the jacket to a charity shop, because the nieces are just growing out of this size (and I'm not sure they'd like it anyhow) but then Bonnie at Beaches Wellness Centre said her niece would like it. Works for me!  I have many, many items slated for making and donating in the near- to mid-future. 

Overall I'd say this counts as a positive stash-busting experience. Just as well, because I have the same amount of white bouclé with which to make another jacket! 

gigantism by Katherine Hajer

A co-worker gave me some yarn a few months ago. She's a loom knitter, but she hasn't had time for it lately, and was trying to clear some space at home.

Being given yarn can be a good challenge, especially if the giver works outside your usual zone. I received two skeins of chunky chenille, and four skeins (in two different colours) of chunky bouclé.

The bouclé was enough to make its own project from, but the chenille was difficult. Unlike the bouclé, the yardage wasn't that great, and all the patterns for it seemed to be blankets. Several people recommended making hats out of it, but in general kids don't like wearing bulky hats, and the colour strongly indicated making something for kids. 

Then I remembered this washcloth pattern. It's unusual in that it specifically calls for chenille. Even though the yarn was a lot thicker than what's called for, I used the recommended needle size and wound up with a dense, soft fabric. The finished cloths are about 25% bigger than the pattern predicts, but the central non-petaled part is about the right size for a washcloth, so meh.

Chenille can be weird to work with, and of course famously "worms" at looser gauges. These cloths should hold up nicely. 

I got some fruit-scented soaps to wrap the cloths around, and have designated them stocking stuffers for the nieces at Yule. Stash-busting and  gifts sorted out! Works for me.


atomic age accessories by Katherine Hajer

The conventional wisdom is that, for the most part, hand-crafted items have no clear utility in the modern age. Factories churn out mass-produced goods to serve every purpose and desire. Hand-made things retain a niche only because of aesthetics, tradition, and leisure time.

I say the conventional wisdom is full of it.

I replaced my old toaster recently. It wasn't so much because it wasn't working anymore — it was half-working as well as it ever did — but because it was full of dust and tiny, stuck-on crumbs of toast. It got replaced with an even-cheaper toaster, which at least toasts consistently, and has the current advantage of being new and therefore clean.

I wanted to keep it that way, so I decided to get a toaster cover for it. My kitchen doesn't have the cupboard space to put it away between uses, and I use it nearly every day anyhow.

What I discovered is that when it comes to commercially-produced toaster covers, there are no good options. The prices ran from $10 to $100 CAD, yet all of them were equally awful. Quilting with a plastic, easily-meltable lining (be careful how soon after using the toaster you replace the cover!). A choice between either super-plain, single-pattern colours, or super-cutesy, mock-feminine covers depicting cats, chickens, flowers, and other things that would look ridiculous in my kitchen.

This, friends, is why I'm glad I know how to make my own stuff.

I got the idea for my own design from Pinterest. Sadly, the image I found links to one of those sites which vomit gambling, porn, and malware ads as soon as you navigate there — obviously not the real source of the image! I haven't found a way to credit the original designer, but I'd like to. Their version had a crocheted piece of "toast" coming out of the top as a handle, and a little crocheted tab out the side. The original 1950s-ish "atom" shapes were in shades of grey and green.

My version has "atoms" to match the backsplash tiles in my kitchen, on both sides so that it doesn't matter which way I pull the cover onto the toaster. Because it's custom-made, the fit is loose enough that the cover pulls off easily without a handle.

Everything was made from stash. The body of the cover and the circle appliqués are made from leftover dishcloth cotton, and the black antenna appliqués are from fingering-weight cotton. I used the tails from the black appliqués to embroider the connecting lines and sew the crocheted circles onto the cover.

I wound up enjoying the exercise so much, I decided to make a knitted version too, using the same yarns but in a different design. That way I'll have a spare cover for when the other one is in the wash.

Gotta love the internet: while I was researching patterns, I came across the on-line Toaster Museum. Who knew toasters were so interesting?

upcycling challenge completed by Katherine Hajer

#craftblogclub held its 2016 upcycle challenge over the summer, which was a great prompt for me to dig out the "yarn" I'd made from a worn-out set of bedsheets a while ago. I already blogged about the large basket I'd made, but by the time I was done I still had most of one ball/sheet left.

Around the same time I finished the basket, I found this old Guardian article about how to crochet apple jackets. I know the common wisdom is to never read the comments, but the sheer vitriol of the comments on the apple jacket article was wonderful in an awful sort of way. Who says crafting is boring? Besides, a few commenters explained the article was wrong; these are not apple "cozies" but rather a reusable way to keep fruit from getting gouged or bruised as it travels in your purse or carryall. So as fey as they seem, they really are practical!

Be that as it may, it occurred to me that if the apple jacket idea was scaled up — by using upcycled bedsheet yarn instead of the called-for DK cotton, for example — the shape would be very close to the ceramic yarn bowl my friend Cathy gave me.

I have been using that yarn bowl nearly non-stop since it arrived. It is perfect for using with odd-balls, ensuring they don't migrate all over the floor in the course of their being worked. It seems to keep centre-pull skeins in better order as well.

The only drawback is that, being ceramic, the yarn bowl is not really meant for travel. The crocheted versions are more amenable to being tossed in a bag to be brought along for knit night.

The crocheted flower-buttons were added just because I've been meaning to try that out for ages, and for fun. Nothing wrong with using a plain button or a different type of closure, of course.

The smaller basket is smaller simply because I was running out of yarn. Its bottom is made from the very last few metres of bedsheet yarn left over from the doily rug I made a couple of years ago.

All three baskets were crocheted with a bamboo 10mm hook, held knife style instead of my usual pencil style. I read somewhere just before I started these that the knife style is much more comfortable for doing this sort of bulky, densely-gauged work, and although I am a dedicated penciller most of the time, I have to say it really did keep my hands and shoulders from getting too tired too quickly.

The fabric has to be worked rather tightly to make it self-supporting. The strips I used were about 2cm wide, but when worked they get folded up so they are more like 5mm wide.

Next challenge: making a new glove/hat/scarf set before the snow flies!

practical whimsy by Katherine Hajer

I suppose it's in reaction to the giant blanket I just finished (which, er, I haven't done a final blog instalment on), but I've been churning out all sorts of quick items, using up stash.

I found this blog post about pan protectors on Pinterest, and it just seemed like such a good idea. Not only will it keep the pans from scratching each other — although you can see it's too late for the sample pan in the top photo — but they won't clatter so much when I put them away.

The pattern is from Vivian Høxbro's Domino Knitting book. She starts the book by giving directions for a series of potholders, each focusing on a different domino knitting technique. I've always been fond of this octagonal one, but this is the first time I've made it. The yarn is just standard dishcloth cotton worked on 4mm needles. The pattern called for smaller needles and DK cotton, but worsted is what I had in stash, so that's what got used. Turns out I knit more tightly than the book's sample knitters, so my pot holder is the same size as what's prescribed in the book despite the thicker yarn and bigger needles.

I can see making more. All of the ends are woven in as one knits, and there are no seams. The only thing I don't like about this one is that I wasn't very picky about the size of the circular needles used for the edging, and I should have gone up a size instead of down:

laid out.jpg

I'm doing a bit of an apartment upgrade at the moment, but very much on the cheap. For instance, I finally found a set of glass mixing bowls to replace the icky scratched-up black ones that were given to me. I wear a lot of black, but I do not like it in my cookware! (All right, except for appliances, but there's not much choice there.) They're a clear set of nesting bowls, so I think they'll be getting protectors as well.

This could be a really fun way to use up stash.

a tale of two baskets by Katherine Hajer

Two baskets, both alike in fibre content
In my fair-to-middling apartment, where we lay our scene
From ancient bedclothes break to new crocheting,
Where smaller stash makes smaller households more clean. 

Okay, enough of that! Really, from the blog title I chose, I ought to be mangling Dickens instead.

The two baskets have been in the to-do queue for a while. They're both made from this free pattern, which works up very quickly with a 10mm hook. The purple basket is made of four strands of Bernat Cotton Tots held together, while the yellow is an old bedsheet set torn into "yarn".

I find it interesting that both baskets are made of mostly cotton with some synthetic, yet the structure of the materials gives them such different traits. The purple yarn sheds horribly, and the basket started pilling as soon as I finished it. I'm not surprised Bernat discontinued the yarn.

The bedsheets came from IKEA, and lasted nearly fifteen years. They've definitely earned their basket afterlife. Like anything made from "rag" yarn, the basket has plenty of stray threads. I pulled quite a few out once I finished it, but most of them got crocheted in.

As for their purpose, both baskets, having been constructed 100% from stash, shall be used... to store stash. Even modest, upcycled baskets are far more stylish than the plastic shopping bags I'm using for the stash that won't fit in cubbyholes.

The end game is to empty out the stash storage, period, and then repurpose some of the storage. Onwards. 

the limits of the observable universe by Katherine Hajer

Work on Sophie's Universe continues apace. Last week the blanket finally got squared off again (see above), but I didn't get around to blogging.

The return to a square form means that the blanket creation is in its final movements. From here on out, there are several border patterns to construct, and then washing/blocking.

As of this moment, Sophie looks like this:

The blanket is now just over 1.5m across, which means that it's far too big to travel with. It also means that while before I was easily tearing through 2-3 rounds a night, it now takes a couple of nights to finish even one round.

The photo points to another, blogging-related problem. Not only is the blanket already reaching the edges of my (queen-sized) bed, but I can't get a complete photo of it anymore! The one above was taken standing on the very top of a stepladder, knees pressed against the carry handle, knuckles pressed against the ceiling plaster, and still I cut off a bit of one edge. Next time I'll have to clear the library/office and photograph it from the floor. I can't get any natural light in that room — it's the library because it's the only room in the apartment with walls and no windows — but it does have a good set of overhead halogen lights.

I'll still need a stepladder to get it all in, though.

The rounds are now sufficiently big (1.5m x 4 = 6m around!) that I had to cave in and buy some white yarn to make it across the finish line. It's not that I don't have more white odd-balls — I have a lot — but they're all too small to last through one circumference. I decided to get a 790g super-size skein, not because I'll need that much, but because I didn't want to be stingy and then get caught out. Besides, maybe I can use it with the left-over bits of odd-sized whites to make something else. I have a few candidates already.

Meanwhile, the Toronto summer has hit in full force, with weather advisories all last weekend due to the heat and humidity. The sooner I can get this blanket done, the better!

the universe is expanding by Katherine Hajer

I think I've mentioned before here that I basically have three levels of active-ness. If I'm fully well or just a wee bit ill, I'm able to write. If I'm worn-out or outright sick, I can knit or crochet, so long as the pattern isn't too involved. If I'm truly suffering, the best I can manage is to hide under a pile of blankets and quilts on the couch and scowl at whatever nature documentary on Netflix I haven't seen too many times yet.

Surely I'm not the only person who watches nature documentaries when they're sick. They were one of the few types of shows my entire family would sit down to watch when I was a kid, so they have a certain nostalgic feel to them, even as they show polar bears stranded on ever-shrinking ice caps. Also, I've watched so many that if I doze off into a fever-induced slumber in the middle of one, I can wake up whenever and not have really missed anything.

I've been ill for the past two weeks with some sort of sinus infection, so not much writing has been getting done (grr). For a few nights, I was too busy having fever and chills to get any needlework done either. Right now I'm better but not yet illness-free, so the stash-busting has had more progress than the novel-writing.

The photos show that I'm still working on Sophie's Universe. I'm still not sure it's not ugly — I seem to say that about all my blankets — but it's definitely a lot of fun to do. Every single round has something or other going on. I've learned a lot about the mechanics of overlay crochet, and about what post stitches can do. Everything is still 100% stash. I even [sigh] found a big ball of leftover white yarn I am setting aside for the broad border section with the negative-space butterfly motifs.

The cut-off corners will eventually become the blanket's sides, while the sides with the rows of bobbles will eventually narrow to points. The central square will be tilted 45 degrees in the final version into a diamond. Right now it's almost exactly a metre across; well on its way to the planned finished size of 1.8 metres square.

By which time I hope to be doing more writing than needlework, and to have used up lots and lots of stash.