crochet

ten hats by Katherine Hajer

Last summer the ever-generous J-A and I each made a set of hats to donate to Hat not Hate, an American organisation that hands out hats to kids while teaching them how not to bully (and how not to be bullied).

The logical thing to do when making hats for a charity drive is to pick a simple pattern you can make in an evening or less, and then make it over and over, to maximise how many hats your produce.

I find that just doesn’t work for me. I get bored, and then my output slows. Instead, I gathered up all the patterns I thought looked cool, or that I’ve always wanted to try to make but never had a reason to, and matched them up with stash yarn.

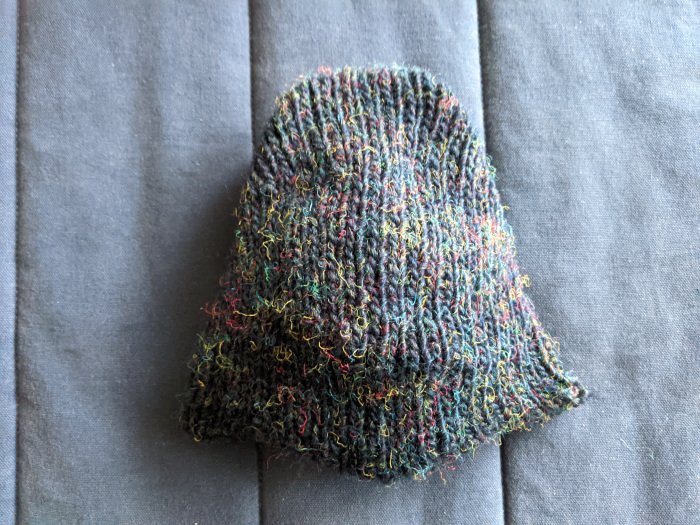
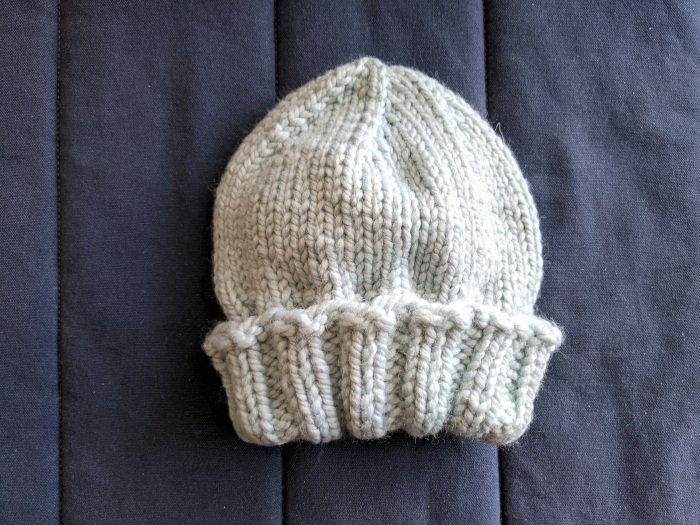
The rules for Hat not Hate in terms of yarn is that it can be any colour you like, so long as it’s mostly blue. The blue can be anything from the light icy blue of the toque, to the teal of the rivet hat, to the navy tweeds of the simple hat (the navy tweed was donated by Lynda Tam — thank you!). All of the hats were stash, and it was a lot of fun to match yarn to projects.

Notes on each hat are below.

cabled beret

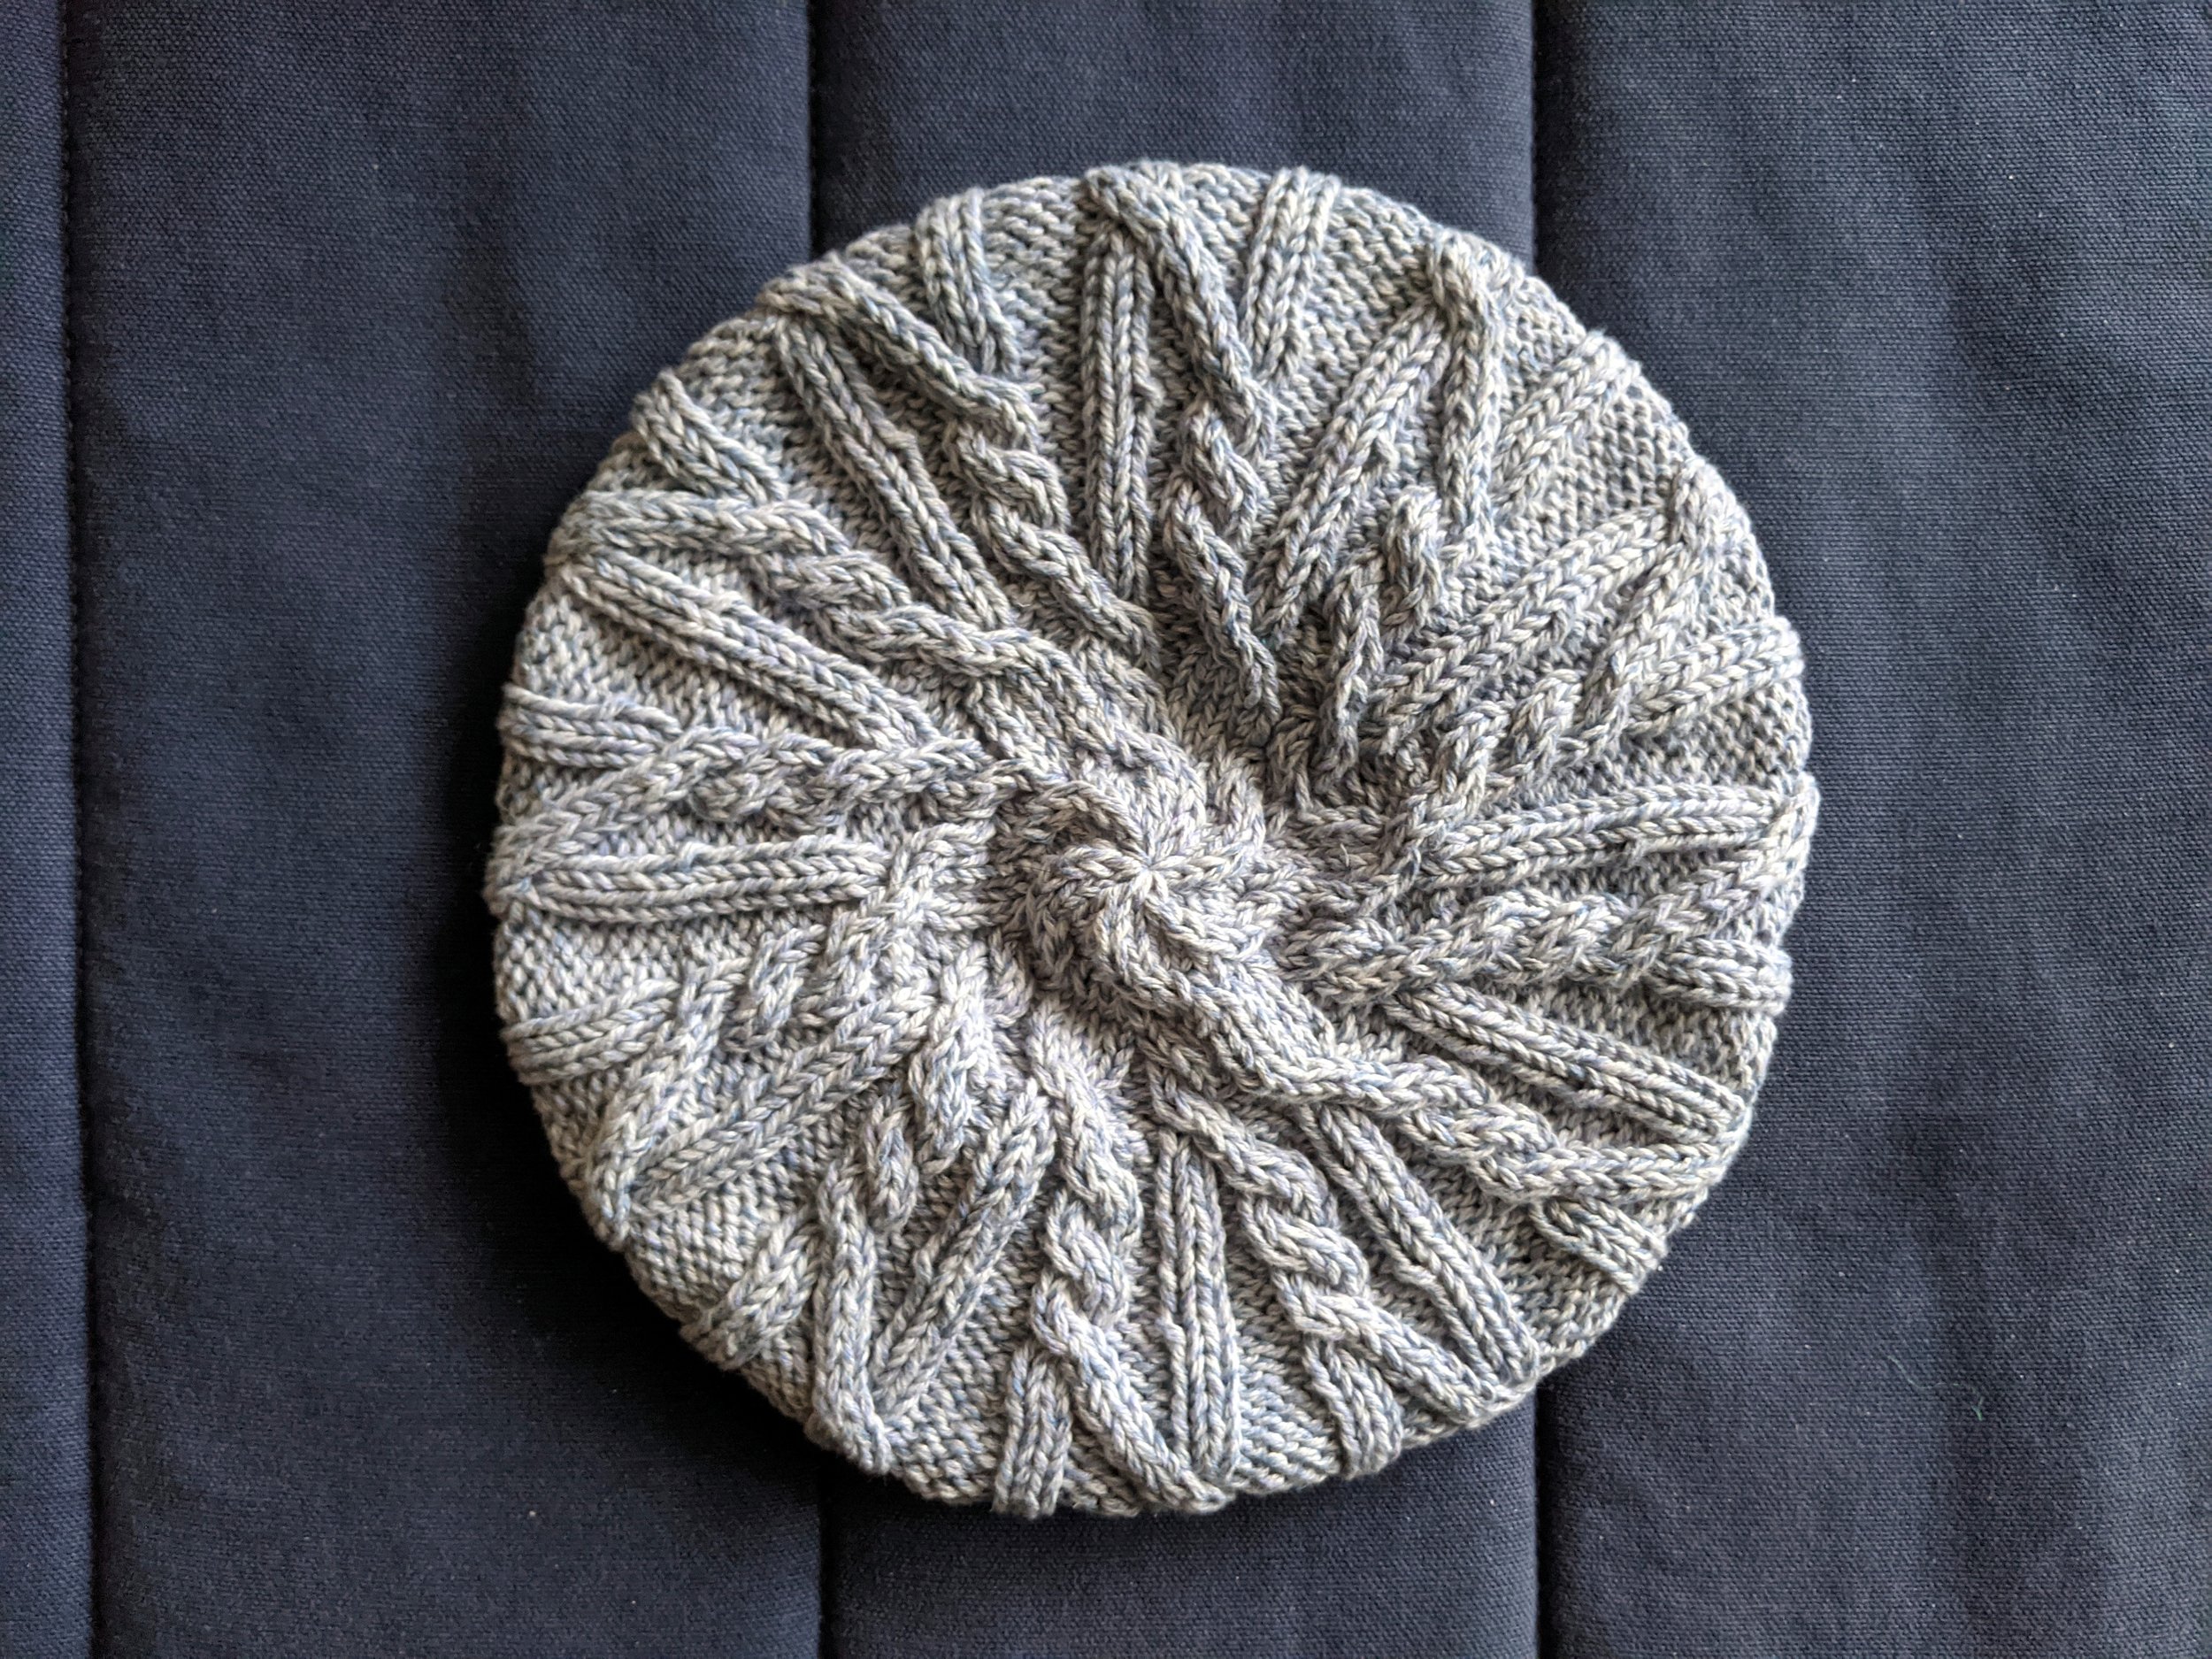
This is from an old copy of Vogue Knitting. Since it’s supposed to be a summer hat (!), I made it in blue-and-white marled cotton. The cables are integrated into the bottom ribbing, which was fun, as was the tidy finishing of the cables at the centre top of the beret.

crocheted cloche

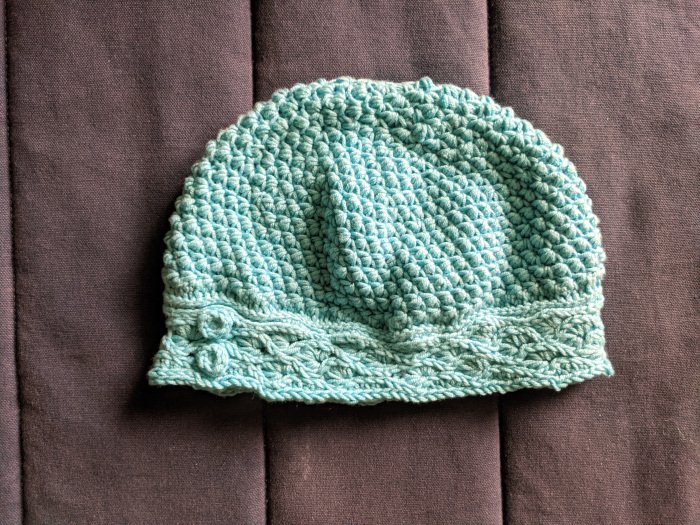
This was from a recent-ish Interweave Crochet. Honestly? it was a complete pain to make, but I was still glad to make it. The main body stitch was interesting; I could see it being used once upon a time to make a bathing cap in the days before those all switched to latex.

raindrop bobble hat

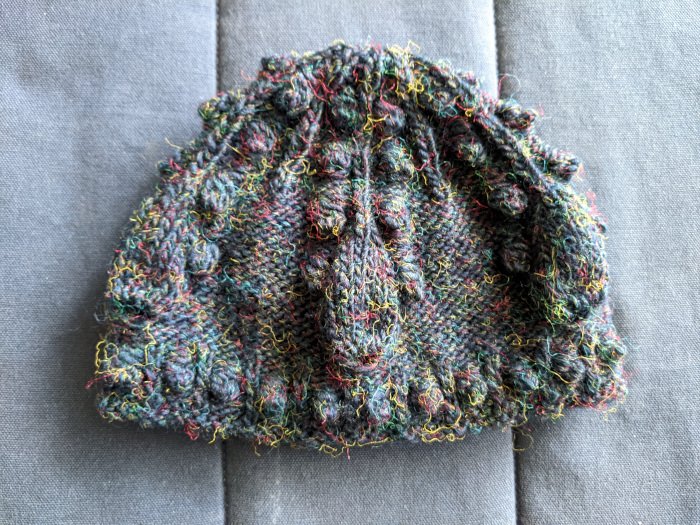
This is from Norah Gaughan’s Knitting Nature book. It’s very bobbly and otherwise textured, which is unusual these days, but still seemed aesthetically pleasing. I hope the recipient agreed.

rivets hat

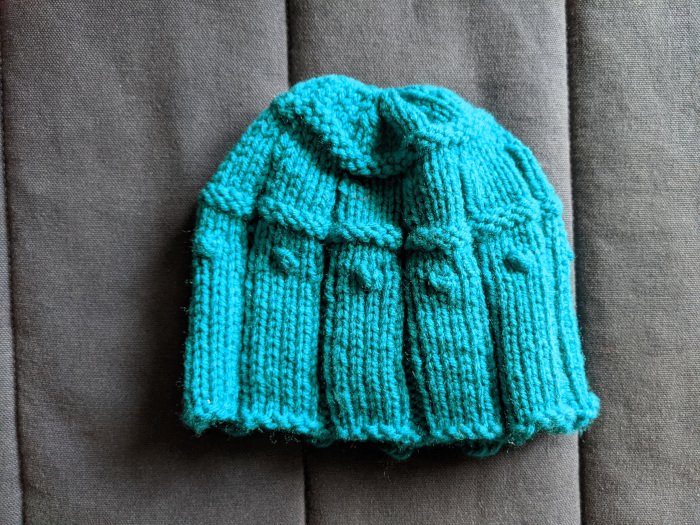
This is from one of Elspeth Lavold’s books, The Embraceable You Collection, based on the clothing carved on China’s famous Terracotta Army statues.

simple hat

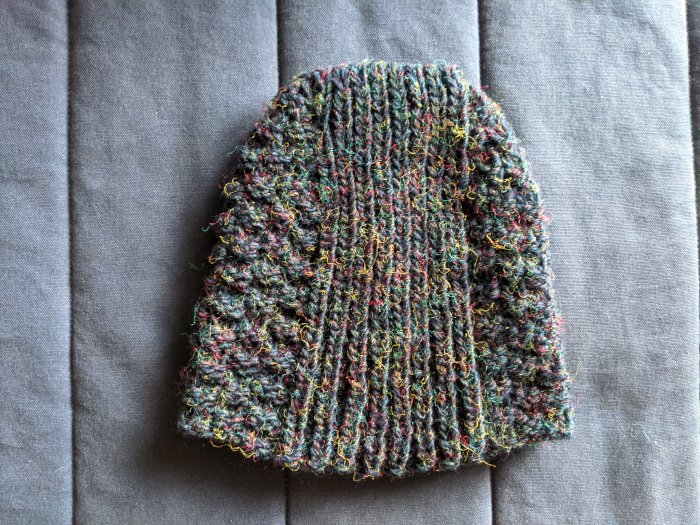
This version was my sixth or seventh rendering of this pattern. It’s a fun, quick hat to make, and so far everyone I have given one to has talked about how much they like how it looks on them and how well it fits. It also has time travelling abilities, because people have guessed it’s everything from vintage late 60s to vintage 90s (which is mostly correct) to a brand new design. From The Shape of Knitting by Lynn Truss.

sunflower beret

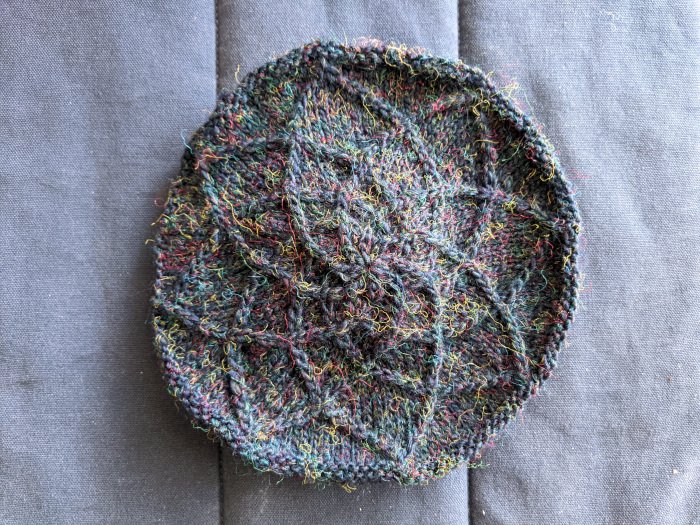
This is another one from the same Norah Gaughan book as above. It went faster, and is not as complicated, than I expected, and the top especially is a very satisfying knit.

tilda reverse flat cap

This is another one from The Shape of Knitting that I’ve made more than once. The brilliance here is that for most of the hat, you’re working short rows around just the top half. It’s basically a slouch hat with all the excess fabric removed, and a much more interesting ending.

toque

I got this pattern from the Lion Brand website when I had finished Cathy’s The Shining Apollo sweater. I made three versions of The Simple Hat (fourth version included here and described above), and then made the Lion Brand pattern as another basic hat friends and family might like.

Nobody wanted it, while the Simple Hats got snapped up with requests for more. My mum has two of them now.

I do think the toque will appeal to someone. Probably someone who is used to only getting hats from major chain stores. It has a certain kind of plainness to it.

two colour beanie

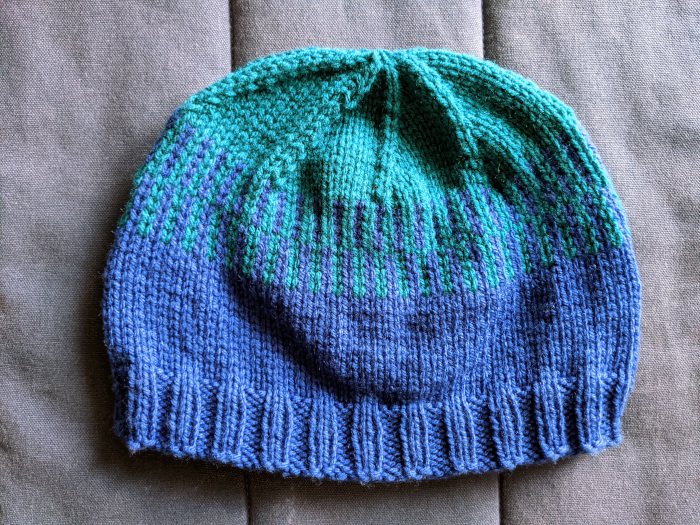
This is the sort of hat that happens when you are trying to use up stash, but don’t have enough for even a hat. I used a basic free beanie pattern found on Ravelry for the base, and then did a very plain stranded colourwork section for the transition to the other colour, rather than just doing an abrupt change. The colourwork hides the beginning-of-round job and makes it a bit less plain.

crocheted lace beret

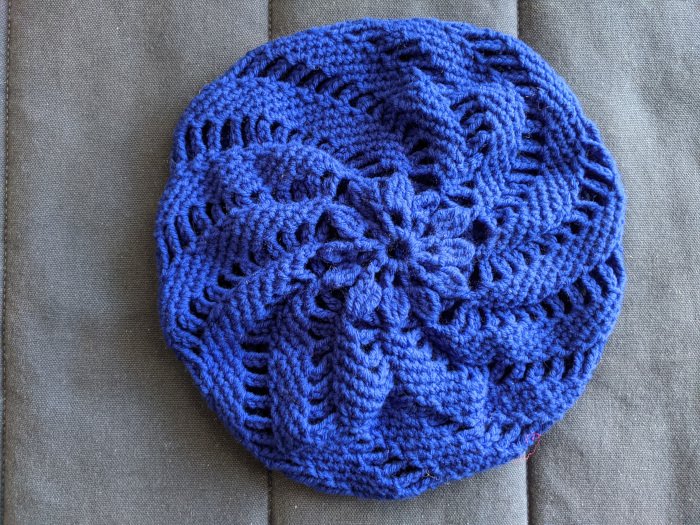
Of all of the hats, this might be the most “statement” one. I pictured a different imaginary kid as the target recipient for all of these hats, but for this one, I specifically imagined a kid with super-curly, high-volume hair. Of all the hats, this was the one I could see as most likely to be worn all day, not just outside. It’s a big enough beret with big enough openwork that it lies somewhere between a proper beret and a 1940s-style snood.

The pattern comes from Crochet Red: Crocheting for Women’s Heart Health. The pattern was pretty easy to execute once the first few lace rounds were established, and I found the increase/decrease method interesting and fun to do.

The hats all got very carefully stuffed into a padded mailer envelope and shipped off to New Jersey. Since then, Hat Not Hate has changed their hat collection method, and… I don’t know, I like their cause, but supporting a foreign charity just wasn’t as satisfying as the work I’ve done for local/Canadian groups in the past. Since then, I have been making hats and scarves from stash in all sorts of colours, not just blue. Next autumn, when the charities are collecting warm wearables again, I’d like to give them somewhere locally. I always try to make things people will want to wear, so hopefully everything will find owners who are happy to have them, not just because they need a hat and rely on community groups to get them from.

clutter to... usable clutter? by Katherine Hajer

four hats and one set of four coasters made from odd balls of yarn

There’s stash, and then there’s “it’s in my way” stash. For the first pandemic Yule season, I made the nieces and nephews some fun hats and sweaters. I also managed to finish one earflap hat (the first one shown in that earlier post).

That still left rather a lot of stash yarn. Too much for me to put away in my yarn storage, because… it’s already full of stash yarn.

Meanwhile, the ever-generous J-A gave me some assorted odd balls of yarn from a box she’d won.

All of which means that right now, I’m having some fun just making whatever the yarn moves me to, with the caveat that it has to be useful to someone, somewhere.

In the top left of the photo is a geodesic dome hat (aka a Buckminster Fuller dome). Something about my gauge compared to the pattern gauge was off, hard to say what because the pattern was on the vague side, so I added another row of triangles and made the earflaps small single triangles instead of the larger four-triangle shapes from the pattern. The colours were fun to work out for this one. I made a rule that two triangles of the same colour could share points but not an entire side.

In the top right is a beige knit-and-purl textured hat made from one of J-A’s prize skeins. Yes, I have made this pattern about seven times now. It’s quick and interesting to knit, and all recipients report the hat fits them well. The ribbed band goes from the forehead to the back of the head, and stretches width-wise to accommodate the wearer’s head.

The blue watch cap in the bottom left is also very stretchy, and has a neat diagonal panel wandering through the main fabric to keep the knitting from getting monotonous. I suspect it will fare better against the wind than a standard watch cap, because it’s in worsted-weight yarn , but only 3.5mm needles instead of the usual 5mm-ish.

The peppermint stripe had (seen here folded into quarters) will also be great against the wind, because the floats on the inside block the stitch holes on the outer layer. It’s a simple pattern that gets very mesmerizing and soothing to knit.

And then… There was a ball of cotton-based yarn from J-A’s stash that just didn’t want to be a hat. It’s the type of yarn where a biggish strand of unspun cotton is wound with a thin thread, creating a slubbed yarn with a light thick-and-thin texture. It’s not particularly stretchy, and the large amount of off-white doesn’t lend itself to items which might get dirty easily. Instead, I found a free crochet pattern and made a set of coasters out of it. Four coasters came within a couple of metres of using up the entire ball of yarn. I like the results — to me, the colours make for a 1950s-1970s look, almost like a raffia effect. I can imagine someone setting down some fruity cocktails on top of them.

It would be nice to say this made a substantial dent in the stash and that my living room is a bit less cluttered now, but I’ve still got about… two kilos of yarn, say? left. Two items are already on the needles and will contribute to the next blog post.

slipper evolution by Katherine Hajer

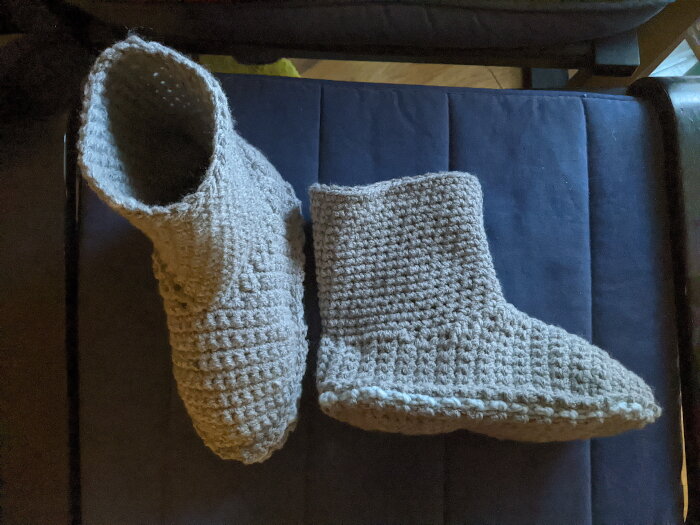
I’m back to prototyping slippers made closer to shoe-making construction. Unlike last time, where the slippers were all for other people to borrow, these are all for me. I wear out slippers frequently enough that making a clutch of slippers and setting them aside for next winter is a good idea. Besides, it’s using up stash!

The first pair I made was from a free Bernat pattern which renders slippers that look like Ugg boots. I’m not a fan of actual Ugg boots, but they work out to be great slippers when the annual Toronto deep freeze happens in January-February.

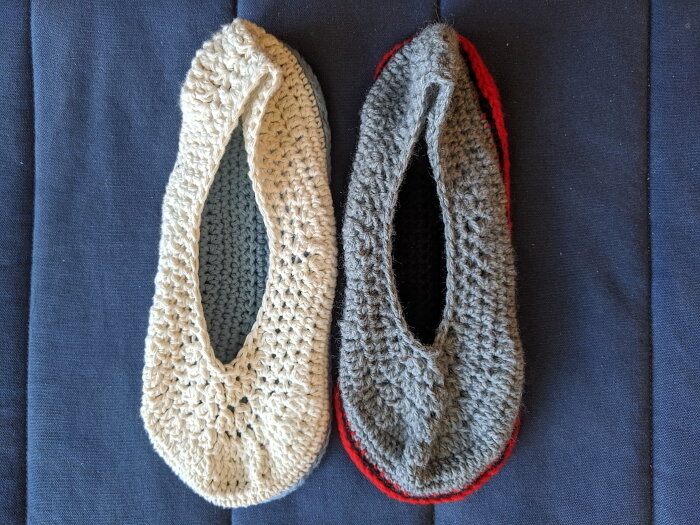
The next pair were me improvising on a crocheted double sole to create ballet-type slippers. I did one pair in the regular acrylic leftovers I use for slippers, and one in dishcloth cotton for when the weather is in between slippers and bare feet.

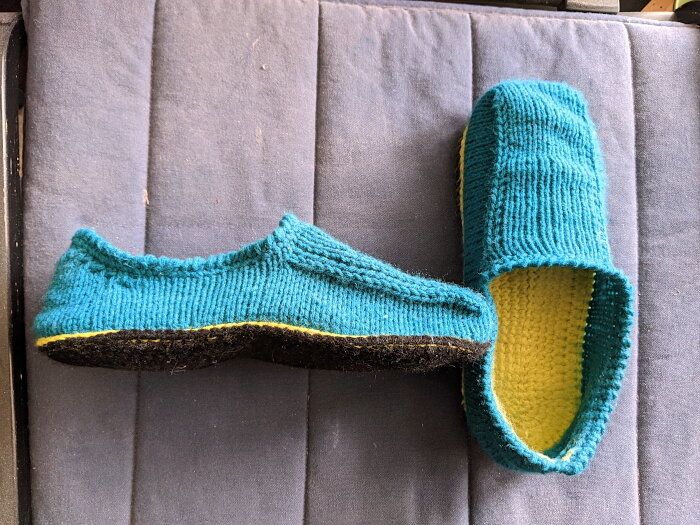
The teal-and-lime pair are my most recent experiment. Crocheted double soles as usual, but then I pick up stitches and knit the uppers. That way the soles have a nice dense fabric (and then doubled), but the uppers get all the stretch and flexibility from knitting. (Yes, crocheters will claim I can crochet the whole thing, but since I know how to do both, I’m happy to switch between the two fabrics to get the effect I want).

I’ve currently got a medium-grey pair on the go with orange soles. They’re basically the same as the teal and lime slippers, but I’m trying to refine the shaping a bit (making the toe box narrower).

Next iteration, I want to try to fit the soles to my actual foot size better. The ultimate goal is to get a pair of these onto flip-flop soles to make true indoor (and maybe outdoor?) shoes.

droid cuteness by Katherine Hajer

BB8 front.jpg

The nieces have finally been bitten by the Star Wars bug. The last two times I've visited them, they've been marathoning the films on DVD, and are completely enraptured even though they have seen all of the films many (many, many) times now. Luckily for their auntie, so far Original Trilogy films have been on during visits and not anything from the second trilogy. This is a post about crocheting, so we'll leave it at that.

When The Force Awakens was released, Niece the Elder wanted to know why the movie trailer was playing the Angry Birds theme. How times change.

Of course the nieces now want to go out on Hallowe'en in SW costumes. Niece the Elder wants to dress up as BB8, while Niece the Younger wants to be Rey, even though she is also a massive fan of R2D2.

Niece the Elder didn't like the Jetsonesque fascinator thingie that came with her BB8 costume, so she asked if I could make her a BB8 hat. I'm not too fond of it either, so of course I could.

This is Canada, and the nieces are lucky to live below the snow belt and not have to worry about wearing costumes over snowsuits like their auntie and father did. Still, it can be a bit nippy at night by Hallowe'en, so I made the nieces droid beanies.

The instruction for the BB8 hat and related appliques are in two separate Youtube videos, and only in Youtube videos. This was frustrating. The good news is that if you're completely new to crochet and just really want one of these hats, you can probably make it through by watching these videos, maybe with some beginner crochet videos as warm-ups. The bad news is if you already know how to crochet, it's maddeningly tedious to work through them. I wound up challenging myself to finish a step before the narrative/demo was over, just as a way not to go numb. Near as I can figure, the purpose of sharing the pattern on Youtube rather than on a web page seems to be to make you sit through advertisements. Thankfully these don't played if the video is Chromecast.

r2d2 front.jpg

The R2D2 hat design is by the same person, and is also Youtubed into a hat video and an applique video. Having done the BB8 hat first, I made some execution decisions which were different from what's in the video. Rather than leave floats of unused colour at the back of the work, I cut strands of white yarn and did a sort of intarsia for the one-stitch white bars between the blue areas. I also cut the blue yarn rather than carry it across long stretches of white. I liked the results so much better I unravelled the BB8 hat and re-did it using the same techniques. It made for more ends to darn in, but meh. I'm not one of those crafters who gets upset about darning in ends. The final product was tidier both to work and in finished form.

r2d2 back.jpg

One thing I learned about my crocheting by making these hats: my double crochets tend to be shorter and wider than normal. To get a tidy start of round, I only chained 2 instead of the usual 3, which made for a distinctive gap at the back of the first version of the BB8 hat. The chain 2s are hardly noticeable at all.

Even with re-doing the entirety of the BB8 hat, these were quick to make and took surprisingly little yarn. All the yarn except for BB8's orange came from stash, which was satisfying. It's also nice to make something for Hallowe'en which the nieces can wear throughout the winter.

an interlude project by Katherine Hajer

upload.jpg

The Tuesday before Easter I baby-sat the nieces. I'd seen that Caron Cakes were on sale, so I showed them the dragonfly poncho pattern and asked them if they wanted one for themselves. 

The nieces are not much into boho fashion. Niece the Elder's take was, "what the what?"  She wasn't very clear on how such a contraption was to be worn, or why. Niece the Younger likes cuddly clothing, though, and said she wanted one. 

I'd thought she would have wanted the turquoise colourway shown in the pattern photo, since that's what she usually asks for, but it turns out she's moved on to dark blue, so that's what she got. 

I picked up the yarn the following afternoon, and by the end of the evening I had one panel done... and it looked horrible. The edges were wavy. The whole thing just looked sloppy. I was not pleased. 

upload.jpg

Still, I pressed on, and somehow found my stride on the second piece, which came out more even. The difference was so stark I unraveled the first piece down to the first three rows and re-did it.  

The pattern is very quick and easy to work up, so long as you're comfortable working a double crochet rectangle (I'm not, apparently). People who didn't know what the openwork dragonflies were supposed to be recognised them correctly right away, which was pleasing.

Niece the Younger received the poncho at the Saturday Easter dinner/belated sixth birthday party for her. At first she refused to pull the poncho over her head, preferring to cuddle it in her lap instead. Later on she wore it correctly, but didn't stay still long enough for me to get a good photo.

The best part was when her new Hatchimal was cold and she bundled it up in the poncho.  

I still don't think the nieces really grok what ponchos are for, but at least Niece the Younger likes hers! 

So: a kid's poncho in three days, including a redo of nearly half of it. Not bad. Now back to the giant ogee blanket.  

miscalculated by Katherine Hajer

So there I was, finishing off the last couple dozen of motifs for the ogee blanket, and I decided to join a few motifs just to double-check measurements and confirm they were going to fit together. As one does.

And that's when I noticed that I had made some very wrong assumptions in calculating the number of motifs I'd need.

The first assumption was easy to mitigate. It turned out a vertical row of 11 motifs was closer to the measurement I wanted than the planned 12, especially if you included the border I was going to add. Okay, more arrangement options, less to join, what's not to love?

The second assumption, that's what. I'd figured an original blanket size of 12 motifs long by 12 motifs wide. And I'm not wrong, except that I treated the motifs as a square grid, not as what they are — a tessellation.

Look at that red-edged motif in the photo up top. See how it reaches the halfway point of the row to the left of it? Now imagine there were motifs to the right of it, where the table is. It, and the entire vertical row it belongs to, would span from halfway inside the row to the left to halfway inside the row to the right, adding virtually no width to the overall piece. The point of each ogee adds about a centimetre, not the 13 centimetres I'd planned.

That means I need nearly twice as many vertical rows as I thought to reach the actual width I wanted, which works out to... 12 more horizontal half-motifs and 94 whole motifs.

That's the bad news. The good news is I still have lots of yarn left over, even taking seam yarn and border yarn into account. It's just going to take a few weeks longer is all, and I'll have to be careful when placing motifs which are made from colours in short supply so they don't get clustered together.

Yeah. That's it. Really.

Sigh.

10-90 by Katherine Hajer

There's a saying among software developers: the last 10% of the product takes the last 90% of the effort. I think the same rule applies to making anything, which might explain some of the pitfalls crafters run into when they're working on projects. Consider second sock/sleeve syndrome, or people who get really bogged down and discouraged by the finishing step. It can be frustrating to know there is so much done, and yet so much more to do before completion.

That's where I am with the ogee motif blanket. I've been applying the fourth and final motif round for two weeks now, darning in the ends as I finish each colour set. The final round is just single crochet and takes hardly any time to do. Darning in the ends (8 per motif) isn't so bad either, because there are easy, logical places to bury all the ends, and some of the ends can be darned in two at a time.

But. There are 162 motifs in total: 120 whole motifs, 24 vertical half-motifs, 12 horizontal half-motifs. The half-motifs have the same number of ends as the whole ones, so that's 162x8 ends to do: 1,296.

Sometimes it's better not to figure these things out!

I was sick last weekend, which means all my estimates for finishing are blown out again. I do want to finish soon, though, because spring is already trying to come to Toronto, and I don't want to be working on a bedspread-sized blanket when the weather is warm.

The assembly stage is coming soon soon soon, and it will have its own challenges. The bigger the piece gets, the less portable it will be. Probably I'll get around this by assembling in strips three motifs across, then connect the strips to form the full blanket.

The border will have to be applied in rounds. I don't think there's any better way to do that.

Onwards.

math at the helm by Katherine Hajer

Years ago at a craft fair, I learned a great technique from Eugene of The Philosopher's Wool Company. I'd bought a kit from him which called for “random stripes”, and I was worried my stripes would either be not random enough, or so random as to be sloppy and erratic.

He told me to keep a six-sided die in my knitting bag, and to roll it to determine how many rows to do for a single stripe. Ta da! No-stress randomness with an aesthetically-pleasing frequency.

The conversion of aesthetic work to simple mechanical action is great for all sorts of stash-busting projects. You get the satisfaction of a good-looking finished object without having to check every stitch for how it's affecting the overall look.

Recently I heaped all my Briggs & Little yarn on my living room floor, took out the skeins that didn't go with the majority, and figured out which colours I needed to buy to complete a usable combination for a blanket (4 skeins).

Then I categorised my 18 colours into 13 groups, and let the math kick in.

The first step was to complete a single motif so I could figure out how many motifs I needed to make a blanket. Is it just me, or are most blanket patterns too small to actually use as blankets for anyone who's not baby-sized? Maybe it's because I'm stash-busting, but I like blankets to be at least as long as I am (175cm) and at least as wide as my sofa is deep, since that's where I usually use them. This particular blanket I planned to be about the same dimensions as my bed (202x152cm).

The motif I was using (the ogee granny from Mystical Lanterns) is both oblong and tessellated. I had to work out the number of half-motifs I'd need at the edges to have a straight border.

Conveniently, the overall area was 12x12 motifs, 144 total. I had 13 colour groups, and 11x13 would get me to 143 motifs. One block extra and I was there.

I love it when little coincidences like that happen. They usually mean you're on the right track.

The first two rounds of the motifs and half-motifs were pretty mechanical — just make versions of all possible colour combinations. Not having to think through each set made the work go quickly. After a week I had 13 stacks of half-done motifs sitting on my coffee table, grouped by the colour of the second round.

And then next... as of this writing I've finished the third round for all of the motifs, and have started adding in the fourth round and darning in the ends. More progress photos next week.

kitties! by Katherine Hajer

As with any human endeavour, there's a certain amount of misconceptions and just plain head-messing with needlework. Non-DIYers will often assume you are a) poor and b) trying to save money, whereas in truth making things by hand is often at least as expensive as buying ready-made (though of course with the bonuses that you have far more control over factors like colours, sizes, and fibre content).

Crafters play head games with themselves too. I have a bad habit of under-estimating projects which require making lots of small things. Sure, each small thing may be very quick to work up, but the finishing can equal or surpass the work necessary for a much larger thing.

The nieces requested me to knit them kitties back in mid-October. Niece the Younger wanted blue, Niece the Elder grey with a black face. The kitties also had to stand up on their own and have toy mice to play with. Got that? The kitties needed toys.

The kitties. Uh huh.

Fortunately, I like to keep track of what knitting books have been published for just such occasions, and knew that Osborne and Muir of Princess Diana sheep jumper fame had written a book called Knit Your Own Cat (among many other books). Both the blue cat and the Siamese (they didn't have the right shades of grey and black at the yarn shop, so I made do) are knitted from the British Shorthair pattern, which was the most, er, "catlike" of all the cat patterns. The rest of the patterns tended to give the cats very narrow bodies and pointed faces, which made them look rather rodent-like.

I did originally intend to also make the nieces Bengal cats in their preferred colours, but once I'd stuffed the first one I realised I didn't like the body proportions. Do you see what I mean? The hind legs are too thick, the forelegs too thin, the neck is too long, and although I did mod the head a little so it would be looking straight ahead instead of down like the original, it's just not right. To me it looks more like a bird's head. It's lovely shaping and all, but it's just not a cat.

Someday I will borrow the book from the library again and plot out the fur pattern on a graph, so that I can expand it and make it to cover the shape of the British Shorthair. I just ran out of time.

In the meantime, I knit the kitties some mice from this great (and free!) 20 Minute Mouse pattern, and crocheted each of the kitties a bed, a dangle toy, some collars, and a food bowl. I also got some Goldfish crackers for the food bowl because, let's face it, those things look like pet kibble to begin with.

The collars were made last, and were finished around midnight Christmas Eve. Like everything else for this project, they weren't difficult, but they were fussy. Foundation single crochet for the collar strap. A single star or moon (circle) medallion. Then sewing the strap together and sewing the medallion to the strap, burying four separate ends into a finished piece made up of not-very-many stitches. It was all very fiddly, as was everything else in the play set. Altogether there are two finished cats, two beds, two food bowls, two dangle toys, four toy mice, and eight collars. It all took much longer than expected.

Niece the Elder has already named her Siamese Fluffball. Niece the Younger's kitty went through several names Christmas afternoon, ranging from Fluff to Fartball. We'll have to see what she settles on.

the universe is complete by Katherine Hajer

hardwood 01.jpg

The last time I blogged about Sophie's Universe was back in May, when I was about to start the outer border. The top photo there shows it nearly complete, with just half of the final round to go. The nieces were nice enough to sit on it while I had it draped over my brother and SIL's sofa, which gives you a sense of scale. Apparently jumping on something Auntie Kat made is super-fun!

The final size of the blanket was about 170cm along each side. By area it's probably the biggest thing I've ever made, which led to a new challenge: how to photograph the thing so that the entire pattern was visible? I got this shot (still at my brother's, still with the last round to finish) by standing on a stepladder:

I wish it was straight-on instead of at an angle, but you get the idea. My cousins, who are a few centimetres taller than I am, offered to take a photo, but I figured I'd hijacked enough of the family gathering by that point.

So. This is stash-busting on a grand scale. I only bought one ball of white yarn for the entire blanket — it's used for the background of the last border pattern (the one with the red crisscrosses on it). I had more white yarn. I even had lots of white yarn, but not enough to make it around the perimeter without switching yarns, which would have made the blanket look a bit too raggedy and patchy. I was already playing with a certain amount of fire by using different shades and textures of white and cream throughout the blanket. It was worth the $8 in new yarn to finish it without making it look any shabbier.

I haven't blogged about the blanket being finished because it was finished in terms of crocheting, but not destination. The whole plan all along was to transform the stash into something useful and, with any luck, aesthetically pleasing to someone, and then give it away. I've had various suggestions (my initial idea was a women's shelter), but in the end gave it to Pegasus on Kingston Road here in Toronto. It will make a nice bright bed-topper for someone. Here's one final shot of it on my bed — which, again, for scale has a 150cm x 200cm mattress:

The pattern isn't my style since I'm more of a modernist, but anyone who's into folky/bohemian things should like it. I would definitely make something else by the same designer again. In fact, I already have my eye on something, if only I can collect the right yarns from my stash together in the right amounts.

atomic age accessories by Katherine Hajer

The conventional wisdom is that, for the most part, hand-crafted items have no clear utility in the modern age. Factories churn out mass-produced goods to serve every purpose and desire. Hand-made things retain a niche only because of aesthetics, tradition, and leisure time.

I say the conventional wisdom is full of it.

I replaced my old toaster recently. It wasn't so much because it wasn't working anymore — it was half-working as well as it ever did — but because it was full of dust and tiny, stuck-on crumbs of toast. It got replaced with an even-cheaper toaster, which at least toasts consistently, and has the current advantage of being new and therefore clean.

I wanted to keep it that way, so I decided to get a toaster cover for it. My kitchen doesn't have the cupboard space to put it away between uses, and I use it nearly every day anyhow.

What I discovered is that when it comes to commercially-produced toaster covers, there are no good options. The prices ran from $10 to $100 CAD, yet all of them were equally awful. Quilting with a plastic, easily-meltable lining (be careful how soon after using the toaster you replace the cover!). A choice between either super-plain, single-pattern colours, or super-cutesy, mock-feminine covers depicting cats, chickens, flowers, and other things that would look ridiculous in my kitchen.

This, friends, is why I'm glad I know how to make my own stuff.

I got the idea for my own design from Pinterest. Sadly, the image I found links to one of those sites which vomit gambling, porn, and malware ads as soon as you navigate there — obviously not the real source of the image! I haven't found a way to credit the original designer, but I'd like to. Their version had a crocheted piece of "toast" coming out of the top as a handle, and a little crocheted tab out the side. The original 1950s-ish "atom" shapes were in shades of grey and green.

My version has "atoms" to match the backsplash tiles in my kitchen, on both sides so that it doesn't matter which way I pull the cover onto the toaster. Because it's custom-made, the fit is loose enough that the cover pulls off easily without a handle.

Everything was made from stash. The body of the cover and the circle appliqués are made from leftover dishcloth cotton, and the black antenna appliqués are from fingering-weight cotton. I used the tails from the black appliqués to embroider the connecting lines and sew the crocheted circles onto the cover.

I wound up enjoying the exercise so much, I decided to make a knitted version too, using the same yarns but in a different design. That way I'll have a spare cover for when the other one is in the wash.

Gotta love the internet: while I was researching patterns, I came across the on-line Toaster Museum. Who knew toasters were so interesting?

upcycling challenge completed by Katherine Hajer

#craftblogclub held its 2016 upcycle challenge over the summer, which was a great prompt for me to dig out the "yarn" I'd made from a worn-out set of bedsheets a while ago. I already blogged about the large basket I'd made, but by the time I was done I still had most of one ball/sheet left.

Around the same time I finished the basket, I found this old Guardian article about how to crochet apple jackets. I know the common wisdom is to never read the comments, but the sheer vitriol of the comments on the apple jacket article was wonderful in an awful sort of way. Who says crafting is boring? Besides, a few commenters explained the article was wrong; these are not apple "cozies" but rather a reusable way to keep fruit from getting gouged or bruised as it travels in your purse or carryall. So as fey as they seem, they really are practical!

Be that as it may, it occurred to me that if the apple jacket idea was scaled up — by using upcycled bedsheet yarn instead of the called-for DK cotton, for example — the shape would be very close to the ceramic yarn bowl my friend Cathy gave me.

I have been using that yarn bowl nearly non-stop since it arrived. It is perfect for using with odd-balls, ensuring they don't migrate all over the floor in the course of their being worked. It seems to keep centre-pull skeins in better order as well.

The only drawback is that, being ceramic, the yarn bowl is not really meant for travel. The crocheted versions are more amenable to being tossed in a bag to be brought along for knit night.

The crocheted flower-buttons were added just because I've been meaning to try that out for ages, and for fun. Nothing wrong with using a plain button or a different type of closure, of course.

The smaller basket is smaller simply because I was running out of yarn. Its bottom is made from the very last few metres of bedsheet yarn left over from the doily rug I made a couple of years ago.

All three baskets were crocheted with a bamboo 10mm hook, held knife style instead of my usual pencil style. I read somewhere just before I started these that the knife style is much more comfortable for doing this sort of bulky, densely-gauged work, and although I am a dedicated penciller most of the time, I have to say it really did keep my hands and shoulders from getting too tired too quickly.

The fabric has to be worked rather tightly to make it self-supporting. The strips I used were about 2cm wide, but when worked they get folded up so they are more like 5mm wide.

Next challenge: making a new glove/hat/scarf set before the snow flies!

a tale of two baskets by Katherine Hajer

Two baskets, both alike in fibre content
In my fair-to-middling apartment, where we lay our scene
From ancient bedclothes break to new crocheting,
Where smaller stash makes smaller households more clean. 

Okay, enough of that! Really, from the blog title I chose, I ought to be mangling Dickens instead.

The two baskets have been in the to-do queue for a while. They're both made from this free pattern, which works up very quickly with a 10mm hook. The purple basket is made of four strands of Bernat Cotton Tots held together, while the yellow is an old bedsheet set torn into "yarn".

I find it interesting that both baskets are made of mostly cotton with some synthetic, yet the structure of the materials gives them such different traits. The purple yarn sheds horribly, and the basket started pilling as soon as I finished it. I'm not surprised Bernat discontinued the yarn.

The bedsheets came from IKEA, and lasted nearly fifteen years. They've definitely earned their basket afterlife. Like anything made from "rag" yarn, the basket has plenty of stray threads. I pulled quite a few out once I finished it, but most of them got crocheted in.

As for their purpose, both baskets, having been constructed 100% from stash, shall be used... to store stash. Even modest, upcycled baskets are far more stylish than the plastic shopping bags I'm using for the stash that won't fit in cubbyholes.

The end game is to empty out the stash storage, period, and then repurpose some of the storage. Onwards. 

the limits of the observable universe by Katherine Hajer

Work on Sophie's Universe continues apace. Last week the blanket finally got squared off again (see above), but I didn't get around to blogging.

The return to a square form means that the blanket creation is in its final movements. From here on out, there are several border patterns to construct, and then washing/blocking.

As of this moment, Sophie looks like this:

The blanket is now just over 1.5m across, which means that it's far too big to travel with. It also means that while before I was easily tearing through 2-3 rounds a night, it now takes a couple of nights to finish even one round.

The photo points to another, blogging-related problem. Not only is the blanket already reaching the edges of my (queen-sized) bed, but I can't get a complete photo of it anymore! The one above was taken standing on the very top of a stepladder, knees pressed against the carry handle, knuckles pressed against the ceiling plaster, and still I cut off a bit of one edge. Next time I'll have to clear the library/office and photograph it from the floor. I can't get any natural light in that room — it's the library because it's the only room in the apartment with walls and no windows — but it does have a good set of overhead halogen lights.

I'll still need a stepladder to get it all in, though.

The rounds are now sufficiently big (1.5m x 4 = 6m around!) that I had to cave in and buy some white yarn to make it across the finish line. It's not that I don't have more white odd-balls — I have a lot — but they're all too small to last through one circumference. I decided to get a 790g super-size skein, not because I'll need that much, but because I didn't want to be stingy and then get caught out. Besides, maybe I can use it with the left-over bits of odd-sized whites to make something else. I have a few candidates already.

Meanwhile, the Toronto summer has hit in full force, with weather advisories all last weekend due to the heat and humidity. The sooner I can get this blanket done, the better!

the universe is expanding by Katherine Hajer

I think I've mentioned before here that I basically have three levels of active-ness. If I'm fully well or just a wee bit ill, I'm able to write. If I'm worn-out or outright sick, I can knit or crochet, so long as the pattern isn't too involved. If I'm truly suffering, the best I can manage is to hide under a pile of blankets and quilts on the couch and scowl at whatever nature documentary on Netflix I haven't seen too many times yet.

Surely I'm not the only person who watches nature documentaries when they're sick. They were one of the few types of shows my entire family would sit down to watch when I was a kid, so they have a certain nostalgic feel to them, even as they show polar bears stranded on ever-shrinking ice caps. Also, I've watched so many that if I doze off into a fever-induced slumber in the middle of one, I can wake up whenever and not have really missed anything.

I've been ill for the past two weeks with some sort of sinus infection, so not much writing has been getting done (grr). For a few nights, I was too busy having fever and chills to get any needlework done either. Right now I'm better but not yet illness-free, so the stash-busting has had more progress than the novel-writing.

The photos show that I'm still working on Sophie's Universe. I'm still not sure it's not ugly — I seem to say that about all my blankets — but it's definitely a lot of fun to do. Every single round has something or other going on. I've learned a lot about the mechanics of overlay crochet, and about what post stitches can do. Everything is still 100% stash. I even [sigh] found a big ball of leftover white yarn I am setting aside for the broad border section with the negative-space butterfly motifs.

The cut-off corners will eventually become the blanket's sides, while the sides with the rows of bobbles will eventually narrow to points. The central square will be tilted 45 degrees in the final version into a diamond. Right now it's almost exactly a metre across; well on its way to the planned finished size of 1.8 metres square.

By which time I hope to be doing more writing than needlework, and to have used up lots and lots of stash.

a universe of stash by Katherine Hajer

Okay, maybe just a medium-sized galaxy...

Somewhere in my travels I came across the Sophie's Universe crochet-a-long. I've been wanting to do more mandala/surface crochet for a while, and the pattern looked like a great way to use up the ~2kg of white and cream odd-balls I have, plus a lot of other colours as well.

Even if I didn't like the pattern, the sheer amount of technical writing, reference links, and planning that went into the instructions for three (!) different versions is staggering. While the stitching for each of the three different yarn weights is the same, the colourways and checkpoint dimensions (as in, "if you have hit round X your work should be Y centimetres across") is very impressive.

Every single round starts with separate instructions for whether you are continuing with the colour from the previous round or starting with a new colour. Meanwhile, I've done 21 rounds and have yet to encounter a single error.

And, oh yes, the pattern has been fully or partially translated into seven other languages, plus one more language for a series of video tutorials.

And for this particular version? I've done a quick estimate based on the yarn pack information given in the introduction to the crochet-a-long, and I should be able to pull this one off entirely from stash. And still complete the stripey blanket from stash, even though they share some of the same colours (and yarn sources).

In the photo above, all of the colours are worked in single strands of worsted-weight yarn, except for the burgundy and cranberry, which are thinner yarns held double. The burgundy isn't even made of the same two yarns. Instead, it's a thinner 100% acrylic held with a thicker 100% wool. Now that they're crocheted together, it's difficult to see the colour difference even up close and in good light. Go figure.

This means that the weight of each particular round of work varies a lot, but so far Sophie has been lying flat and adjusting to the physics of each yarn type very well.

Since this photo was taken, I've started part 3. The rounds are getting big enough now that they take a while to finish. The completed blanket is supposed to be about 1.8m square, although when I've done gauge-check measurements the work seems to be coming out slightly too big for a change. Usually it comes out slightly too small and I have to either try again or improvise.

It'll be great to weigh the finished blanket and see how much stash I've used up.

a smaller mess by Katherine Hajer

Now that the latest gift makes are done and delivered for the spring, I have been working on larger, ongoing stash-busting projects. The giant stripey blanket is back in rotation, in part because the leftover yarn from the mermaid afghans can be incorporated into the colour scheme and used up.

While I was checking how much yarn I had already set aside for this project, I realised there was only this much left (plus the mermaid yarn):

Now, you may be thinking to yourself, "er, Katherine, that basket is completely full." But that's when I raise my shaking hands into the air and cackle, "Yes! But it's only one basket!". When I started the blanket, I had two baskets plus a shopping bag. So getting it down to one basket is excellent.

Is it making a dent in the actual yarn storage requirements? Yes and no. I mean, once it's done, the blanket will have used up a lot of yarn. The broadest periwinkle and pink stripes in the photo below are made from single 100g skeins — already it's a heavy blanket. And it'll mean that I don't have to store stash yarn in the main sitting/working area of my apartment anymore. But the bedroom yarn storage — the bulk of the stash — is in a sad state. There are already two more blankets queued after this one to keep stash-busting efforts up.

Onwards.

fiddle faddle by Katherine Hajer

Elizabeth Zimmermann had a way of giving the exact right name to categories of things, so much so that in the knitting world, a lot of the personal jargon she used in her books have become the standard terms. A favourite of mine is the "fiddle faddle" she dedicated a chapter to in Knitter's Almanac. In the book, Zimmermann provides patterns for little nets, used for holding oranges so they can adorn Christmas trees. There's also little knitted stars and other small, decorative items.

Zimmermann being Zimmermann, she also lists off some items which are fiddle faddle, but which, if anything, are less useful than Christmas ornaments. I remember this was the first time I'd heard of doorknob cozies which, sadly, seem to be becoming more popular again.

Coffee cup cuffs are a more recent invention for this category, and have a major advantage over doorknob cozies in that they are actually useful, protecting the user's fingers from discomfort and helping reduce waste by removing the need for cardboard equivalents.

I used a free pattern for a dress-up crown, and just reduced the number of pattern repeats until it fit around a standard take-away cup (20cm). The designer did a thorough job of writing out the pattern, but it hurt my brain, and I'm not sure the decreases are written out correctly, so I did some experimenting and came up with my own version... which looks exactly the same as her finished-item photos. I'm not sure I actually changed anything or not.

The leaf pattern is something I copied from a photo a while ago when I made a lot of cuffs at once. If you know how a basic aspen leaf motif works in knitting, it's not hard to reproduce. This cuff makes for a lot of ends to darn in (two per leaf), but it's not difficult to work and I like the finished effect.

The friend I gave the crown cuff to gave me a leaf charm she'd bought. She had several, and had intended to make a bracelet with them until she saw how big they were. I thought it looked like the dangle part of a bookmark, so I dug up some tatted and crocheted thread bookmarks on Pinterest and decided to try this graduated pineapple one (Ravelry, free pattern):

Mine is purple just because that's the first reel of crochet thread I came across that wasn't white. I figured white would just get grubby. The bookmark took the second half of Ant-Man and disc 2 of Archer season 3 to finish. It's a very straightforward pattern — once you see where the geometry is going, you hardly need to follow the pattern at all. It's also the first time I've done the very traditional pineapple pattern, so hooray for personal firsts!

Given how much stash yarn (er, and crochet thread) I have left over, I can see a lot more fiddle faddle in my future. Hey, so long as it's the useful, non-cringey kind.

mermaid aftermath by Katherine Hajer

After I finished both mermaid blankets, I had a lot of yarn left over. Lots and lots and lots. You can see it in the photo at the top of this post — weight-wise, it works out to:

  • 233g turquoise
  • 235g jade
  • 186g macaw (variegated) 
  • 410g peacock

That totals just over a kilo of leftover yarn. In fact, I'm just one skein short of the variegated to have enough to make a third mermaid blanket. I saw some comments on-line that the yarn estimates in the pattern are off, and now I have proof. It happens.

But no, I am not making a third mermaid blanket. That would be boring to the point of masochism.

Instead, I've been making some quick, small things to use up the yarn and get it out of the apartment as soon as possible. No net gains to stash!

I knew the most difficult yarn to get rid of would be the variegated. I like handpainted and self-striping yarn as much as the next knitter, but old-school variegated has always been... difficult. It has strong connotations with the items left over after the church bazaar, or gifts from well-meaning relatives you just couldn't get rid of politely.

The macaw called for in the pattern has the benefit that it isn't as ugly as the brown/gold/rust/white blends we saw in the 70s. I had a vague recollection of a feature set of patterns for self-striping/variegated yarn from a recent crochet magazine I'd bought, found the article in question, and stuffed the yarn in a tote bag before I headed to my hairdresser's. I picked a pattern (the Swoopy Cowl from Interweave's Crochet Accessories 2014) and started stitching between the colouring and the shampooing, and by the end of the following day I had a finished cowl:

I skipped the shaping and just made it straight-sided — it seemed like it would be too tight around the neck otherwise. This one is headed for the donation box since I don't need it and don't know anyone who wants it. I hope someone takes a liking to it.

Crocheted blankets are still of interest for me, because they are great for using up a lot of leftover yarn quickly. I tried out some of the square patterns I've been collecting on Pinterest:

I'm not completely thrilled with these, just because they're uncomfortably close to putting the "granny" back in "granny square", but they were all good exercises. The geometric-patterns square at the back and the mandala square on the left were both copied from photographs, and the flower square at the bottom right is a free pattern (Ravelry link). It's also my first attempt at crocodile stitch, so it was educational.

At this point, I have nearly all the variegated yarn used up (one more dahlia square should do it), but most of the turquoise, jade, and peacock solid-coloured yarn left over. I think it will go towards the stripey blanket I've had on the go for a while.

That's the next major stash-busting to complete: the two blankets I have on the go. There's always something.

second afghan syndrome by Katherine Hajer

Second Sock and Second Sleeve syndromes are well known in crafting — the idea that an item, if big enough, means that the second version of the same item will be boring and onerous to do. This is working reason behind why picture sweaters and mirror imaged socks were invented (and deliberately mismatched earrings, no doubt).

I have two nieces so I have had to work through Second Toy and now, Second Afghan Syndrome.

The photo above is of the first, finished mermaid afghan. I started it around the middle of December and finished it around the end of January. It's now the beginning of March, and the second one has been... languishing. I'm just at the point where the initial rows will be joined in the round. I'm hoping it will let me pick up the pace a little, because it's when things get joined in the round that the decreases start.

The original pattern calls for the opening slit (not shown) to be almost all the way to the bottom of the afghan, and for the decreases to be both abrupt and late. The afghan is to go from full width (25 shells) to something like 4 shells in about the minimum number of rounds it is possible to do that in gracefully.

The end effect is much like a nineteenth-century reticule purse, and although there are plenty of crocheters on-line who reported they liked this way of ending, I didn't. I joined the work into the round after only about 45cm, and decreased gradually until the body of the afghan was just wide enough to accommodate the tail (16 shells). The tail closes off the bottom by being slip-stitched directly onto the bottom of the body, working from the inside so no seams were on the outside.

Today after work I marked each decrease in the finished afghan with a safety pin (take notes? what do you mean, take notes?), so I'd know when to make the same decreases in the second afghan. With preparation comes effiency and all that good stuff.