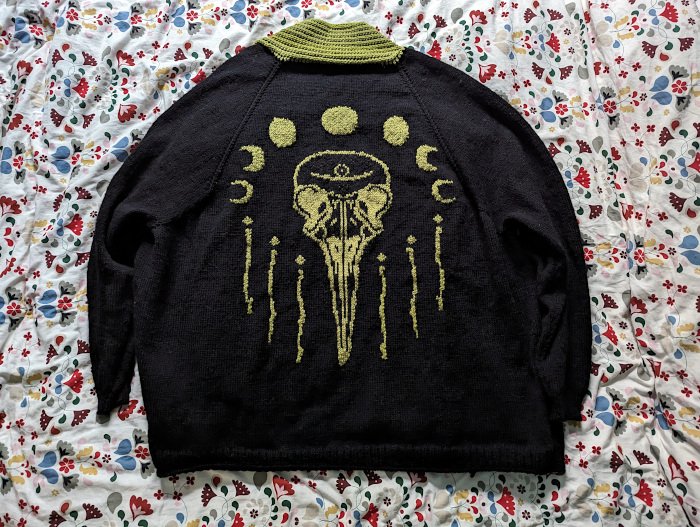
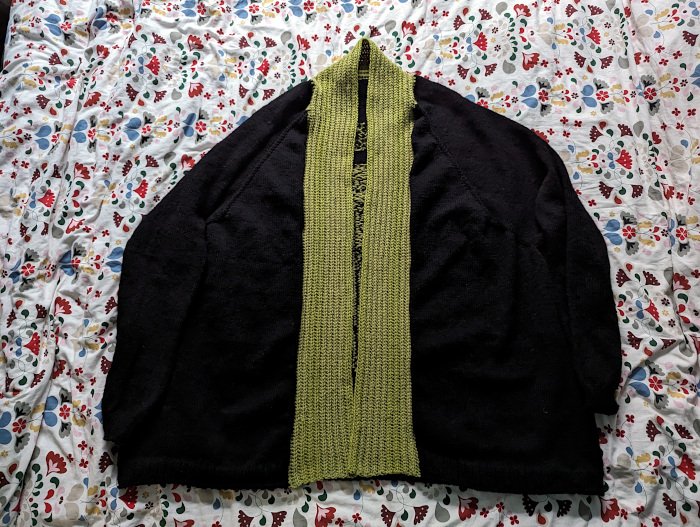
the crowdigan by Katherine Hajer

This became one of those epic knits for me, one that got considered for “abandon and re-use the yarn” status several times over.

Just for reference, I am 175cm/5’9” and usually take a 2XL in retail clothing pants and tops, or a 3XL in coats and jackets (because they never account for what you’re wearing underneath!). This cardigan goes down almost to my knees and is 4-5 sizes too big for me.

The pattern is The Possibility of Crows by Harper Bee, which I got in kit form from Bistitchual (the pattern links to them since it’s not on Bee’s site). The way the prices and sizing worked out, it made sense to me to just get the largest size and go for the oversized, drapy style I like in these kinds of cardigans anyhow. It might have been overkill, because the armholes go down to my waist, but the “blanket with sleeves” effect is very pleasing, and I hope to get many years of wear from it.

The design is top down, which everyone seems to love but me. My usual objections stand: this got to be a royal pain to cart around when it was closer to done, and I a large percentage of my knitting on public transit or while waiting for other things to happen. I also don’t like working on sleeves while an entire cardigan hangs off them.

Buying the yarn as a kit was also a concern, as sometimes kits are stingy with yarn amounts, so I am please to report it was not the case here. I have two and a bit balls of black left over, and just under one ball of green. I expect to turn them into a watch cap or suchlike after I’ve finished some other things which are already on the go. I did like that Bistitchual lets you choose any combination of foreground and background colours that you like from their stock for the kit.

Modifications: I should have made this into a pieced-and-sewn construction for my own ease of knitting, but I didn’t, and it’s done now. I changed the 1x1 twisted rib edges called for in the pattern to 2x1 mock rib for the body edge (because there’s no point in having an oversized swoopy cardigan pull in at the bottom) and 2x1 real rib for the sleeve cuffs. I also purled the one stich between the sleeve decreases, because for me doing that always leads to a smoother shaping.

I also didn’t quite do the recommended intarsia at the back. The moon phases and candles/wands are each their own intarsia motif, and then the crow’s skull is one big motif. The main body black yarn was carried behind the green throughout. This made each separate motif slightly thicker than the surrounding background fabric, and therefore raises them slightly, kind of an applique effect.

Lastly, I wish I had gone with my gut feeling to change the instruction’s eyelet increases to make-1s, but again, it’s done now and I probably won’t even think about it once I get used to the cardigan as clothing, not project.

Challenges: maybe it was just from working with black and having 500+ stitches on the needles at some points, but I wound up ripping out more than usual for this one. I’ve made way more complicated knits than this, but I just didn’t have the brainpower this time out. The cast-on and initial shaping took 3-4 tries, and then I had to rip out 30+ rows just when the intarsia was getting complicated, because I mis-read the instructions for when the armhole shaping changed increase rates. The last mistake to be fixed was when I was finally done the colour work, spread out the project on a flat surface for the first time in ages (remember I said I frequently knit on the go?), and discovered I’d twisted the fabric when putting the sleeve stitches on hold at the bottom of the armhole. Fixing that required snipping a stitch on the very last row of the armhole at the front, taking out just the one row, untwisting the fabric, and grafting the unravelled row back into existence.

Speaking of armholes and sleeves, thanks to the oversizing, the armhole stop at the top of my hips, I can press my elbows into my sides without touching any of the cardigan. That gives a sort of dolman effect, which works for me, but that the sleeves at this size are 55cm/22” long from the underarm does not. I do have long arms, and back when I was thin my underarm-to-wrist measurement was 47cm/19” or so, but I find now that I’m in plus sizes I don’t need the extra length as much. I should have decreased more frequently to make shorter sleeves.

I had one more surprise working the collar: depending on the light, it looks like there are different dye lots mixed together, although I can’t find a different dye lot in the ball bands (they were in a heap on my coffee table because I did the collar in only three sittings). It doesn’t really show up in natural lighting, and it goes with the overall theme of the cardigan, so I’m not that fussed about it. it makes it less industrial-looking than most clothes, including many hand-knits made from highly-processed yarn.

The temperature dropped in the last couple of days it took me to finish. After working on this project off and on for over a year, I’m glad I get to wear it.
no-paper patterning by Katherine Hajer

I got a copy of Birgitta Helmersson’s book Zero Waste Patterns: 20 Projects to Sew Your Own Wardrobe a few months ago, and have been poring over it ever since. Thanks to the excellent Check Your Thread podcast, I have been shifting to thinking of everything fabric as “resources”, which led me to the idea of sewing a wearable mock-up dress from the instructions in the book.

And I did have several old sheet sets sitting in a storage box… it made sense to educate myself about zero-waste patterns by using some old bedlinens. Since the bedlinen doesn’t match standard fabric widths, it wouldn’t be zero-waste as such, but Helmersson’s methods would help ensure I had nice rectangular off-cuts that would be easy to integrate into another project.

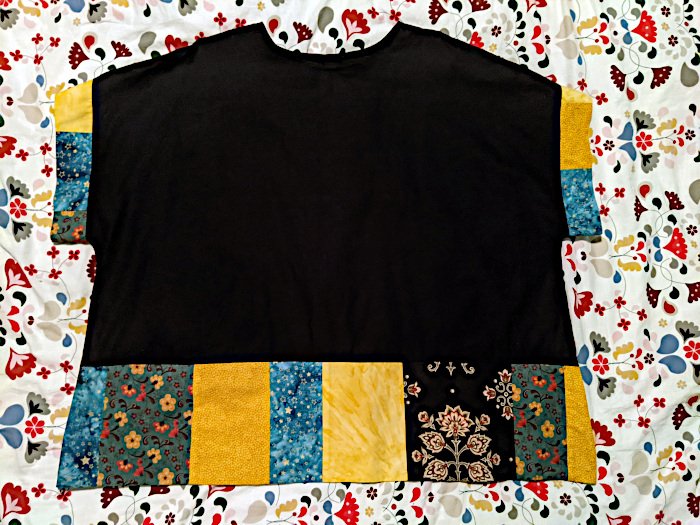
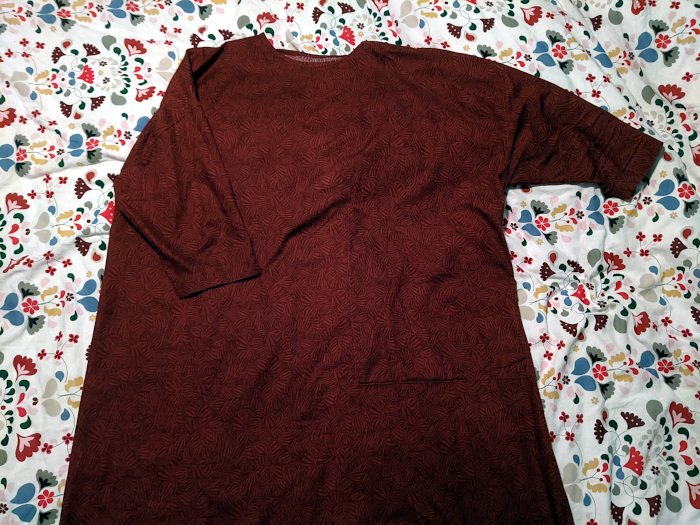
The dress in the above photo is made from one fitted sheet and one pillowcase (because I miscalculated the usable width and length of the sheet), plus some buttons I already had. The only purchase was for matching thread.

Things I liked:

  • I had an incredible amount of control over the dress details. The bodice is very oversized (on purpose!), and its width is based on a tunic pattern I like. The bodice length, shoulder shaping, and other details are from Helmersson’s boilersuit pattern in her book.

  • The sleeves are based on a different pattern from the book. I very much liked how the sleeve cuffs are four fabric layers deep (plus a fifth layer of sleeve fabric), so they have structure without requiring interfacing. The same thing was done for the button placket/neck edging. I took an educated guess on the sleeve length, accepting I may wind up with 3/4 sleeves, but instead they fall perfectly to my wrists.

  • The skirt size was pulled from yet another book pattern, and worked out well for me both in width (a little bit gathered, but not a lot since the silhouette is already oversized) and length. I also managed to make some seam pockets for the skirt, and arranged things so they are placed ergonomically.

Things I didn’t like:

  • The placket took three tries. In the end I gave up on sewing it on in one go, and did the wrong side first, then topstitched the right side over it. So on the inside, you can see two stitch lines, but on the outside only one. Know your sewing limits.
  • I sewed the very bottom of the placket shut per the boiler suit instructions, but didn’t take the seam allowance into account, so it doesn’t overlap perfectly above the waist seam. Oh well.

  • The top button should have been a bit lower, so the buttonhole ends just before the V shaping starts.

  • Next time I need to gather a skirt, I’m making separate basting lines for the front & back, instead of one big baste around the entire waistline.

Notice that all the things I liked came from the book and the designs, and all the things I didn’t come from my own sewing skills!

The end result does look a lot like the ZW Gathered Dress pattern Helmersson sells separately from the book on her website (which I admit was the general idea), but it’s not the same; the back neck facing and some other shaping are different. As for the zero waste part, I pretty much used up everything I cut. The few leftovers will make good patch pockets, or bag linings, or trim.

I’m looking forward to doing more from the book. I might even, you know, follow one pattern by itself next time. The pattern collection is more than enough to create a capsule, or just regular, wardrobe, without making it look like you’re using the same patterns over and over.

Verdict: am I pleased with the dress? Very! Am I okay with wearing bedsheets out and about? Not sure yet, but I have worn the dress at home a few times and it’s super-comfy, practical, and surprisingly warm (I guess sheets have a denser weave than fashion fabrics?). It’ll be great for colder weather, either by itself or under another layer. I would definitely like to try out more versions of the dress in different fabrics too.

pattern and puzzling out by Katherine Hajer

I’ve been doing a lot of sewing in the last several months, and I’m starting to see a difference in the general construction mindset between sewing and knitting or crochet.

Knitting and crochet are more like playing with Lego. You build up stitches until you get the desired shape and size, and then you do your finishing. Even with seamed garments, there’s play between seaming and building, seaming and finishing. Often there will be a bit of both happening, like when you pick up stitches along a sweater neckline to knit on a collar.

Sewing is more like putting a puzzle together, except you have to cut out the puzzle pieces first.

Maybe there will be adjustments required to make the finished item fit better.

Or maybe there will be pattern mistakes. Crochet patterns are often off on their stitch counts, as are knitting patterns. Somewhere in my Vogue Knitting magazine collection is a pattern for a sweater which is missing the sleeve instructions entirely — and they are non-standardly shaped with a different stitch pattern from the body. Not a problem for someone who knows how to design and construct their own sleeves, but a total roadblock for those who don’t.

Most pattern errors seem to be made because of deadline pressures. Sometimes, especially for indie patterns with no deadlines attached, the author either couldn’t be bothered, or didn’t realize technical editing was even necessary. Other times it’s because the author was trying to give the reader more than they had the time and resources to give.

All of the above is a long preamble to the jacket I just finished making from Bold & Beautiful Easy-Sew Clothes. All the signs point to an author who had more care and passion than they had time to give under the deadline, which meant I had to improvise a few times. The book errors I’ve discovered so far have erred on the side of generosity, meaning they give the reader as much as possible, but there have been a few just outright errors.

For the book overall, the most notable error is in the sizing index table on page 7. There are more sizes available on the accompanying CD than the table indicates. For example, the gathered skirt pattern is listed as being available for US sizes 10-16, but on the CD a size 18-20 pattern is also included. Fortunately, there is a different table on the CD listing the actual sizes available.

This tells me the author’s heart was in the right place, but they just didn’t have the time to finish the book properly and have the technical editing done.

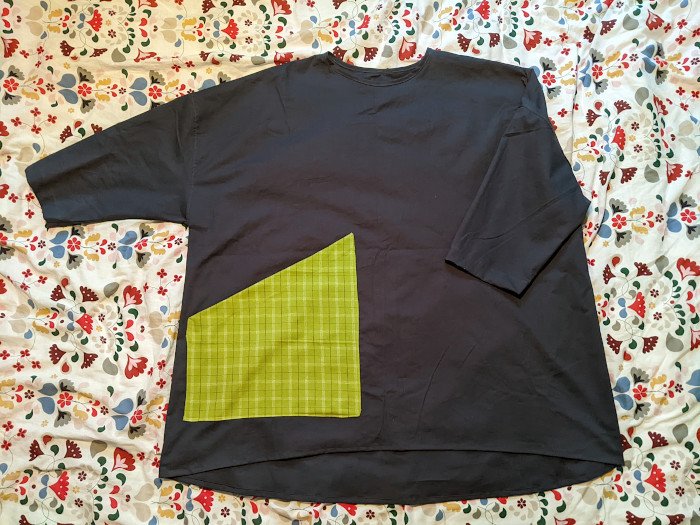
On the Kimono Jacket shown above (that’s the official name; it’s more like a reproportioned Spencer), there were also two errors which required some work to overcome: the button placket provided on the size 2 pattern I was using was actually for the size 1 version, and was therefore too short for the front it had to attach to. Upon checking the size 1 pattern file, I confirmed it has the size 2 placket, which at least would be easier to recover from.

Also, the sleeve shaping is off. The cuff as drawn is far deeper than what the instructions say to expect. I was able to fix this myself with a small amount of redrawing. The top photo shows the original cuff, the bottom the updated cuff after I did some sorting-out.

In the end, it was all right that the placket was a different length because the two fronts and the back are all different lengths anyhow, and the sleeves were an easy fix.

I'm not much of a sewist (yet?), so this project had some personal firsts:

  • first time using interfacing

  • first machine-sewn buttonhole

  • first facing

  • first sleeve seam topstitching

  • also first improvising on already-cut pattern pieces

The pocket is also not quite made the way it’s shown in the book, but that is on me for not figuring out the instructions until it was too late.

I’ve worn the jacket a few times and been pleased with how it fits and how it turned out in the cotton canvas I used. I’m looking forward to using it as a layering piece come spring. The green gives it sort of an army surplus vibe, and I’m planning on treating it as a neutral colour (even though it’s not really).

on the sew again by Katherine Hajer

My sewing machine has four (four!) dials which all control different aspects of how the thread interacts with the fabric. Two of them are not supposed to be adjusted very often; one of these is set at the factory and is not supposed to need adjusting often, if at all.

The last week of September, I wound up adjusting all four until I got a consistent stitch out of the machine.

Since then, I have made one item of clothing per week, plus some extras as I go along.

This gallery has most of them (er, as of late October). The only thing I left out was the black pair of dress pants because they’re just a black pair of dress pants, and therefore a photograph wouldn’t show very much.

Things I have learned so far:

  • there are way more free or pay-what-you-can patterns out there than you may think before you get into it

  • sewing is, or at least can be, way, way faster than knitting

  • you don’t need to be a dressmaking master if you (and this is important) take your time and keep a seam ripper handy


simple is good: cedar point sweater by Katherine Hajer

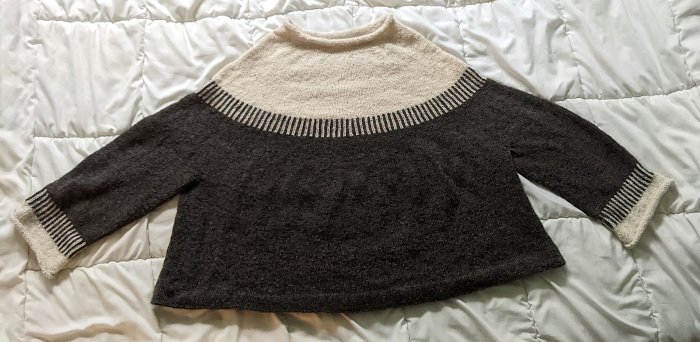
grey & cream sweater laid out

I’ve had the Cedar Point sweater by Espace Tricot on my to-do list for a while now. Which is weird, because it has a lot of things about it I usually avoid:

  • I don’t usually make yoke sweaters for myself because they often don’t fit me well.

  • I don’t usually like making top-down sweaters because they get awkward when it’s time to work the sleeves (with an entire sweater hanging off the sleeve in progress).

  • I don’t usually go for unfinished edgings for myself. This last one is just because I had CURLING EDGES ARE BAD stamped on my brain at some point. It has softened to CURLING EDGES ARE CUTE ON KIDS BUT NOT YOU, which I suppose is a sort of improvement.

But I kept coming back to look at the pattern, and coming back to it, and I even saw a knockoff for sale in a shop window in my neighbourhood a couple of winters ago. Finally, after perusing every single version posted to Ravelry (and there are lots), I decided to make a cream & charcoal version over the beige & black original, because on top of all those other reservations I don’t like beige against my face because it makes me look sallow.

For the yarn, I used one strand each of Winter Glow Solid and Diablo. This more-or-less matches the original yarns called for, just more economically. Altogether the sweater has wool, mohair, and synthetics in it, and feels super soft with just a slight aura of fuzz. The fabric came out very light and thin, despite being made from the double strand.

Alterations: I made the sleeves first, then finished the body (opposite for a typical top-down pattern). I also made the sleeves full-length instead of bracelet-length, because my current set of gloves don’t have gauntlets.

Amazingly, for once in my life my gauge was a little too loose, so I wound up making one size smaller than I had originally planned, and it’s still generous. I can see myself wearing this instead of a coat on a crisp fall day. Ideally I’ll be sitting on a patio, sipping a warm beverage. Later, when the annual southern Ontario deep freeze hits, the sweater will be a welcome extra layer under my coat.

There is something about this design. I got a lot of compliments from friends, family, and random strangers when I was making it. It’s a very basic design — it would work great as an introduction to round yoke sweaters and stranded colourwork — but something about it just appeals.
Because of its generous shape and sizing, the round yoke fits over my shoulders very comfortably. I finished the neck and cuffs without any edging as the pattern instructs, but decided to hem the bottom edge. It makes the edge lie flat and bell out in a very pleasing way when worn.

The pattern is excellently written, and free! Espace Tricot has a whole collection of free patterns on Ravelry, and they all cover a wide range of sizes (plus there’s enough information to draft a missing size or make alterations if you need to). I’ve already got some other ones in mind to make.

a shining example of conquering procrastination by Katherine Hajer

the finished jacket, featuring the carpet pattern from the Kubrick film

What do you remember from November 2018? Personally, I don’t remember much, except that I commuted between forty and ninety minutes each way to and from work most days, and sat in a cubicle trying to get things done while I was there.

And also, I was not having very much luck figuring out Yule gifts for my friend Cheshin. We have this rule: no buying or making gifts unless you actually think they are cool and would be something the other person would like. Some years, this is easy, and the challenge is to decide how many gifts are too many.

Some years, the world is very uncool and boring and I wonder if a gift certificate would really be that terrible of a cop-out.

November is late for me to be gift-hunting for Yule at all. I usually have it all sewn up by then, and it was really bugging me I was coming up empty-handed.

On that day in November 2018, though, inspiration was sitting in my personal email. I’d signed up to get the newsletter for this American rockabilly clothing store (they carried plus size, and any variety in plus-sized clothing is to be celebrated). And this time, they had an entire newsletter devoted to their clothing line patterned same as the carpeting from Kubrick’s film adaption of The Shining.

And it occurred to me that this was one thing Cheshin might like. I know she likes The Shining, and she also likes midcentury modern geometric patterns. She also likes the colour orange.

Cheshin wearing the Shining jacket

I checked Ravelry: someone had already charted out the carpet pattern for knitting (thanks Amy Schilling!) With the chart in hand and Ann Budd’s The Knitter’s Handy Book of Sweater Patterns along for the math, I worked out a jacket that was somewhere between a bomber jacket and a classic Chanel. There are some projects on Ravelry that use the Schilling chart to make more conventional knits, cardigans and hats, and while it seemed like those knitters had rendered exactly what they were aiming for, I wanted something that said, “this is knitting!” a bit more quietly.

So hems for the lower body and cuffs, and an i-cord button band instead of the original rib (I nearly did a zipper but lost my nerve). The buttons are plastic versions of the leather-knot buttons which were so popular in the late 70s/early 80s.

The chart itself could have been worked with stranded colourwork, but that would have meant some rows had three colours per row while others had two. Even at two, I was using 100% wool. That’s a warm jacket, both too warm for spring and fall or indoors, and not warm enough for an actual Canadian winter day. Intarsia seemed the best bet, and I have lots of experience working intarsia, so “all those ends” didn’t bother me.

And yet… the thing took four years to finish.

Partly that was because I kept working on other projects: knits for the nieces and nephews, birthday presents for various relatives, “quick” items that turned out to be not so quick. Cheshin knew I had something “big” I was making her, and no doubt guessed it was something wearable, but not exactly what.

She even asked me at one point if I thought the carpet from The Shining would make a good knitting pattern, and I just kind of blathered.

Joining a new knitting group online helped the work continue, as did pulling it out of UFO storage and realizing I had more done than I thought.

Yes, there were a lot of ends, but I switched between darning in ends and knitting sleeves, and that worked out well. I also did the I-cord edging before I sewed the sleeves on, so there would be less fabric to wrestle with as I went around the neck. The I-cord edging was done twice (the first time it turned out too tight), and it still didn’t feel like that much work.

At the same time, am I happy it’s done? Oh yeah. Also guilty. But happy.

ten hats by Katherine Hajer

Last summer the ever-generous J-A and I each made a set of hats to donate to Hat not Hate, an American organisation that hands out hats to kids while teaching them how not to bully (and how not to be bullied).

The logical thing to do when making hats for a charity drive is to pick a simple pattern you can make in an evening or less, and then make it over and over, to maximise how many hats your produce.

I find that just doesn’t work for me. I get bored, and then my output slows. Instead, I gathered up all the patterns I thought looked cool, or that I’ve always wanted to try to make but never had a reason to, and matched them up with stash yarn.

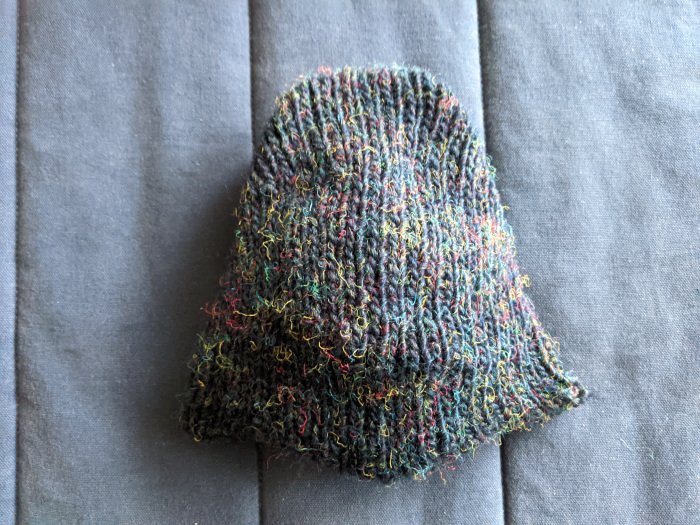
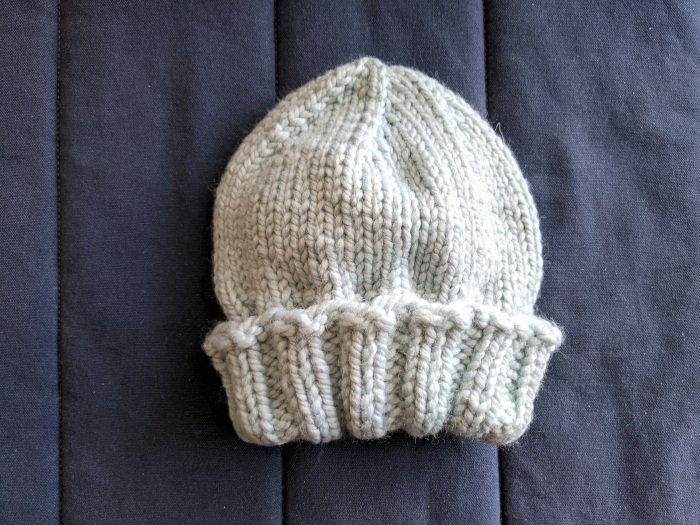
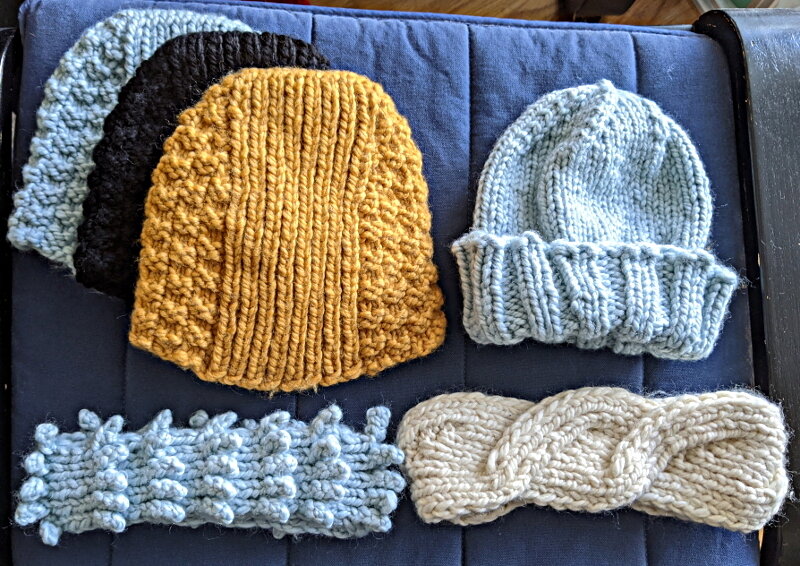
The rules for Hat not Hate in terms of yarn is that it can be any colour you like, so long as it’s mostly blue. The blue can be anything from the light icy blue of the toque, to the teal of the rivet hat, to the navy tweeds of the simple hat (the navy tweed was donated by Lynda Tam — thank you!). All of the hats were stash, and it was a lot of fun to match yarn to projects.

Notes on each hat are below.

cabled beret

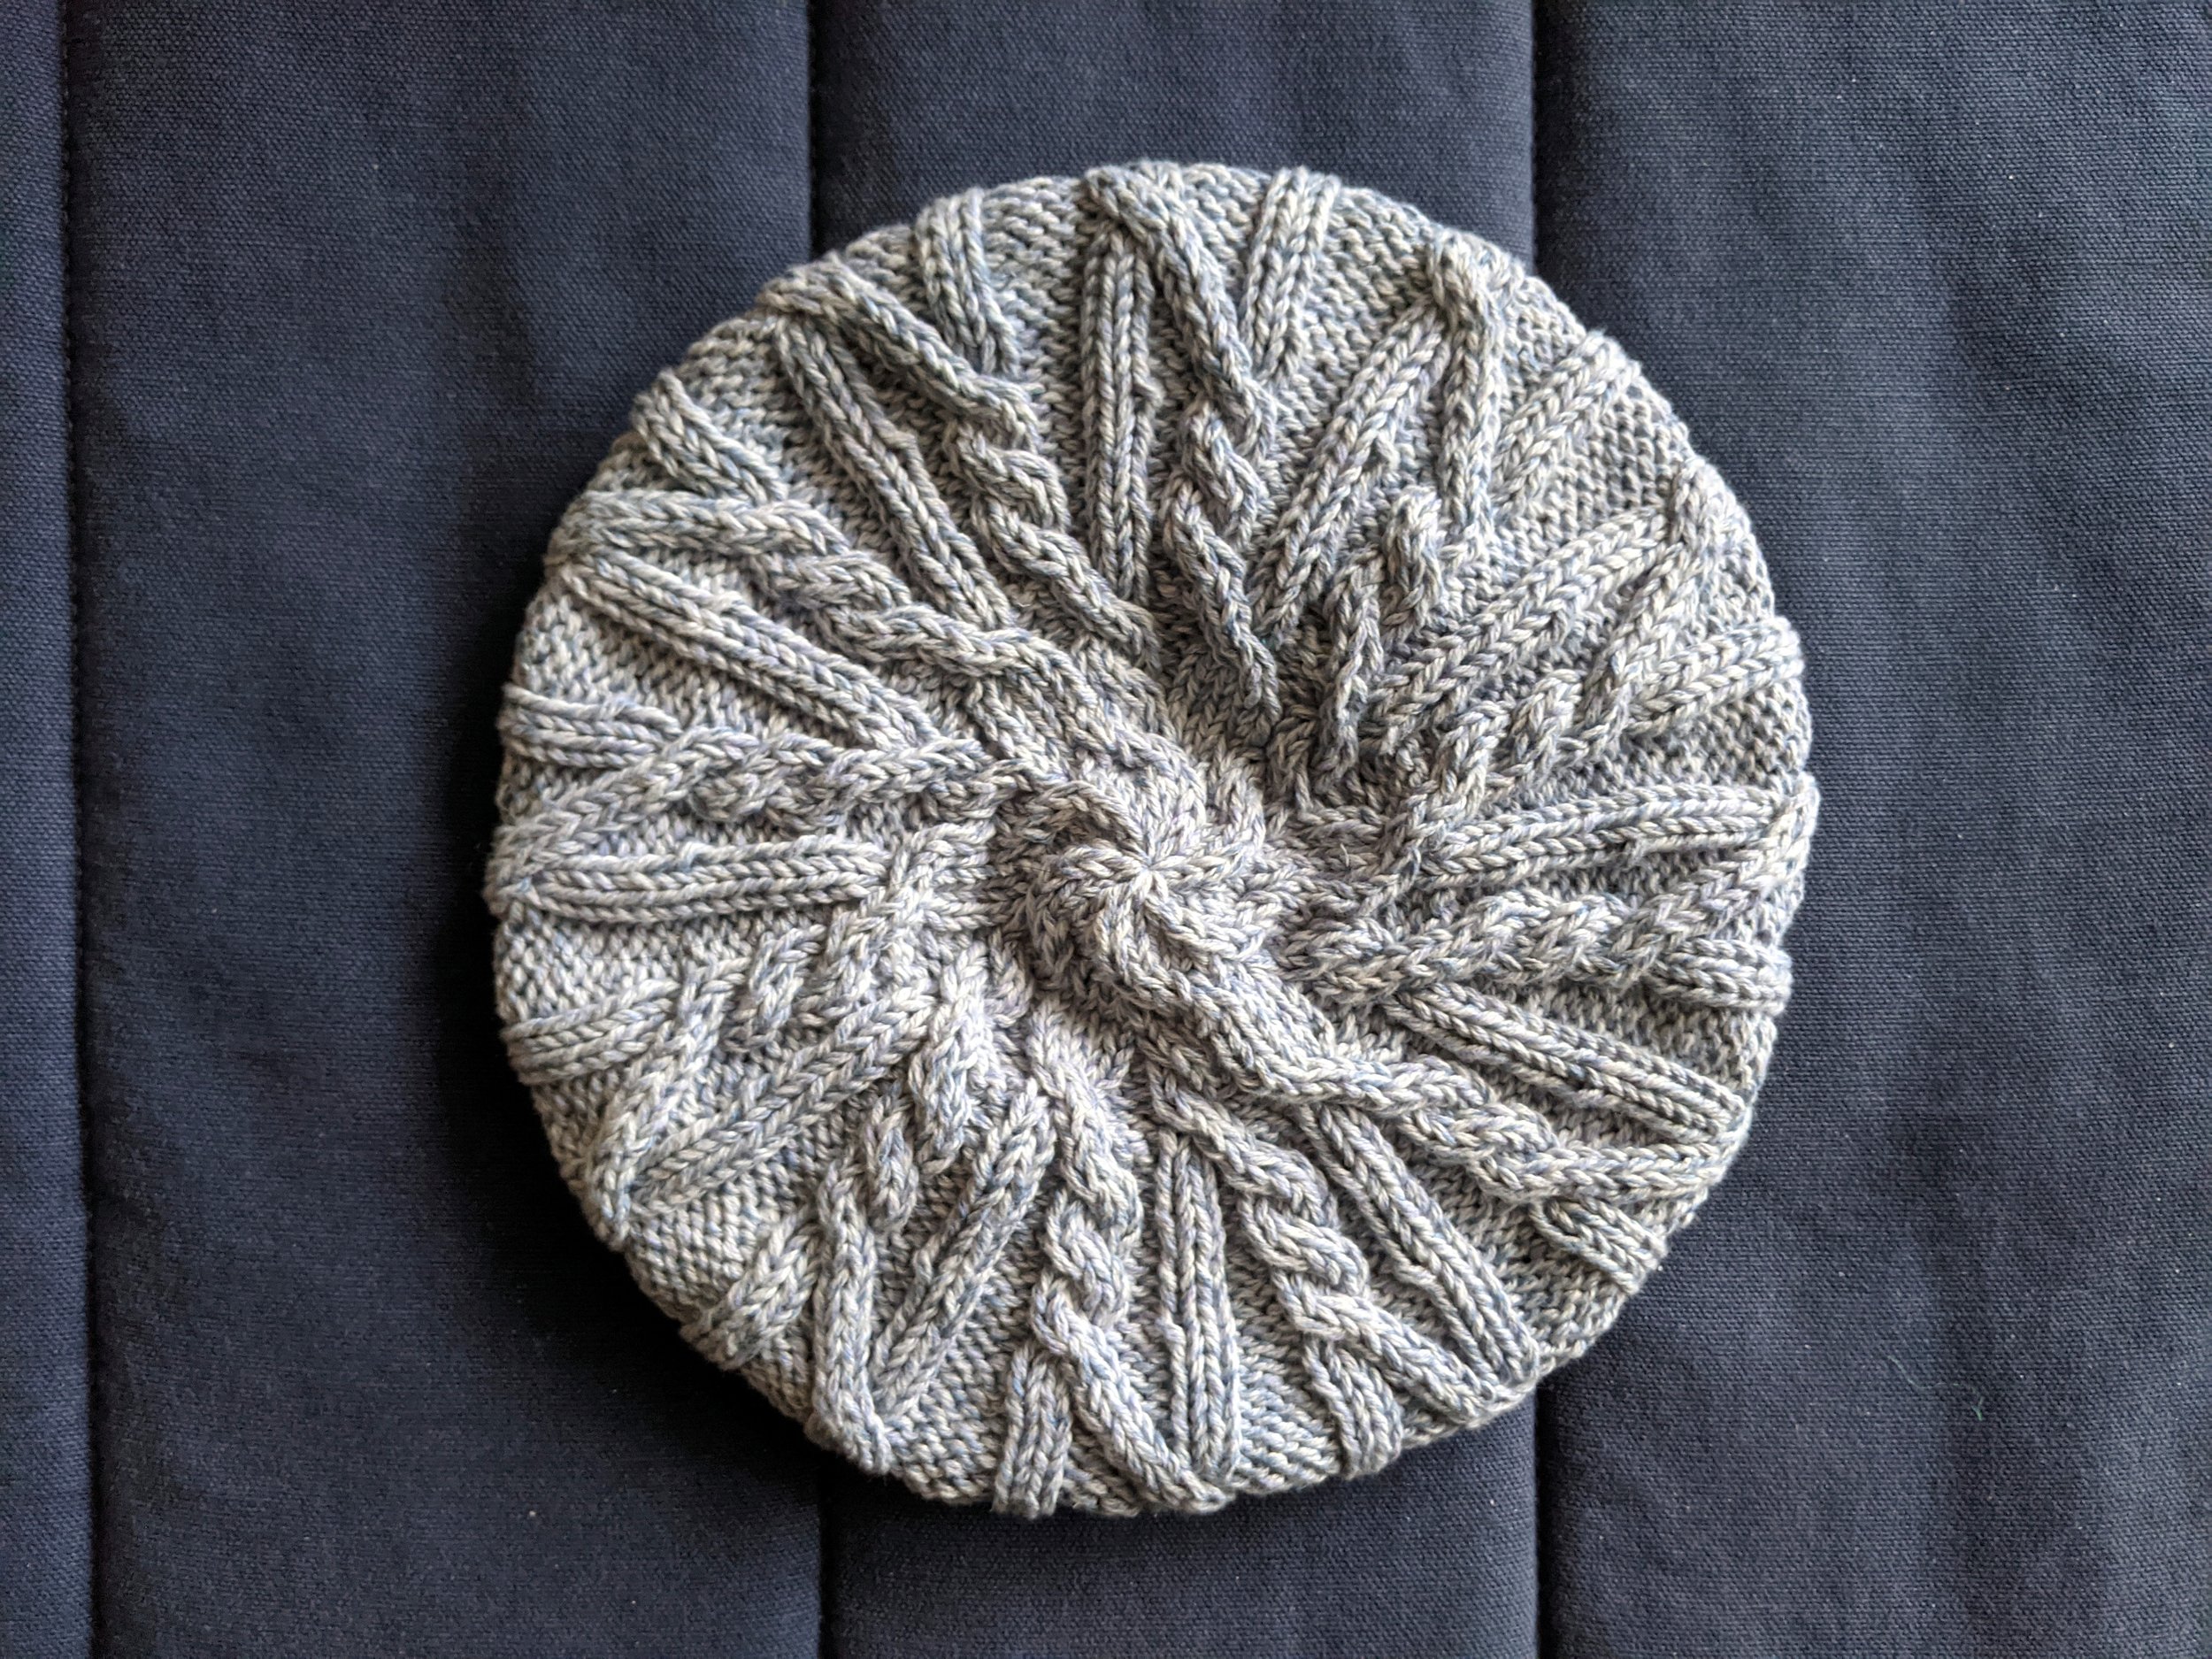
This is from an old copy of Vogue Knitting. Since it’s supposed to be a summer hat (!), I made it in blue-and-white marled cotton. The cables are integrated into the bottom ribbing, which was fun, as was the tidy finishing of the cables at the centre top of the beret.

crocheted cloche

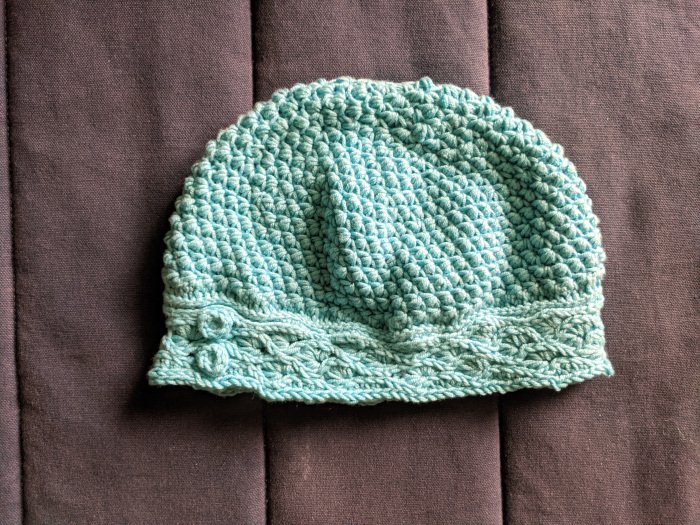
This was from a recent-ish Interweave Crochet. Honestly? it was a complete pain to make, but I was still glad to make it. The main body stitch was interesting; I could see it being used once upon a time to make a bathing cap in the days before those all switched to latex.
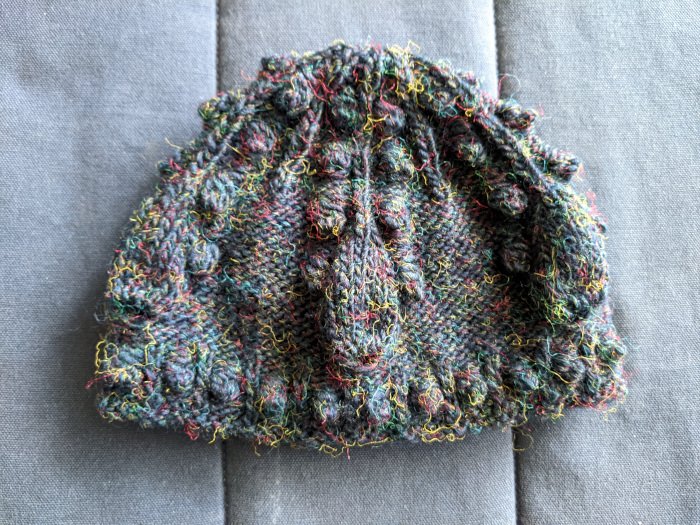
raindrop bobble hat

This is from Norah Gaughan’s Knitting Nature book. It’s very bobbly and otherwise textured, which is unusual these days, but still seemed aesthetically pleasing. I hope the recipient agreed.

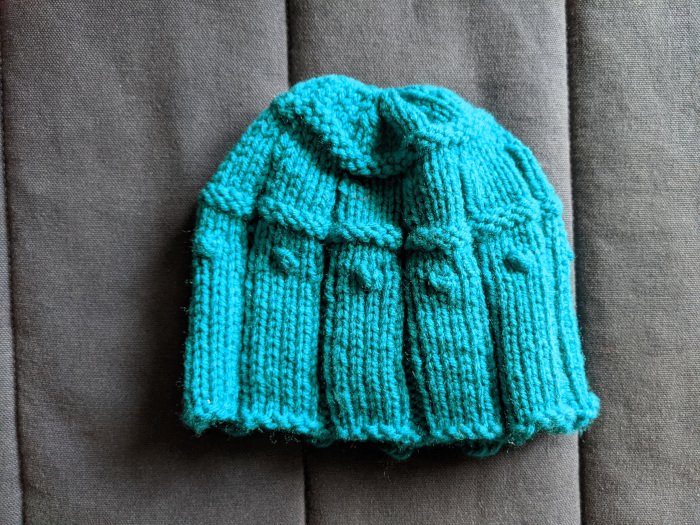
rivets hat

This is from one of Elspeth Lavold’s books, The Embraceable You Collection, based on the clothing carved on China’s famous Terracotta Army statues.

simple hat

This version was my sixth or seventh rendering of this pattern. It’s a fun, quick hat to make, and so far everyone I have given one to has talked about how much they like how it looks on them and how well it fits. It also has time travelling abilities, because people have guessed it’s everything from vintage late 60s to vintage 90s (which is mostly correct) to a brand new design. From The Shape of Knitting by Lynn Truss.

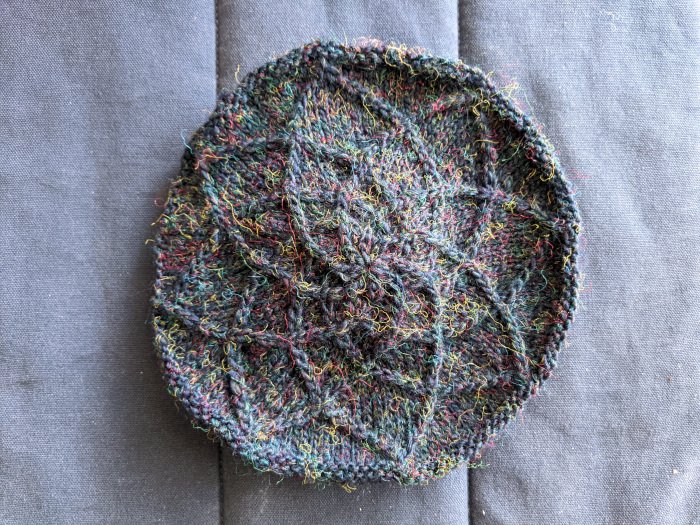
sunflower beret

This is another one from the same Norah Gaughan book as above. It went faster, and is not as complicated, than I expected, and the top especially is a very satisfying knit.
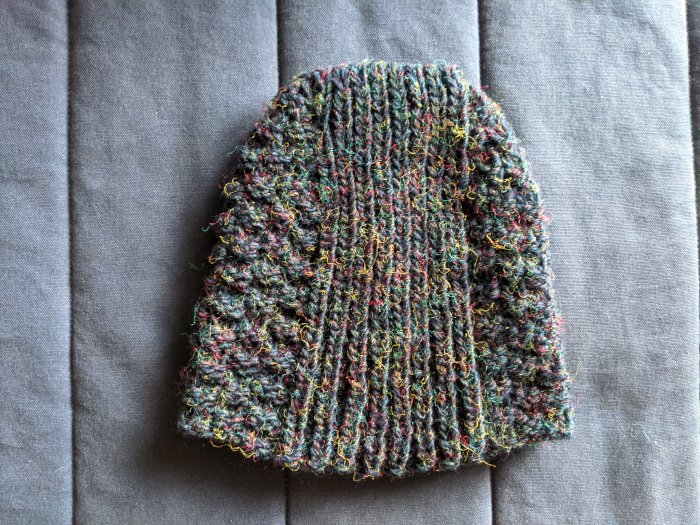
tilda reverse flat cap

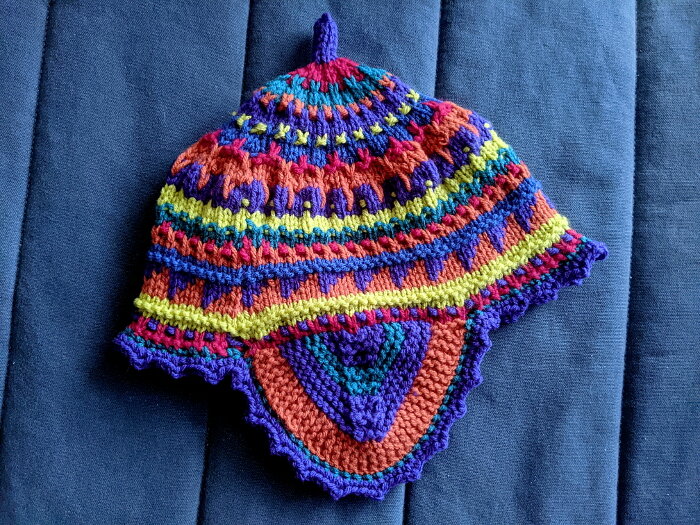
This is another one from The Shape of Knitting that I’ve made more than once. The brilliance here is that for most of the hat, you’re working short rows around just the top half. It’s basically a slouch hat with all the excess fabric removed, and a much more interesting ending.
toque

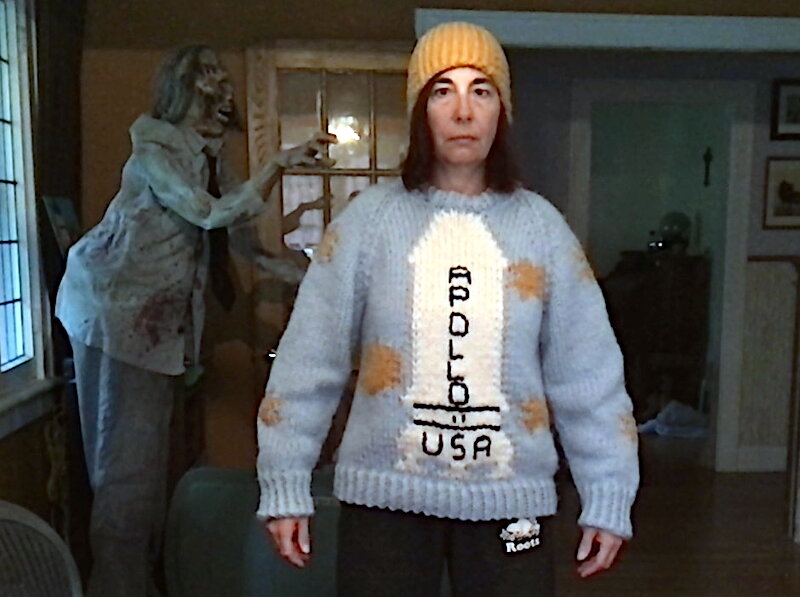
I got this pattern from the Lion Brand website when I had finished Cathy’s The Shining Apollo sweater. I made three versions of The Simple Hat (fourth version included here and described above), and then made the Lion Brand pattern as another basic hat friends and family might like.

Nobody wanted it, while the Simple Hats got snapped up with requests for more. My mum has two of them now.

I do think the toque will appeal to someone. Probably someone who is used to only getting hats from major chain stores. It has a certain kind of plainness to it.

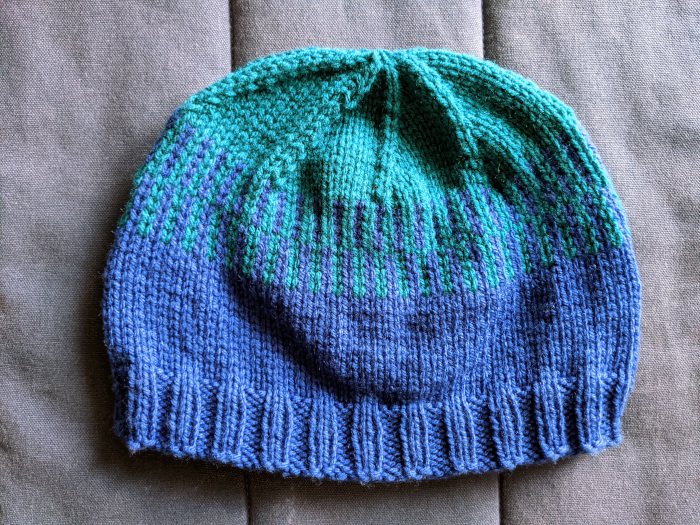
two colour beanie

This is the sort of hat that happens when you are trying to use up stash, but don’t have enough for even a hat. I used a basic free beanie pattern found on Ravelry for the base, and then did a very plain stranded colourwork section for the transition to the other colour, rather than just doing an abrupt change. The colourwork hides the beginning-of-round job and makes it a bit less plain.

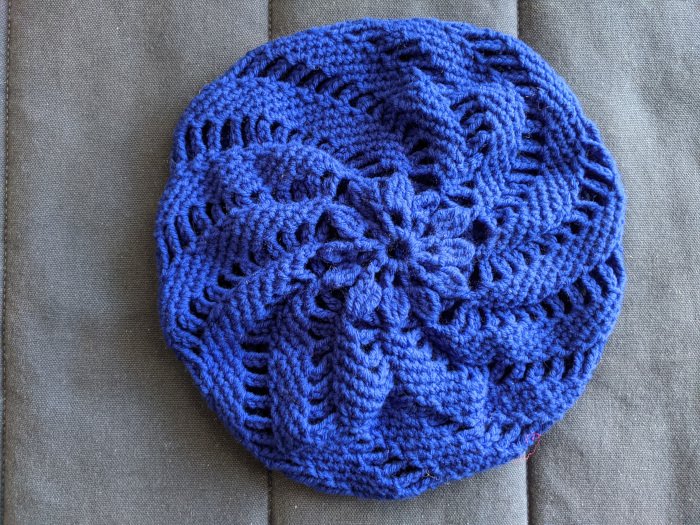
crocheted lace beret

Of all of the hats, this might be the most “statement” one. I pictured a different imaginary kid as the target recipient for all of these hats, but for this one, I specifically imagined a kid with super-curly, high-volume hair. Of all the hats, this was the one I could see as most likely to be worn all day, not just outside. It’s a big enough beret with big enough openwork that it lies somewhere between a proper beret and a 1940s-style snood.

The pattern comes from Crochet Red: Crocheting for Women’s Heart Health. The pattern was pretty easy to execute once the first few lace rounds were established, and I found the increase/decrease method interesting and fun to do.

The hats all got very carefully stuffed into a padded mailer envelope and shipped off to New Jersey. Since then, Hat Not Hate has changed their hat collection method, and… I don’t know, I like their cause, but supporting a foreign charity just wasn’t as satisfying as the work I’ve done for local/Canadian groups in the past. Since then, I have been making hats and scarves from stash in all sorts of colours, not just blue. Next autumn, when the charities are collecting warm wearables again, I’d like to give them somewhere locally. I always try to make things people will want to wear, so hopefully everything will find owners who are happy to have them, not just because they need a hat and rely on community groups to get them from.

on a wishbone and a prayer by Katherine Hajer

grey handknit pullover with ribbed sleeves and mock turtleneck

Winter 2020, the first winter of the COVID-19 pandemic, I had a blast making all sorts of handmade stuff for the nieces and nephews. Sweaters, cardigans, hats, toys… all personalised for each of them.

Winter 2021 was… less enthusiastic. Even though I had tried to use up the stash yarn from the previous Yule’s gifts, I still had a lot of it lying around (and I still do — more on that in another post). My job had gone from very busy to very even busier, which meant that rather than starting my Yule knitting in July like I had in 2020, I’d barely started by the start of November 2021.

And, as with a lot of other people, the pandemic walls had really started to close in. As i write this, I’m still working from home (which I love) and I’m still wearing a mask in shared spaces (which I don’t love, but with the case rates where I live it’s still a necessity). It’s been draining, and what’s happening on the geopolitical stage is not helping.

Still, it was Yule, and I wanted to make something. I decided to skip the nephews because they’re still too little to really appreciate handmade stuff (and I did the same for the nieces at that age), but I wanted to make the nieces something.

Inspiration came when I saw that 1980s sweaters with fluffy, chunky yarn knit on large needles were back on display in clothing shops. That reminded me that the original 80s sweaters were based on big-needle knits from the late 1960s. Grey for Niece the Younger, and black for Niece the Elder.

And when it comes to big-needle knits from the 1960s, I know that there happens to be a sweater pattern that was itself designed to be a quick, easy, last-minute gift: Elizabeth Zimmermann’s Hurry-Up Last Minute Sweater (aka the Wishbone Sweater for its armhole/shoulder shaping), from Knitter’s Almanac, still my favourite of all her books.

Knitting for the nieces lately has been a bit fraught, since they have both acquired the troublesome tendency of growing faster than I can knit them things. I needed to make something that would look sufficiently fashionable, but change gracefully from an oversized to a regular-sized sweater.

So I read through the Wishbone instructions, spent way more time on Pinterest than the projects demanded, and decided to rib the sleeves, neck, and body edging.

The sweater basically is the Wishbone, using Zimmermann’s EPS for sizing and stitch counts. I did some tweaking so that there would be a K2 at the centre top of each sleeve (made the neck shaping easier). Zimmermann’s original design calls for shoulder shaping along the tops of the shoulders, but since I didn’t want to have the rib columns get interrupted, I just decreased twice as much on the raglan lines to make up for it. In stocking stitch this would be risky, but since the sleeves and shoulders have stretchy ribbing, the fabric adjusts very nicely.

Once I got to the neck, I realised that due to the shaping, the shoulders were tilted up and the centre front and back neck was tilted down, like this:
\/

I incorporated some short rows to make everything level, and that took care of that.

The nice thing about the ribbed raglan is that the nieces’ shoulders don’t have to align with any particular shaping or seam line to get a good fit. With any luck, they’ll be able to at least get a few years out of these before they’re too small to wear.

scarf as garment by Katherine Hajer

three-ended scarf with angled side pockets

Scarves with pockets are one of those winter items which are always nearly useful, but never quite there. The pockets are typically patch pockets, so not quite ergonomic. They have a built-in conflict, too: if you want to put your hands in the scarf pockets because your mittens aren’t keeping your hands warm enough, that means you probably can’t wrap the scarf around your throat. Which, really, means it’s not doing its primary job.

This three-ended scarf from The Shape of Knitting book solves these problems well. The scarf pockets are integrated into the scarf instead of patched on, which allows them to be angled and for the pocket openings to be at the sides, rather than the top. This makes them very comfortable and allows the wearer’s hands to be inserted in a thoroughly non-contrived way.

The wearer’s throat is kept warm by the third end: the grey extension anchored to the main scarf at the centre back neck. This may be wrapped around the front of the neck and then locked in place under the black part of the scarf, with the extension’s tail dangling over the back of the wearer’s shoulder. The third end is plenty long to be worn as snugly or as loosely around the throat as the wearer prefers. If it’s completely unwanted, it can be un-tucked and flipped away to hang down the wearer’s back.

Both the black and the grey yarn are leftover from sweaters I made the nieces for Yule, out of Hobbii’s Fluffy Day XL. This is a wonderfully soft, lightweight bulky yarn. The only real negative thing I can say about it is that it’s unfortunately 100% synthetic. I keep trying to stop using acrylic, but it always seems to be the only way to knit a lot of things economically. I’m hoping that as the world deals with climate change, we come up with new types of lower-cost fibres that aren’t derived from fossil fuels.

The knitting itself was fun (except for the long stretches where no shaping was going on). As with all the patterns in The Shape of Knitting, the instructions are clear and the technical editing is excellent. I’ve made ten patterns from this book, some of them multiple times, and I’ve never found a single error. The only hard part is that sometimes I don’t trust the instructions enough, and try an alternative because it’s “easier but does the same thing”, only to have to rip out a few rows and do it the way the book says to. Serves me right!

clutter to... usable clutter? by Katherine Hajer

four hats and one set of four coasters made from odd balls of yarn

There’s stash, and then there’s “it’s in my way” stash. For the first pandemic Yule season, I made the nieces and nephews some fun hats and sweaters. I also managed to finish one earflap hat (the first one shown in that earlier post).

That still left rather a lot of stash yarn. Too much for me to put away in my yarn storage, because… it’s already full of stash yarn.

Meanwhile, the ever-generous J-A gave me some assorted odd balls of yarn from a box she’d won.

All of which means that right now, I’m having some fun just making whatever the yarn moves me to, with the caveat that it has to be useful to someone, somewhere.

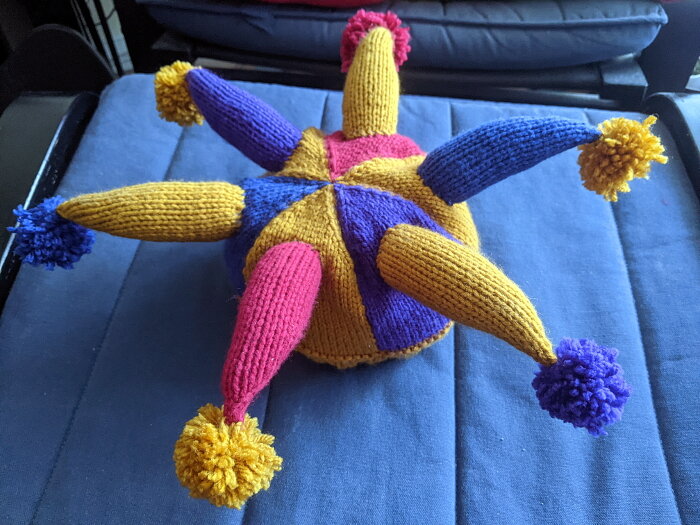
In the top left of the photo is a geodesic dome hat (aka a Buckminster Fuller dome). Something about my gauge compared to the pattern gauge was off, hard to say what because the pattern was on the vague side, so I added another row of triangles and made the earflaps small single triangles instead of the larger four-triangle shapes from the pattern. The colours were fun to work out for this one. I made a rule that two triangles of the same colour could share points but not an entire side.

In the top right is a beige knit-and-purl textured hat made from one of J-A’s prize skeins. Yes, I have made this pattern about seven times now. It’s quick and interesting to knit, and all recipients report the hat fits them well. The ribbed band goes from the forehead to the back of the head, and stretches width-wise to accommodate the wearer’s head.

The blue watch cap in the bottom left is also very stretchy, and has a neat diagonal panel wandering through the main fabric to keep the knitting from getting monotonous. I suspect it will fare better against the wind than a standard watch cap, because it’s in worsted-weight yarn , but only 3.5mm needles instead of the usual 5mm-ish.

The peppermint stripe had (seen here folded into quarters) will also be great against the wind, because the floats on the inside block the stitch holes on the outer layer. It’s a simple pattern that gets very mesmerizing and soothing to knit.

And then… There was a ball of cotton-based yarn from J-A’s stash that just didn’t want to be a hat. It’s the type of yarn where a biggish strand of unspun cotton is wound with a thin thread, creating a slubbed yarn with a light thick-and-thin texture. It’s not particularly stretchy, and the large amount of off-white doesn’t lend itself to items which might get dirty easily. Instead, I found a free crochet pattern and made a set of coasters out of it. Four coasters came within a couple of metres of using up the entire ball of yarn. I like the results — to me, the colours make for a 1950s-1970s look, almost like a raffia effect. I can imagine someone setting down some fruity cocktails on top of them.

It would be nice to say this made a substantial dent in the stash and that my living room is a bit less cluttered now, but I’ve still got about… two kilos of yarn, say? left. Two items are already on the needles and will contribute to the next blog post.

slipper evolution by Katherine Hajer

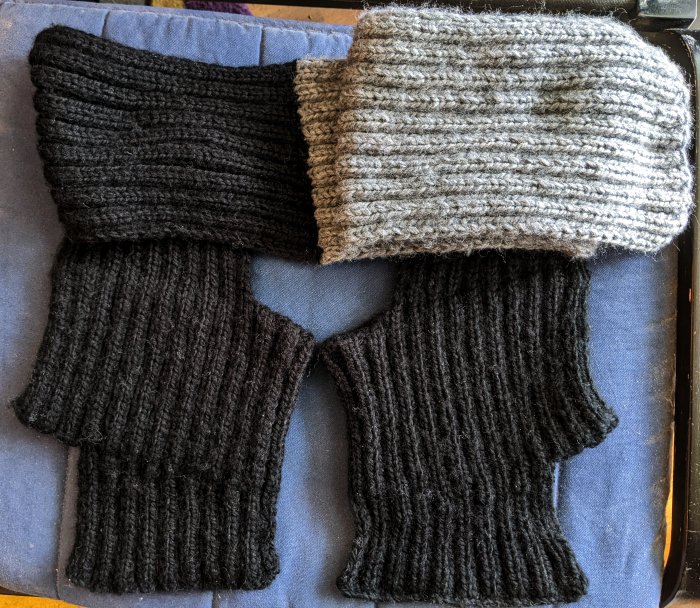
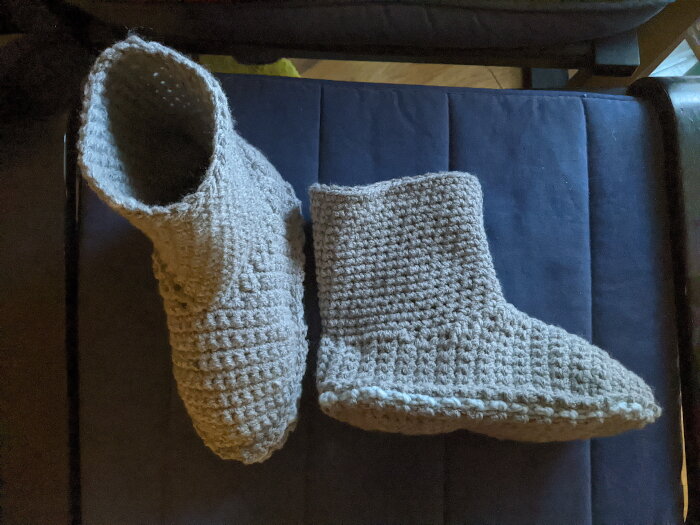
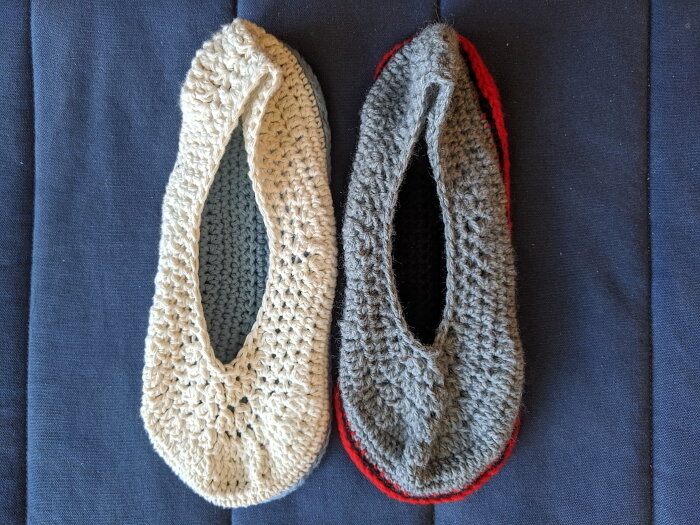
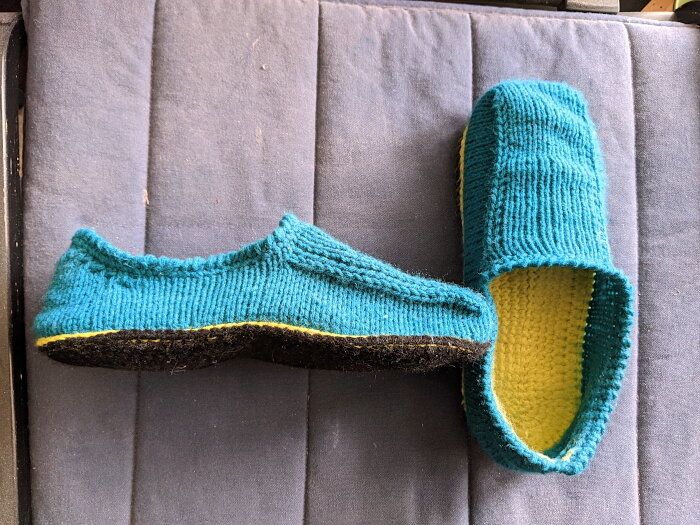
I’m back to prototyping slippers made closer to shoe-making construction. Unlike last time, where the slippers were all for other people to borrow, these are all for me. I wear out slippers frequently enough that making a clutch of slippers and setting them aside for next winter is a good idea. Besides, it’s using up stash!

The first pair I made was from a free Bernat pattern which renders slippers that look like Ugg boots. I’m not a fan of actual Ugg boots, but they work out to be great slippers when the annual Toronto deep freeze happens in January-February.

The next pair were me improvising on a crocheted double sole to create ballet-type slippers. I did one pair in the regular acrylic leftovers I use for slippers, and one in dishcloth cotton for when the weather is in between slippers and bare feet.

The teal-and-lime pair are my most recent experiment. Crocheted double soles as usual, but then I pick up stitches and knit the uppers. That way the soles have a nice dense fabric (and then doubled), but the uppers get all the stretch and flexibility from knitting. (Yes, crocheters will claim I can crochet the whole thing, but since I know how to do both, I’m happy to switch between the two fabrics to get the effect I want).

I’ve currently got a medium-grey pair on the go with orange soles. They’re basically the same as the teal and lime slippers, but I’m trying to refine the shaping a bit (making the toe box narrower).

Next iteration, I want to try to fit the soles to my actual foot size better. The ultimate goal is to get a pair of these onto flip-flop soles to make true indoor (and maybe outdoor?) shoes.

thick and quick and a little bit sick by Katherine Hajer

There is a certain, um, DIY project which I started work on [winces] in November of 2017.

It’s supposed to be… it’s still going to be a gift for my friend Cathy.

I’m actually very close to finishing it now. I’m on the last piece I need to do before final finishing and assembly.

Danny in the sweater that launched a thousand conspiracy theories.

Danny in the sweater that launched a thousand conspiracy theories.

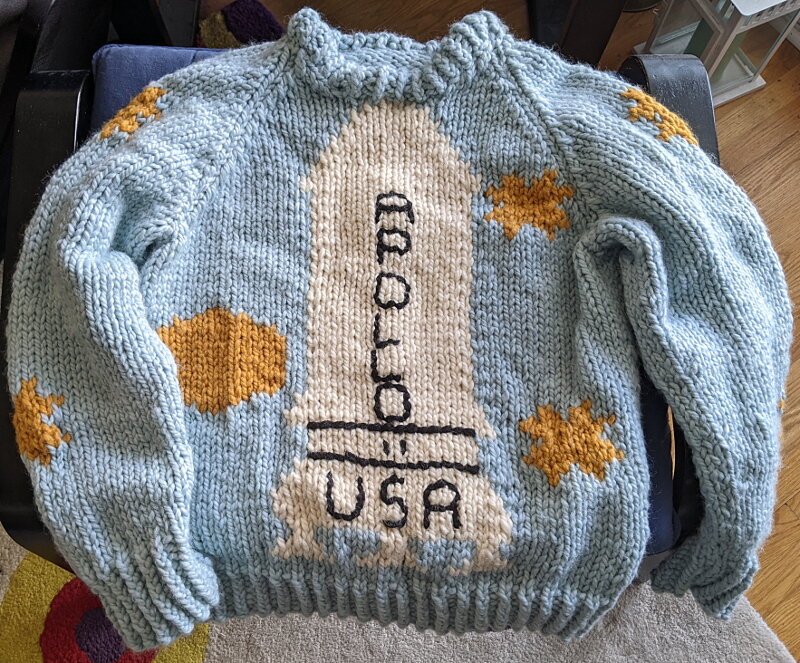
But it’s not done yet, and that’s why last winter I took a week out to make her a version of the Apollo 11 sweater that Danny wears in The Shining.

I actually got to see the original sweater at the Kubrick exhibit TIFF held a few years ago. Remember that? We used to go to public buildings and see exhibits in person. Up close, it was abundantly clear the sweater had been hand-knitted (well, you could tell that in the film too), but also that it was probably made from a hobby knitter pattern, as opposed to something designed for a garment factory or paid piece work.

Kids modelling the original sweater pattern, and probably breaking today’s safety standards for toys with those helmets.

Kids modelling the original sweater pattern, and probably breaking today’s safety standards for toys with those helmets.

I went poking around the web for the pattern. There are a lot of imitation/reimagined versions of the sweater out there! But, miracle of miracles, I managed to find someone on Etsy actually selling PDFs of the original commercial pattern.

The pattern is very late 70s/early 80s in so many ways. The intarsia details are only on the front and sleeves. There are only two sizes, and they’re very close in actual measurements. There’s no full fashioning on the raglan seams. Perhaps most noticeably compared to today’s patterns, the neck is done on straight needles and then seamed over one of the back shoulders. That last bit would horrify a lot of today’s knitters, but hey, they’d already be freaking out at the mandatory seaming the intarsia demands.

I did some math with the help of my copy of Ann Budd’s The Knitter’s Handy Book of Sweater Patterns, and figured out that if I followed the instructions for the smaller size but just made it longer, I could make an adult-sized sweater for Cathy.

To get the sweater to be the right size with minimal math, I used an even thicker yarn than the 70s chunky called for in the pattern. Lion Brand’s Wool-Ease Thick & Quick has a name with a lot of assumptions (just because the yarn is thick does not make the thing quick to make), but it got the job done here.

Then, because intarsia, I found myself with a lot of leftover yarn. I don’t tend to have a lot of yarn in this weight in my stash, so I decided to use it up by making a bunch of hats and winter headbands.

The results are in the gallery below, including Cathy being a good sport and doing her best Danny imitation.

And now I really have to finish the actual, main gift project!

brei-blast by Katherine Hajer

Times Being What They Are, I wound up making nearly all my gifts for Yule 2020. At first I was hoping to make at least some on my machine, but that didn’t work out.

Here’s a gallery of what I managed to photograph before it got dropped off at various family curbsides. All of the hats except for the play crown are from an old 1990s Vogue Knitting On the Go book I have.

how to prevent the locked-car mystery by Katherine Hajer

Introducing the first crocheted car accessory that’s not cute!

Introducing the first crocheted car accessory that’s not cute!

So here’s the scenario: a person parks their car, checks all the doors are locked, and leaves. When they return a few hours later, their car is still locked tight, but now the hazard lights are blinking. The car owner opens the door and checks the dashboard to figure out what’s going on, only to discover that the hazard light button is now in the “on” position. it definitely wasn’t before.

Let’s say there’s a security camera nearby, and we can verify that no-one gained access to the car. The only way to turn on the hazard lights is with that physical button — a hacker couldn’t be clever and trick the car into turning on the hazard lights by remote.

Transponder in its sling

Transponder in its sling

So what happened?

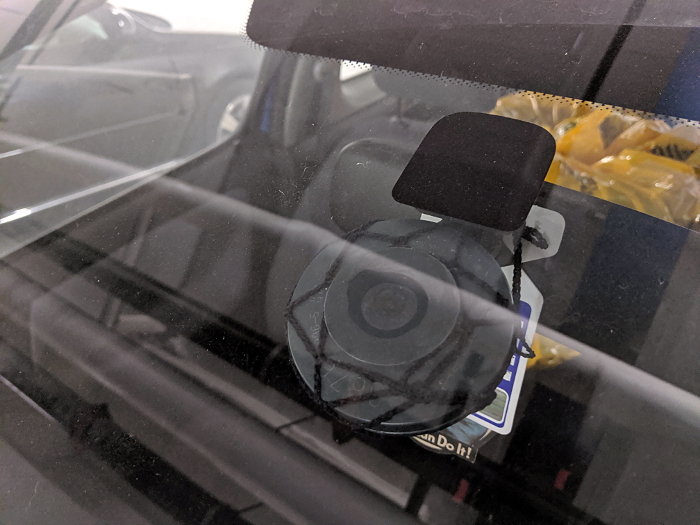
Answer: the car had a transponder suction-cupped to its windshield, and it lost suction. And when it fell from the windshield, it hit the hazard light button on the way down, hard enough to push the button to the “on” position.

We use transponders to access the parking garage at work, and mine has fallen off my windshield at least half a dozen times now, including once when I was driving. Half of those times the transponder has hit the hazard light button, and the last time, this past weekend, it wasn’t caught before the battery had been run down.

So there I was, all packed and ready to Get Things Done at work, and I couldn’t start my car. Instead, I wound up working from home until CAA showed up and gave me a battery boost.

At first I figured, okay, lesson learned. Remove the transponder from the window every time you park. But that didn’t seem very practical, because when the suction cup does decide to stick, it really sticks.

installed and ready for prototype testing

installed and ready for prototype testing

What I needed was a backup, a way to prevent the transponder from hitting anything on the dashboard when it became unstuck (er, and not hitting my right hand if it fell while I was driving). Like a seatbelt, but for transponders.

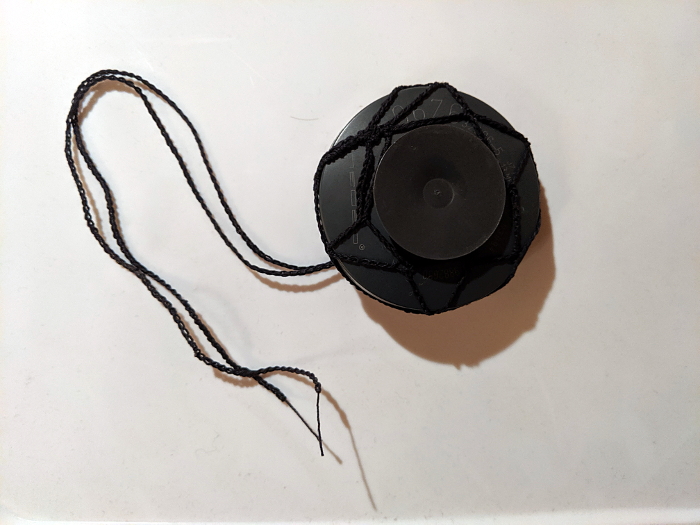
What I came up with is the Transponder Sling.

It’s crocheted out of laceweight doily cotton, so it’s stretch-resistant. It’s made in a net pattern, so it won’t interfere with the transponder signal. And it’s invisible to the driver behind the rear-view mirror.

The net is placed over and around the suction cup, then the ties are laced through the outer ring of loops and tightened to keep the transponder snug in its sling. Then the ties are tied over the rear-view mirrors mounting stem, so if the transponder falls off the windshield, it’ll hang from the mirror.

I’ve already got the prototype installed in my car. The real test will happen when the transponder falls off again.

more fiddle faddle by Katherine Hajer

Ouf.

There is a folder on my laptop called "working folder". It's where I throw photos destined for my blogs before I upload them, so I can do the usual cropping, level adjustments, and whatnot.

Usually I am taking photos only two or three blog posts ahead. When I am on a roll, like I was at the beginning of the year, I will take photos, upload them, and then have the blog all ready and scheduled weeks and advance.

And then, you know, things happen, and it all falls apart again.

These soap sacks were made for Cheshin for her birthday, which was last spring, which gives you an idea of how far behind I've got. I found some interesting soaps at a local shop and decided to include them as part of her birthday present, but they were minimally packaged with just a cardboard band around the soap. Minimal packaging is all well and good, but it might not survive being mailed to Ottawa and it might not be very protective of the soaps if they aren't used right away.

So I went on Ravelry, where all fun small patterns are catalogued, and found this soap sack pattern. There are lots of different patterns for soap sacks on the net, but I liked this one because it is reusable; most patterns have you sew the soap into the sack and are thus for one-time use.

Besides having the benefit of being free as in beer, the soap sacks feature my favourite "sandwich baggy" closure for pillows and, um, soap — no fussing with knots or drawstrings. The only mod was to change the garter stitch heart motif to a more-practical-for-scrubbing diamond.

I used up an entire ball of mystery yarn from the stash (definitely cotton, but beyond that, no clue). Cotton seemed like a logical choice since it's what gets used most often for handmade washcloths, but Cheshin gave me a bar of soap for my birthday which is entirely enclosed in felted wool, the idea being it will get more felted and therefore more scrubby in the shower. I'm still working through a big bottle of shower gel, but I think the felted soap will be up next.

Because of course showers is where fun experiments happen. Isn't it?

droid cuteness by Katherine Hajer

BB8 front.jpg

The nieces have finally been bitten by the Star Wars bug. The last two times I've visited them, they've been marathoning the films on DVD, and are completely enraptured even though they have seen all of the films many (many, many) times now. Luckily for their auntie, so far Original Trilogy films have been on during visits and not anything from the second trilogy. This is a post about crocheting, so we'll leave it at that.

When The Force Awakens was released, Niece the Elder wanted to know why the movie trailer was playing the Angry Birds theme. How times change.

Of course the nieces now want to go out on Hallowe'en in SW costumes. Niece the Elder wants to dress up as BB8, while Niece the Younger wants to be Rey, even though she is also a massive fan of R2D2.

Niece the Elder didn't like the Jetsonesque fascinator thingie that came with her BB8 costume, so she asked if I could make her a BB8 hat. I'm not too fond of it either, so of course I could.

This is Canada, and the nieces are lucky to live below the snow belt and not have to worry about wearing costumes over snowsuits like their auntie and father did. Still, it can be a bit nippy at night by Hallowe'en, so I made the nieces droid beanies.

The instruction for the BB8 hat and related appliques are in two separate Youtube videos, and only in Youtube videos. This was frustrating. The good news is that if you're completely new to crochet and just really want one of these hats, you can probably make it through by watching these videos, maybe with some beginner crochet videos as warm-ups. The bad news is if you already know how to crochet, it's maddeningly tedious to work through them. I wound up challenging myself to finish a step before the narrative/demo was over, just as a way not to go numb. Near as I can figure, the purpose of sharing the pattern on Youtube rather than on a web page seems to be to make you sit through advertisements. Thankfully these don't played if the video is Chromecast.

r2d2 front.jpg

The R2D2 hat design is by the same person, and is also Youtubed into a hat video and an applique video. Having done the BB8 hat first, I made some execution decisions which were different from what's in the video. Rather than leave floats of unused colour at the back of the work, I cut strands of white yarn and did a sort of intarsia for the one-stitch white bars between the blue areas. I also cut the blue yarn rather than carry it across long stretches of white. I liked the results so much better I unravelled the BB8 hat and re-did it using the same techniques. It made for more ends to darn in, but meh. I'm not one of those crafters who gets upset about darning in ends. The final product was tidier both to work and in finished form.

r2d2 back.jpg

One thing I learned about my crocheting by making these hats: my double crochets tend to be shorter and wider than normal. To get a tidy start of round, I only chained 2 instead of the usual 3, which made for a distinctive gap at the back of the first version of the BB8 hat. The chain 2s are hardly noticeable at all.

Even with re-doing the entirety of the BB8 hat, these were quick to make and took surprisingly little yarn. All the yarn except for BB8's orange came from stash, which was satisfying. It's also nice to make something for Hallowe'en which the nieces can wear throughout the winter.

a not-saccharine baby blanket by Katherine Hajer

My youngest brother is expecting his first baby, and both he and his wife have made it clear they are not into cute-overload, saccharine baby things. I was talking this design constraint over with J-A, and happened to mention my brother is also heavily into NASA, especially the Apollo era. She came up with the idea of making a baby blanket with the NASA logo on it.

We grabbed our phones and found a few examples of the "space meatball" logo done in cross-stitch, but the only pattern for sale involved signing up for the vendor web site before you could even think about paying, and the credentials were, ah, intrusive and nosy. No, I am not going to tell you my life story just so I can buy one cross-stitch pattern.

So I made my own in a spreadsheet, did some math to figure out how to centre it on a metre square baby blanket, and had at it.

As you can see from the photo above, I did the logo's background in intarsia, but embroidered the white and red details over top. This was simply because the idea of knitting in those far-apart white "stars" did not seem like a good functional design decision. Originally I was going to do the embroidery in duplicate stitch, but that was coming out unevenly and making the fabric too stiff, so I took it all out and switched to cross-stitch.

I like cross-stitch on knitting. The stitches provide good coverage, but the fabric stays flexible because most of the embroidery yarn just sort of floats on top. The only thing to remember is that instead of the square stitches one usually gets, these stitches come out wider and shorter because knitting is wider than it is tall (5:7 ratio for plain stocking stitch as used here). My embroidery chart spreadsheet had to take that into account as well.

The border was 4 rows/stitches of built-in garter stitch (ie: knitted as one piece with the rest of the blanket). I like garter borders, but I have a bad habit of making them too narrow to prevent the edges from rolling/flipping. In this case I gave a blanket a quick stretch/block to settle down the flipping, and added a flannel backing.

The backing was necessary anyhow to cover up the embroidery floats on the back of the blanket, and while it hasn't tamed the edge flipping entirely, it has tamed it to such a large extent I don't think any more adjustments are required. Besides, if it's going to be a "NASA" item, shouldn't it be a little overengineered? 

This was the first time I'd backed any knitting with woven fabric, and it was much easier than I expected. I found a fabulous technical knitting blog which explained all the considerations very well. Everything from cutting to machine sewing the hem to hand-sewing the backing to the blanket took about half a day, and half of that was comfortably sitting on the couch watching TV while I did the hand-sewing part. I used doubled thread for strength, and matched the overcast stitches to the rows/stitches on the blanket — something you can do when your gauge is in the firmish range like mine tends to be.

The knitted part is all 100% acrylic yarn (yeah, I went there), of various brands. The logo itself is all in Red Heart, which is a little thicker than the Lion Brand Pound of Love I used for the main colour. This worked out well because it means that the logo is a little stiffer and "pops" slightly from the background.

The Lion Brand yarn was a great discovery (more advice taken from J-A). It's soft, and the Oxford Grey I used has enough colour depth people thought it was wool. I used a whole ball plus about 20% of another ball for the blanket, and never ran across a single knot — amazing for about a kilometre of yarn.

The finished blanket came out slightly larger than the square metre I had planned (and despite fussy gauge swatching — oh well). I couldn't get a good photo showing the whole thing, but here's an overhead shot from when I was blocking it for context:

context.jpg

211 stitches x 280 rows for 59,080 stitches in total, and all done on straight needles too. And who knows? Maybe the baby will take it to space when they grow up.

an interlude project by Katherine Hajer

upload.jpg

The Tuesday before Easter I baby-sat the nieces. I'd seen that Caron Cakes were on sale, so I showed them the dragonfly poncho pattern and asked them if they wanted one for themselves. 

The nieces are not much into boho fashion. Niece the Elder's take was, "what the what?"  She wasn't very clear on how such a contraption was to be worn, or why. Niece the Younger likes cuddly clothing, though, and said she wanted one. 

I'd thought she would have wanted the turquoise colourway shown in the pattern photo, since that's what she usually asks for, but it turns out she's moved on to dark blue, so that's what she got. 

I picked up the yarn the following afternoon, and by the end of the evening I had one panel done... and it looked horrible. The edges were wavy. The whole thing just looked sloppy. I was not pleased. 

upload.jpg

Still, I pressed on, and somehow found my stride on the second piece, which came out more even. The difference was so stark I unraveled the first piece down to the first three rows and re-did it.  

The pattern is very quick and easy to work up, so long as you're comfortable working a double crochet rectangle (I'm not, apparently). People who didn't know what the openwork dragonflies were supposed to be recognised them correctly right away, which was pleasing.

Niece the Younger received the poncho at the Saturday Easter dinner/belated sixth birthday party for her. At first she refused to pull the poncho over her head, preferring to cuddle it in her lap instead. Later on she wore it correctly, but didn't stay still long enough for me to get a good photo.

The best part was when her new Hatchimal was cold and she bundled it up in the poncho.  

I still don't think the nieces really grok what ponchos are for, but at least Niece the Younger likes hers! 

So: a kid's poncho in three days, including a redo of nearly half of it. Not bad. Now back to the giant ogee blanket.  

miscalculated by Katherine Hajer

So there I was, finishing off the last couple dozen of motifs for the ogee blanket, and I decided to join a few motifs just to double-check measurements and confirm they were going to fit together. As one does.

And that's when I noticed that I had made some very wrong assumptions in calculating the number of motifs I'd need.

The first assumption was easy to mitigate. It turned out a vertical row of 11 motifs was closer to the measurement I wanted than the planned 12, especially if you included the border I was going to add. Okay, more arrangement options, less to join, what's not to love?

The second assumption, that's what. I'd figured an original blanket size of 12 motifs long by 12 motifs wide. And I'm not wrong, except that I treated the motifs as a square grid, not as what they are — a tessellation.

Look at that red-edged motif in the photo up top. See how it reaches the halfway point of the row to the left of it? Now imagine there were motifs to the right of it, where the table is. It, and the entire vertical row it belongs to, would span from halfway inside the row to the left to halfway inside the row to the right, adding virtually no width to the overall piece. The point of each ogee adds about a centimetre, not the 13 centimetres I'd planned.

That means I need nearly twice as many vertical rows as I thought to reach the actual width I wanted, which works out to... 12 more horizontal half-motifs and 94 whole motifs.

That's the bad news. The good news is I still have lots of yarn left over, even taking seam yarn and border yarn into account. It's just going to take a few weeks longer is all, and I'll have to be careful when placing motifs which are made from colours in short supply so they don't get clustered together.

Yeah. That's it. Really.

Sigh.

10-90 by Katherine Hajer

There's a saying among software developers: the last 10% of the product takes the last 90% of the effort. I think the same rule applies to making anything, which might explain some of the pitfalls crafters run into when they're working on projects. Consider second sock/sleeve syndrome, or people who get really bogged down and discouraged by the finishing step. It can be frustrating to know there is so much done, and yet so much more to do before completion.

That's where I am with the ogee motif blanket. I've been applying the fourth and final motif round for two weeks now, darning in the ends as I finish each colour set. The final round is just single crochet and takes hardly any time to do. Darning in the ends (8 per motif) isn't so bad either, because there are easy, logical places to bury all the ends, and some of the ends can be darned in two at a time.

But. There are 162 motifs in total: 120 whole motifs, 24 vertical half-motifs, 12 horizontal half-motifs. The half-motifs have the same number of ends as the whole ones, so that's 162x8 ends to do: 1,296.

Sometimes it's better not to figure these things out!

I was sick last weekend, which means all my estimates for finishing are blown out again. I do want to finish soon, though, because spring is already trying to come to Toronto, and I don't want to be working on a bedspread-sized blanket when the weather is warm.

The assembly stage is coming soon soon soon, and it will have its own challenges. The bigger the piece gets, the less portable it will be. Probably I'll get around this by assembling in strips three motifs across, then connect the strips to form the full blanket.

The border will have to be applied in rounds. I don't think there's any better way to do that.

Onwards.