the week of crafting dangerously: the sequel by Katherine Hajer

Last time I blogged about the oya I made: one for myself, and one for Bonnie, the office manager at the wellness clinic I go to.

Truth is, those weren’t the only items I had to make last weekend. The wedding shower for my youngest brother’s wedding was on the Sunday, and I wanted to make furoshiki for the shower gift, and cushion covers for the cushions I was giving them. The cushions weren’t on the registry, but my new sister-in-law mentioned she liked some cushions my mum had made, and it just so happened I knew that the fabric came from IKEA. Turns out, once I got there, I discovered the cushions had as well, which was convenient.

Sewing is problematic at my place. I do have an en suite washer and dryer in the condo, but even with the ventilation fan on, the dryer can take a long time. Basically I only run it when I absolutely have to, and only then on the weekends. Then pressing lengths of fabric in a small apartment can be challenging as well, just because it’s hard to figure out where to put the ironing board. Usually I use a little table-top ironing board, even if that means I need to press fabric lengths in two passes.

Then once all of that is done, there’s the cutting and the sewing to do. I am not good at sewing. Usually I specify that I’m not good at cutting, but this last session made me realise I don’t sew very well either. Also, my sewing machine chose this particular time to have the needle tension go all wonky. I should have had it set correctly already (it’s always been fine before). Instead, I had to crank it to maximum tension to get barely acceptable stitches. And then the thread kept on breaking. Argh.

Nevertheless, when all was said and done I had two cushions like the one shown above, and two furoshiki, which is how many it took to wrap the gift in its large cardboard box:

If you look closely (although I’d rather you didn’t), you’ll see both the top-stitching and the seams are crooked. Sigh. Oh well, it’s serviceable. I do like the red back fabric with the turquoise bird fabric.

I didn’t convince the cushions (four, two handmade covers, two store-bought contrasting ones) to fit in the furoshiki with the box, so I just stuffed those in a reusable shopping bag (also IKEA) and called it a day. Turns out the shopping bag came in handy for packing all the gifts into the car.

I have fabric to make myself two blouses this autumn, but the sewing machine and its tendency to break thread is making me nervous. I might have to see about getting it adjusted before I let it near the cotton voile I got.

the week of crafting dangerously by Katherine Hajer

My youngest brother is getting married this August.

August in this part of the world tends to be very hot, and very humid. The first thing I said when I was told the wedding date was, “Congratulations! That’s fabulous! Is it all right if I don’t wear stockings?”

Besides not liking to have my legs encased in nylon mesh in 90% humidity, I also have sensitive skin which tends to get annoyed (read: itchy and painful) when metal gets next to it in warm, damp weather. Even metal arms on lawn chairs can set me off. Wearing fine jewelry (real gold or silver) should avoid it, but if there’s any nickel alloyed with it at all, I react. I seem to do better with silver, probably because of what it’s alloyed with.

While I was out buying a dress to wear to the wedding, I noticed that the shop carried a modernist version of oya, which are strips of lace once made to edge head scarves, and now are used on their own as necklaces or bracelets. Wearing 100% cotton, thread-thin jewelry in Toronto’s August appeals very much.

It so happens that Interweave Crochet did a special article on oya a few issues back. I made the purple and black version shown above to go with the dress I bought.

Bonnie, the office manager at the wellness clinic I go to, asked for an oya of her own, and so I made up this cream, brown, and grey-beige version:

The lighter colours show the construction method better. The cream large flowers are made first, then the brown backgrounds are added. Then you make the grey-beige ribbon, attaching as you go. The cream fan shapes are added last.

It took me two weeks to make my oya, but only a week for Bonnie’s — partly because I already knew the pattern by that point and could work more efficiently, and partly because she wanted to take it with her on vacation, so I had a tight deadline to work to. For once I tried to track my time, and it worked out to about:

  • 45 minutes per large flower centre

  • 45 minutes per large flower background

  • 30-40 minutes per ribbon segment between large flowers

  • 90 minutes for the fan shapes, not counting darning in ends

There are 10 large flowers with 9 ribbon segments between them, for a total length of about two metres. You do the math.

I’ve only done a very limited amount of thread crochet before, so these projects were good learning experiences. One of things I learned is that if you hit the index finger on the hand holding the work enough times with the point of a 1.25mm steel crochet hook, you will break the skin. Two days later it’s almost completely healed, but I had to make a point of washing it with antibacterial soap because it was starting to fester. Ouch! Next time I do this sort of thing, I’m going to try putting a thimble on my left index finger to protect it.

In case anyone is wondering what happened to my stash-busting efforts, erm, both of these were made from 100% stash. I didn’t even know I owned the grey-beige thread until I found it, misfiled with my knitting yarn, while I was looking for something else. Thread-crochet purists will notice that the purples and the brown are perle cotton while the other threads are odds and ends of different stuff, but it all worked out. The purple large flowers might need some ironing, even a light blast of spray starch, to encourage them to stay flat and not crushed in half, but that’s about it.

#craftblogclub spring gift swap: oodles of cool cards! by Katherine Hajer

Yesterday I blogged about what I sent Zoe in Beckenham as part of the #craftblogclub spring clean gift swap. Today I want to show the lovely cute cards she made and sent to me:

upload.png

Each motif is made up of one or more pieces of fabric, which have been very carefully cut out and glued to the cards. The precison on these is what really pulls them off. The cards are, conveniently, left blank inside, which is what I prefer. And, it just so happens, they are all in my favourite colour scheme too! 

Zoe thoughtfully included matching envelopes, so I don't have to worry about finding some in the right size when I use them. I actually collect cool greeting cards so I always have a selecting on hand when one is needed, so this is a much-appreciated gift!

She also wrote up a very clear, detailed tutorial on her blog. Do go take a look if you want to see more photos and learn how to make your own. 

#craftblogclub spring gift swap! by Katherine Hajer

The spring challenge for CraftBlogClub was to make thing for a gift swap, using only materials one already had on hand. Having materials on hand was not an issue for me [glances guiltily around the apartment at all the yarn]. Katie Gets Crafty organised us into swap pairs, and Zoe Roberts at Oodlesofcraft was my swap partner.

Zoe lists sewing, knitting, jewelry making, and card making as her crafts of choice on her blog, so I thought it best not to do any of those. I stuck with crochet, which seems to be my main method of using up yarn these days. Since I didn't want to make any assumption about what Zoe liked and get it wrong, I made a few small things, in the hopes that one of them would suit her:

Hairpin lace scarf:

This is more or less the same as the one I made a few months ago, except in three colours instead of one. This time around, I wasn't sure I had enough of one colour to make an entire scarf, so I went with long, vertical strips joined by a contrasting trim. As before, each strip of hairpin lace is 300 loops each side. The edging is sc, ch 1 to give it some weight without being too rigid.

Tawashi

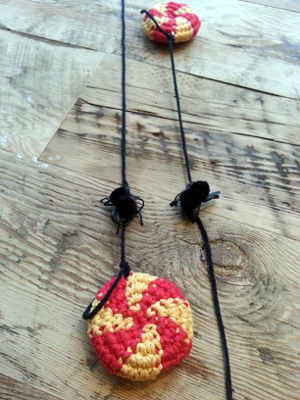
I found out about these from Pinterest recently. By definition, they're small, crocheted or knitted items you can use for scrubbing dishes. The swirled stripes pattern I made is very popular, but there are also ones in the shapes of leaves, rectangles, cartoon characters... they're sort of like practical amigurumi. There are lots of different free patterns floating around for these, but I think this is the one I wound up using.

Tawashi are supposed to be made in cheap acrylic so that they can withstand the rigours of pot-scrubbing, but they're so small and cute I thought they might be nicer for washing one's face. I made them in dishcloth cotton so they could be used either way.

Coasters

Crocheted coasters seem to be having a moment. The day I got the ribbon and other packaging materials for the gift swap, I found some commercially-made ones for sale, and patterns for them seem to be proliferating. Summer's practically here, so I decided to make a set of four for the gift swap as well — the night before I had to mail everything off to make the deadline (oops). They were definitely a last-moment decision, but I made all four in one sitting (2-3 Doctor Who episodes watched on Netflix). They're made from the same dishcloth cotton as I made the tawashi from, and flattened out more after I took these photos. The pin I got the photo from leads to here, but the subsequent link seems to be dead — Etsy just displays a lot of "similar items" which aren't similar at all! I just had a good squint at the photo and figured out a facsimile from there. The pattern as I made it is after the photo:

Four stitch tr cluster: *yo, insert hook in next space, pull up a loop, yo, pull through two loops, repeat from * three more times (5 loops on hook in total), yo, pull through all 5 loops, chain 1 to secure. (US four stitch dc cluster)

round 1: chain 6. Join with slip stitch to form a ring.
round 2: 12 sc in round. Join with slip stitch.
round 3: chain four, *tr (US dc) in next stitch, chain two, repeat from * to end, join to original chain four with a slip stitch.
round 4: chain 2, * make one four stitch tr cluster, chain 2, repeat from * to end, join with slip stitch.
round 5: chain 3, *make one four stitch tr cluster, chain one, tr, chain one, repeat from * to end, join with slip stitch. Change to contrast colour if desired.
round 6: chain 1, 2sc in each chain 1 space and one sc over each stitch of previous round. Join with a slip stitch.
round 7: chain 1, sc 2, inc in next st, *sc 5, inc in next st, rep from * around, end with sc 3. Inc should be placed on top of row 5's cluster stitches. Finish off.

a nice, quick IKEA hack by Katherine Hajer

I got rid of my land line finally, and switched to dry loop DSL for my home internet connection. That involved having someone from Bell come over last Saturday. They installed a new double-jack wall receptacle and making some changes in the telephone locker in my building.

For the weekend, on my already-cluttered end table, I had the (large, old) DSL modem, the router, my answering machine, and my main land line phone, plus the vase of knitting needles and all the other stuff that regularly live in that space. So I decided to use my newly-upgraded internet connection to research ways people had found to hide the electronics. Pinterest was, as usual, a real help.

The choices boiled down to hiding the components in appropriately-sized boxes, or cutting up some old books and using the covers as camouflage. I decided to go the box route because of some on-line debates about whether or not electronics hidden in old book covers would receive adequate ventilation. There were lots of dire warnings about house fires, but also lots of more measured warnings about the modems overheating and being ruined. I took measurements, kept in mind that I would need at least 5cm of headspace for ventilation, and dropped by the nearest IKEA.

As luck would have it, the boxes which fit the coverage/ventilation bill best were also the cheapest, at $5.99 for a set of two boxes. They've discontinued the ones I bought, so they're no longer in the catalogue, but they're a lot like these Fjälla boxes.

I took them home, did some measuring, cut holes in the side I wanted to face the wall, and set the components in to check the fit. It turned out both the modem and the router had sticking-out bits which necessitated the bottom part of the hole to be cut right down to the floor of the box.

Both pieces of equipment have lots of air circulating above them, and the various power and data cords hanging out the back have lots of room to connect without being twisted or crimped. I stacked the modem on top of the router so that the modem's box could hide the router's wifi antenna.

I checked the gear after watching several episodes of The X-Files on Netflix in a row. The router was at room temperature; the modem was warm, but only slightly — I could hold my hand against it for as long as I liked without discomfort. I checked them again in the morning after they'd been sitting mostly idle all night, and they were exactly the same.

With any luck the boxes will protect the electronics from dust while they let them be stacked.

cut the yarn by Katherine Hajer

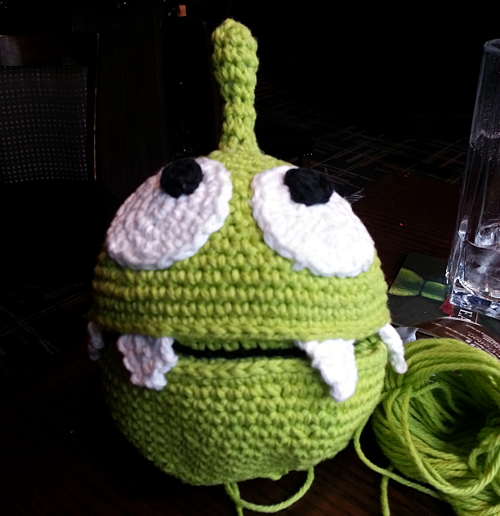
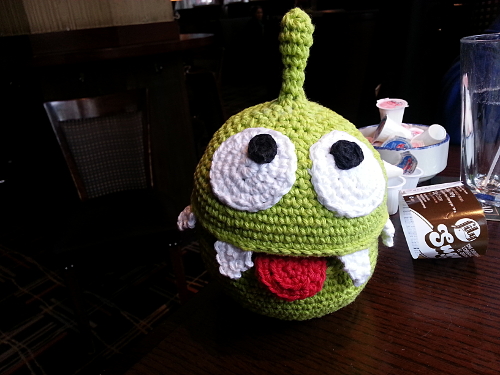
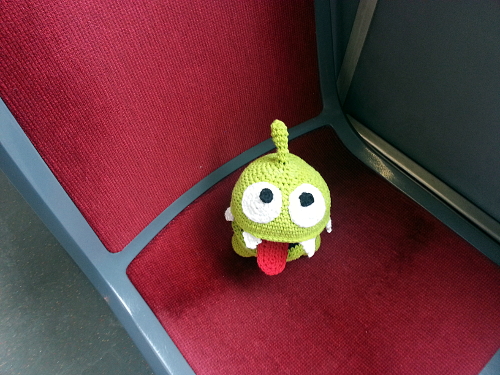
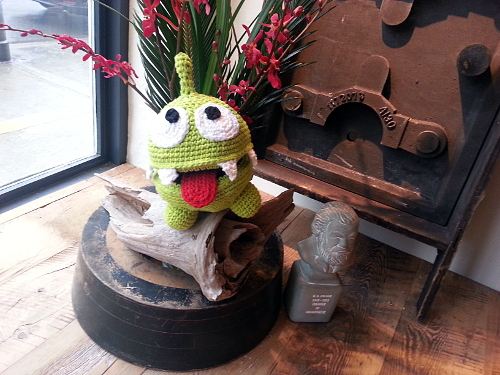
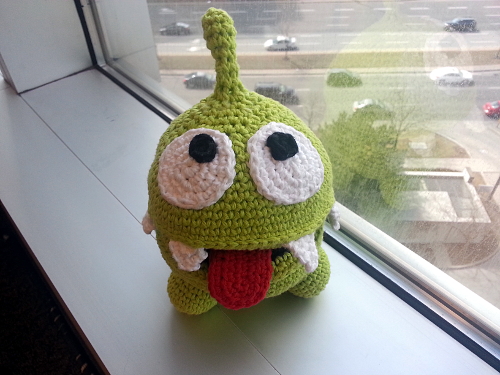
Niece the Elder has seriously gotten into the Cut the Rope game of late, and so asked for an Om Nom doll for Easter/spring equinox. Plushie versions can be had, but she wanted a handmade one so that it would fit her specifications: 10-15cm in diameter so he was big enough to cuddle, with a mouth that opened. He also had to have a candy to eat and a box to live in, just like in the game. In the game he doesn't have a blanket, but she thought he should have one so that he wouldn't get cold.

With a brief that specific, it wasn't difficult to get down to work. I checked Pinterest for Om Nom amigurumi and found a few examples, even some patterns for sale, but although one was close, none were exactly right. I'd checked out the game to get ideas — it's a great game, good use of physics and highly addictive if you can get past the ads — and I just didn't like the proportions on the dolls I saw, especially the eyes to head ratio.

So I sat down, came up with some math, found a crocheted sphere pattern calculator, and ordered Sugar 'n' Cream dishcloth cotton in the right colours. The blanket is one square of a nineteenth-century counterpane pattern and was made with some stash dishcloth cotton, so I got some stash-busting in too. The only things I didn't make were the boxes — those were bought at IKEA.

All of the stuffed pieces were stuffed with polyester batting, so everything is machine washable.

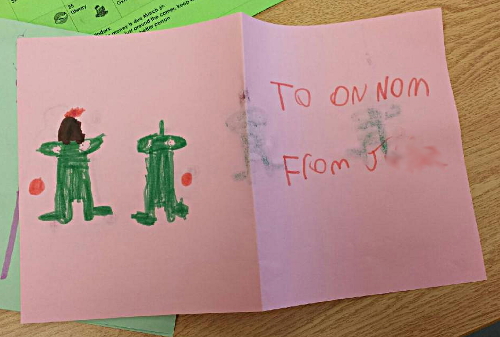
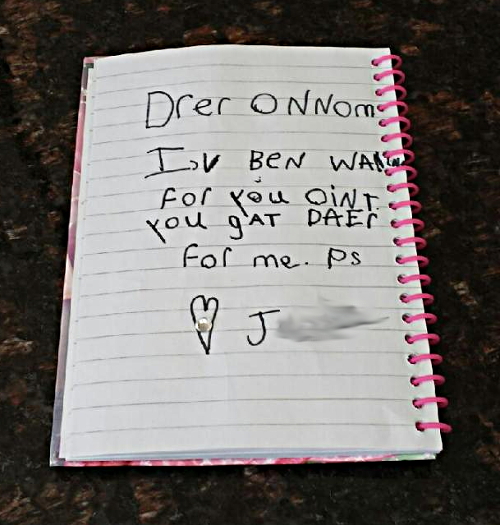
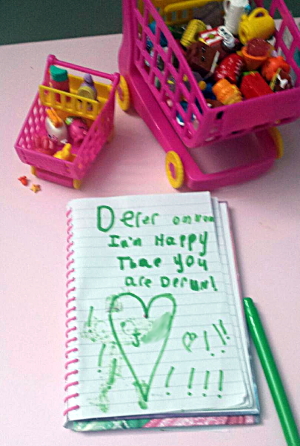
The whole three weeks I was putting together the two sets of Om Noms (two nieces means two dolls and two sets of accessories), Niece the Elder was writing letters to Om Nom and drawing picture books about him. Here's the construction/correspondence gallery:


#craftblogclub challenge: hairpin lace by Katherine Hajer

This month's challenge for #craftblogclub was to try out something new. I'd recently found all the pieces to my hairpin lace loom again (long story), and since I'd never actually made anything from hairpin lace, I thought it was about time that I did.

I pulled out some vintage 80s yarn from my stash — some Scheepjeswol Voluma I'd picked up at a fundraising sale for the Textile Museum of Canada — and started making loops. I guesstimated that three metres of loops would make a two-metre-long scarf.

That worked out to 600 loops per strip (300 to a side). This is hairpin lace at its most soothing, yet most unrewarding. The basic loop-making stitch is very simple, but you need guide yarn to keep the strip from tangling on itself, plus it's a good idea to tie at least one side of the loops into clusters of 50 so you can keep your count straight... it looks messy, and unwieldy, and like you're going to use up a lot of yarn just making a tangle.

But then all of the 600 loops are finally made, and it's time to do a joining pattern. I just used a simple fan pattern, which was included in the instruction booklet that came with the loom. The pattern is four groups of three loops, then one group of twelve loops. The pattern gets reversed on the other side of the strip. The loop joining went very quickly. It took less than a quarter of the time it took to make the loops in the first place. It is good after the discouragement of making the big mess of loops to obtain the final effect with relatively little effort.

I made two strips, then joined them together with small UK treble crochet (US double crochet) clusters. The result was a scarf which was, sure enough, about two metres long, and about fifteen centimetres wide.

The point of the exercise was to learn a new method and to decrease my stash by at least a little bit (the scarf used up about a ball and a half of the Voluma). I brought it in to show Bonnie, my chiropractor's office manager, and she liked the scarf so much that I gave it to her. So it was a win-win — I love it when that happens!

I like the look of hairpin lace when it's finished, but it's a bit of a one-trick pony. Certainly it's a good way to use up either ribbon yarn, or, as here, yarn with some fuzz to it — any type of yarn has some texture and interest to it on its own, so that it looks nice in those loops. I'd like to try making medallions (circles of loops) next time.

All of the scarf photos here, incidentally, are taken in the waiting area of the Beaches Wellness Centre's offices. I love how the wood planking looks behind the yarn!


crochet as decluttering by Katherine Hajer

upload.png

About three years ago, I got the Knit that Shit idea, which was intended to focus on both stash reduction and WIP reduction (erm, okay, make that UFO reduction). There have been some successfully finished objects, and some permanent unravellings too, but overall progress has been made. 

One of the items to be finished was a Kaffe Fassett Red Diamonds jacket:

This is one of my favourite Fassett colour patterns, and I had a lot of fun picking through the stash, finding colours that would work. But: in three years, I never made it past what is shown in the photo. Although the knitting is quicker than someone who's not into intarsia might think, I found every time I had to add new colours I wound up pausing for a very long time, getting lost in all of the possibilities and worrying I would have patches which were too dark or too light. I also worried that I wouldn't get a lot of wear out of the finished item. For my own personal tastes, I'd be more likely to get wear out of either a very large, swingy coat in this sort of patterned fabric (such as Fassett himself makes in different colourways and patterns), or else as a shawl. The boxy jacket I'd started wasn't the best fit with my wardrobe.

Add to that the general decluttering drive I've been on and... I decided to throw out the half-piece I had done (sniff) and use another favourite Fassett idea — random stripes — to use up the project yarn in a hurry. I had a lot of different odd balls of reddish and blueish colours set aside. So I did a row of foundation single crochet until I thought I had a nice width for a blanket, then started working rows.

The results thus far are in the large top photo. The idea to use granite stitch came from Erika Knight's Simple Crochet book. The stripe height is determined simply by how large each ball of yarn is — a 100g/200m skein makes about fifteen rows. The only rule I'm sticking to is that the reddish and blueish yarns alternate.

Granite stitch is often compared to knitted fabric. I don't quite agree — the density is still about the same as for single crochet — but it is far more flexible and drapey than regular single crochet, and not as gappy as, say, granny shells or double crochet in general. It looks the same on both sides, and makes a great blanket fabric. Just as well, because the granny square afghan I made less than two years ago is already showing signs of serious wear (and has been mended once). So much for acrylic yarn lasting longer.

nieces in knits by Katherine Hajer

My brother sent me a photo of the nieces wearing cardigans I made them. Niece the Elder's tiger jacket is almost two years old and still fits her (she just turned six), which is great, because it was a lot of work! It looks like it will fit for for a little while longer. As you can see, she is really into the whole tiger thing.

Niece the Younger's panda cardigan has only been hers for about a month, so it's just as well it's a bit too big for her. I'm glad the collar seems to want to stay down. She will be four soon, so she should get another season, maybe two, out of it.

Both of them got "pitched" on the cardis before I made them for them. I still maintain rule #1 with DIY gifts is to get at least some opt-in from the recipient before making anything, unless you are very sure they are going to like what you're making.

rapid prototyping by Katherine Hajer

Toronto is in the middle of the annual "deep freeze" part of the winter — where air masses migrate south from the Arctic and make the local temperature very cold. We've been in the -10C to -15C range for a week, with the wind chill making it feel more like -30C. It's finally warmed up to around 0C today.

But that got me thinking of slippers. My hairdresser has a basket of slippers by the salon entrance so people can remove their wet, slush-covered boots at the door and wear a pair of dry, comfy slippers while they're getting their hair done. I mentioned it to my chiropractor, since her office has hardwood flooring, and proposed I make some slippers out of leftover yarn for the waiting room.

The criteria:

  • Use stash yarn only (so I clear more stuff out of my apartment — there's my selfish motivation in all this)
  • Unisex styles and colours
  • Durable (long lifecycle — I wanted to make them and then not have to worry about making replacements for a long time)
  • Machine washable
  • Last but not least, they had to appeal to people who are not necessarily into the whole "handmade" aesthetic. I didn't want anything that gave a first impression of, "ooh, saw something like that at a charity sale once. It was really ugly."

There are lots of slipper patterns around. Remarkably few of them meet the criteria, especially that last one. And while usually I'm all for vintage, a lot of these patterns were good reminders that not everything about the 1950s and 60s was chic and elegant.

My first attempt were some "ballet flat slippers" that came out looking like Archie Bunker's grandmother made them as something for someone to wear as punishment. Partly it was the colour scheme I chose, partly the textured stitches (which leave big holes between rows when worn).

Also, even though the slippers were entirely crocheted, they didn't feel very substantial. I could see the soles wearing out very quickly.

Bottom line was, I just didn't like them. So they got ripped out, and I went pattern hunting some more.

Eventually I found a pattern for crocheted loafers with two-layered soles and parts of their construction modelled after shoe-making. I thought the results were acceptable:

I like how the inner sole colour peeks out just below the upper. The pattern came in a wide range of sizes, and the results are shoe-like enough to calm everyone but the most pro-factory slipper-wearers.

Being crocheted, the yarn consumption is relatively high for the results. That's fine for the soles, which need the fabric density anyhow, but I wondered if there were other options for the uppers. I tried making a basic "kimono" upper, and was pleased with the results.

Funny thing: the inner sole and the stitching holding the two soles and the upper together are recovered yarn from those ugly slippers I started with. These got worked on in public a bit, and I got some nice compliments on the colour combination. Maybe it was the pattern all along, or maybe adding the red helps.

The nice thing about the knitted upper is that it's just a plain rectangle, and only about twenty rows high, including the border. Although I think this prototype worked, next time I make slippers like these (um, next Tuesday night, most likely), I'm going to make the uppers about four rows higher so that the overlap at the front is more pronounced and so that there is slightly more coverage at the back of the heel.

I made the knitted upper so that the stitch gauge was approximately the same as the stitch gauge on the crocheted soles. That way, when I was slip stitching everything together, I could count on matching one knit stitch to one inner sole stitch to one outer sole stitch. There was a little bit of easing when I got to the toe, but not much.

The completion of the first pair of kimono slippers led me back to loafers. In the original pattern, you are supposed to make the top part of the toe box as a separate piece and then slip stitch it to the upper, easing to fit. It felt awkward to do, and was a little tricky since the toe doesn't actually fit in place.

On my next pair of loafers, I experimented, working U-shaped rows and matching decreases to the increases used while making the soles. It took two tries, but I was able to finish the toe box without breaking the yarn. I think I'm going to make all the loafer-style slippers this way from now on:

In the meantime, while I was making all of these, it occurred to me that it would be good to provide a basket to put them all in. So I found a pattern on-line, grabbed four mismatched skeins of white acrylic yarn from my stash, and had at it. In about two and a half hours, I had crocheted as far as I could with the four skeins without running out of yarn:

Now I just have to make enough slippers to fill the basket!

aswirl in spreadsheets by Katherine Hajer

I tried making a swirl jacket last autumn, and summed up my problems with the directions/sizing and decision to rip it all out in a blog post. This past week I've been off whilst recovering from surgery, so I decided to finish unravelling the work, make a new gauge swatch (more on that below), and sit down with the pattern book and a spreadsheet.

What I learned has put me off making any sort of swirl from the yarn I had set aside for it. The reasons why mostly have to do with what I found out from my spreadsheet, but also some "helper" information I found on the author's web site. My main take-away is that it would be very difficult to get predictable results if one went by the book alone. I would go so far as to say that making any adjustments for fit at all would require a virtual redesign without the information on the web site.

I didn't like the fabric hand of the original swirl jacket, so decided to go up to 5.5mm needles to get less springy fabric. The gauge swatch in the photo above is 50 stitches wide by 50 rows high. As you can see, the welted fabric (used on every pattern in the book) makes a horizontal rib. Horizontal ribs are pretty much the same width as a similar piece of stocking stitch, but their length/row gauge is going to change drastically depending on whether the fabric is unstretched, slightly stretched, or as stretched as it can be without distorting the stitches. I couldn't find anywhere in the book which actually says how much you're supposed to stretch the fabric to measure row gauge (there is an explainer on the web site since "knitters" were having trouble with it). In the book there is a lot of detail about making a larger-than-normal swatch, washing and blocking it, etc. etc., but never how to actually measure the thing. That seems like a weird omission for a ribbed fabric. Usually an author will at least put in the standard "slightly stretched" directive.

I took one stitch measurement and three row measurements based on different amounts of stretch applied (without reducing stitch width), and got for 10cm/4":

  • 18 stitches
  • 25 rows when pulled out to "maximum" (matches stocking stitch row height without distorting the stitch width)
  • 30 rows slightly pulled out
  • 45 rows fully scrunched (not pulled out at all)

Large, horizontally-draping parts of the jacket, like the lower back, will stretch from their own weight. Vertically-oriented parts, like the collar lapels, will hardly stretch at all. A big fitting issue I had with the original jacket I made was that while the back and shoulders fit well, the fronts could not be closed except by stretching the fronts to their maxium — not very flattering! It seems telling that most sizing photos show the jackets with the fronts open. If I'm going to make a large, A-line jacket, I want to know it can close. I know plus-sized people are supposed to resign themselves to cold stomachs and chests to look flattering, but I refuse when it comes to custom-made clothing. Especially clothing that claims to flatter a large variety of body types.

Okay, I had my gauge swatch — now what? I went through the pattern book, noting all of the patterns which had a similar gauge, their shape category, and the few measurements provided (just for my yoke size, size 3). The list included:

  • Winter Waves (Centred Circle)
  • Tangerine Rose (Centred Circle)
  • Silken Dreams (Off-centre Circle)
  • Strata Sphere (Off-centre Circle)
  • Shades of Grey (Off-centre Circle)
  • Plum Perfect (Off-centre Circle)
  • Wild Thyme (Off-centre Oval)
  • Coat of Many Colours (Off-centre Oval)
  • Silhouette in the Sun (Off-centre Oval)

Note that none of the Centred Oval patterns were even close to the gauge swatch, because they were all made with much thinner yarns.

Now that I had the required gauge and measurements in a spreadsheet, I started calculating the other measurements I wanted to consider, using the following assumptions/calculations:

  • the cross-back measurement: width of the non-collar stitches right before sleeve/upper back shaping began
  • armhole depth: the number of rows from the first sleeve increase to the welt at the top of the sleeve
  • body circumference: The cross-back measurement plus 2x the row depth of the fronts up to the sleeve/upper back shaping. Because the fronts/lapels hang vertically and therefore are stretched by their own weight less, I did this twice — once assuming slight stretch, and once assuming no stretch.

If my numbers are right, the swirls all seem to top out with an effective body circumference of 44 inches. That explains why the vast majority of photos of plus-sized people wearing them on Ravelry have them open, with the sides hanging well away from centre front.

For my own measurements, that means if the fabric has a loose enough hand, I'll just be able to find a swirl I can close, so long as I stick to shapes with more generous fronts. Therefore I focused on the Off-centre Ovals, since they have wider fronts.

Problem is, the book also says they have "more fitted torsos" and "slim, tapered sleeves". Okay, sleeves are easy to alter, but I wasn't sure what the "torso" part meant. The upper back, which is the only part that has any shaping? My spreadsheet was showing the smallest armhole depth to be a still-generous 14.1", so I really wasn't sure what this meant besides "not dolman sleeves".

And then I read this note on the web site about how gauge and fabric hand work together in a swirl. The 100% wool yarn I had set aside for the project was only useful for two jackets out of the entire book. Sure, I'd noticed there was a lot of cashmere and silk listed in the book, but I'd just shrugged it off — lots of books use luxury fibres in their samples. They photograph beautifully, and suppliers will donate them for the promotion the book will provide. I've made lots of natural-fibre sweaters which cost less than even one skein of a luxury-fibre yarn, though. I can almost justify a silk blend to myself, just because it's so hard-wearing, but cashmere? Nah. There were some mohair and alpaca blends listed as well, which can be more reasonable in cost, but still. This jacket was supposed to be a stash-busting project, not an excuse to get sticker shock over exotic yarn.

This time the silk and cashmere matter, because they're less stretchy than wool. Despite the welted fabric, the idea is to create a fabric that will stretch out and stay that way. Lesson learned: the welts are to:

  1. create a reversible fabric so things like lapel fold depth can remain vague
  2. create extra stretch in certain parts of the jacket (sleeve cross-measurements, those pesky fronts) to justify the hand-waving about "flattering a wide variety of body sizes".

Of the two patterns which were designed with 100% wool in mind, only one was an off-centre oval (Coat of Many Colours), and its gauge was two stitches per 10cm/4" smaller than my swatch: 20 stitches instead of my 18.

Okay, I'd already made a spreadsheet 19 columns wide; may as well see if I could follow a smaller size's directions and get the size I wanted. It's a common adjustment method, and one I've used many times before.

I entered the stitch counts for the longest sides of the body into my spreadsheet, then the goal measurement in inches I needed below that. Then I calculated out how many inches I'd get at 18 stitches to the inch, with the goal of seeing if any numbers in the smaller sizes matched what I needed in size 3.

What I found was a surprise: the size 3 numbers already matched. I figured I must have made a mistake, so I ran another row of the same calculations, using the pattern 20 stitches to 10cm/4". This is what I got.

(All measurements are in inches since that was all that was what was given on the book schematic):

The numbers in the top three rows, in red, come from the book. The first row is how many stitches to cast on for the long side for each size (1, 2, 3). The second row is how many inches the side should be per the schematic, and the third row is how wide the mitre point strip should be (this is the same number of stitches for each size, so never changes). Each side of the body shape starts and ends exactly halfway through a mitre point strip, so the full width of the long side is really:

  • long side length + (one-half left-hand mitre strip + one-half the right-hand mitre strip)

Add one mitre strip to the schematic long side length, and that tells me the length of fabric that should be between section markers. That's the fourth row, labelled "total side width".

Next, I calculated how big the section would be if I just cast on the prescribed number of stitches at the same gauge I got in my swatch. That's the row labelled "18", for 18 stitches per 10cm/4". The row below with the blue text shows the difference between my gauge calculation and the book-prescribed length. They're awfully close — it would be hard to alter to fix a .1" difference at this gauge, in a stretchy fabric like this. Even the .4" of the size 1 calculation isn't that far off.

But wait. This is the calculation from my gauge swatch, which is off from the prescribed gauge by two stitches!

So I did the same calculations over again, using the prescribed gauge (the last two rows in the spreadsheet). Unless I'm making a mistake somewhere, the prescribed gauge cannot make the prescribed measurements. The book is inaccurate with itself. I would be better off working with my bigger-needled, looser gauge swatch than what the book itself recommends.

Given that the prescribed gauge is off by about 2.5" for each size, and given that the mitre strips are 1.25", it seems the gauge was calculated from a finished garment without the mitre strips being included in the measurements. And given that there are 8 mitre strips accounting for a total of 10" of the total circumference of the jacket, that's kind of scary.

At this point, I checked for the errata. This pattern has had different errata for every single one of the four printings the book has had to date (I have a third printing). None of them mention the gauge discrepancy. To me, that raises the possibility that some of the printed errata are fixes for shaping or other structural issues raised by the gauge being off from the pattern. And the way the construction works on swirls, a knitter could be well into the pattern before they realise something is horribly wrong and they have to rip out several rows and do some of their own calculations.

As it stands, I've done more calculations for my swirl jacket than I have for sweaters I've designed myself from scratch, and still there are a lot of unknowns which I'd like to have settled before I started knitting. Like the sleeve shaping. I would have to add about four more columns to my spreadsheet to get the sleeve numbers I'd want before proceeding.

And this is the part where I give up, at least for now. Near as I can figure, swirls work because:

  • Fit is only guaranteed around the yoke/upper bodice — anything else is handwaved with marketing words like "softly", "tapered", and "gently".
  • Because it fits around the yoke, an area where wearers will notice binding or other discomfort, the jackets are seen as "fitting" when they don't actually fit in other areas. I've looked at hundreds of photos of swirls now. There's a lot of photos with cuffed-up sleeves (and I didn't even get to sleeves in this post) and fronts which are worn open because they cannot close comfortably. Swirls get around this by having cutaway-shaped fronts, which encourages people to wear them open.
  • Because the fronts aren't pulled closed, the back drapes over the hips more generously than it normally would. There are a lot of photos where the wearers imitate poses from the book and are photographed from the back, holding up the fronts to show the swirliness of the fabric colour changes. Which is very cool, but no-one walks around holding up the fronts of the jacket.

Someday, I will be in a shop with a great sale on, and I will snag a "sweater's worth" of some handpainted stuff with silk in it because I can't resist the bargain. I will get home, set it out on the coffee table, admire it, and then kick myself because I have no idea what to do with it. Then this book will come to mind, and I will realise it is Time to Make a Swirl.

But it is not this day.

Now, that raises a question. When making the original swirl jacket, I only had to break the yarn once, after the neck divide on the sleeves. The smaller bit of yarn I used for my gauge swatch for this exercise. The larger ball of yarn is about the size of a basketball, because I spit-spliced throughout.  What to do with it?

Something that doesn't mean I have to use a spreadsheet to fill in missing measurements and double-check prescribed gauges. Something that suits the 100% classic worsted wool (it's even called Classic Wool), and works with its many wonderful properties.

Something that makes me happy.


the gnome hat decorated with gnomes wearing hats by Katherine Hajer

I found the pattern for this hat around the beginning of August. Coincidentally, my sister-in-law happened to mention she liked "long hats that flop over and have a big pompom on top" around the same time. She also loves Christmas, so of course I had to make this for her. I used Sandnes Garn Sisu sock yarn and 2.25mm needles.

It's hard to see in the photo, but when you first start working the colourwork, the pattern repeat is not one gnome, but two — the foliage around the gnomes' feet is different for each pair of gnomes (there are four in total on the hat). One I got past the belt buckle things got easier, and once I got to the hat they got easier still. The last few rounds, where the snowflake motifs got worked and the crown decreases happened, were the easiest and fastest of all.

This hat took forever, in part because of the complex, asymmetrical patterning, but also in part because I just liked to peck at it and do a few rounds here and there as a break from other things. I did a couple rounds each night in the second half of NaNoWriMo, and in fact finished the hat a few hours after I finished my 50,000 word count. The pattern instructions were clear, and correct right until close to the end — I'm pretty sure the final stitch count for the crown decreases is off. It's not off by much, though, and if you've made it that far, it's no big deal to improvise a little. The instructions seem to be correct, just not the number of stitches given, so if you do what it says to do, you'll be fine.

crocheted doily rag rug by Katherine Hajer

I've wanted to make a rug for my home office for a while. The previous owner did the floor in stone and used the room as a dining room. That doesn't work for me, because the office is the only place in the apartment that can house bookshelves. The stone floor is still nice, but it can be uncomfortable when I want to sit on the floor and look at the knitting books on the bottom bookshelves.

I found a free pattern for a doily rag rug, and used a purpose-bought king-size sheet set torn into 2.5cm/1" strips for the yarn, crocheting loosely with a 10mm hook. Because I was using rags and not the strands of worsted yarn called for in the pattern, mine came out bigger, at 109cm/43" — which turned out to be the perfect size for the amount of available open floor space.

I had to improvise the last few rounds, simply because I was running out of yarn (see the leftover ball in the photo above). One thing I noticed about crocheting with rag yarn instead of the usual spun yarn is that the stitches come out a lot wider — a single stitch can easily fill a ch 2 or even ch 3 space.

One nice bonus is that the rug doesn't seem to slip around a lot on the floor, despite not having any non-slip backing. I think this might be from the texture of the stitches themselves. The other bonus is that since it's made from 100% cotton sheets, it's completely machine washable and dryable.

Edit: A lot of the patterns on-line mention this, and I'm going to mention it here — working at this gauge, on something this big, is very hard on one's hands and arms. I finished the rug in four days, not working more than a couple of rounds at a time before doing something else, and I still wound up with very inflamed arm muscles. Today is the third day after finishing the rug, and the first day I'm not in pain (although I still was a bit this morning). Take your time if you make one of these — finishing in a week is still plenty fast. 

how to make green poppies by Katherine Hajer

One tradition I adhere to very strictly is the wearing of a poppy pin on Remembrance Day. I know it surprises some people who know my politics, but let's just say I'm very big on the "Never Again" that is supposed to come right after the "Lest We Forget" part.

I stumbled across this wonderful free download on Ravelry by loopySue Designs. It has five different poppy patterns in it, all crocheted in worsted weight yarn. The notes say that they were made for an art installation, not to wear, but I used the tail from the centres to crochet a short chain (3 sts) and attach it to the other side on the back so I could pin it easily. Nothing wrong with wearing a handmade poppy — you can always drop some money in the donation boxes the Royal Legion circulates and not take one of the paper/plastic ones.

I just grabbed the first two balls of leftover yarn I had in the right colours and had at it. The two poppies in the photo took about ten minutes to make, each.

what jonathan swift said by Katherine Hajer

upload.png

I was sick all last week, so the last knitting of the swirl went very slowly, but it finally got done. I employed lots and lots of safety pins to the one seam so I could finally try it on and see how it actually fit. How it actually fit was okay, but not great, and what was the most frustrating was that it was impossible to tell until I got this far (ie: nothing but the finishing to do).

In Gulliver's Travels, Jonathan Swift has Gulliver encounter a society called the Laputians, who like to do everything by the "scientific" method (whether or not their methods are in fact scientific is up for some debate). One of their tailors measures Gulliver's thumb in order to ascertain his size for a new suit of clothes. While the thumb size does enable the tailor to create a suit which Gulliver can put on, the new clothes are hilariously ill-fitted, not having taken into account the different quirks of his body which were not reflected in his thumb. The thumb measurement wasn't a bad start for determining Gulliver's overall frame size (bigger thumb, bigger man and vice versa), but would not have revealed, say, his waist size.

The swirl patterns suffer from much the same issue. The pattern book sizes swirls by yoke size, that is, the measurement from one armpit, across the back of the neck, to the other armpit. Lots of different body sizes can have the same yoke size, since it doesn't take into account things like bust or waist measurements.

And that's the problem: yoke size isn't the only measurement where sizing matters. Yoke size determines whether or not one will fit into a swirl, but not how the fabric emanating from the yoke will cover the rest of the wearer's body. The swirl above fits in an A-line on me reminiscent of a cutaway 19th-century riding jacket, which sounds good except that the fabric flares out past my body at the lower edge and just sort of sticks out into space at the back, while providing insufficient coverage in the front unless I stretch the fronts and hold them in place with a pin. Not terribly flattering. The fabric hand has too much density to drape, and not enough ease to flow. It's a cliche, but it does not look like it does in the photos, even taking the much-thinner model's body into account.

You might be thinking, "Well duh, you should have checked your gauge!". And so I did, but as you can see from the photo, the entire garment is knitted in a rib-type fabric that stretches a lot horizontally. This is supposed to be a good thing, so that gravity can create an A-line while keeping the same-number-of-rows collar narrower. It means that different parts of the garment have different effective row gauges, and while the knitter can logic out which parts will have a stretched/hung gauge and which will have an unstretched gauge, the ribby fabric and the weight of the garment itself make it hard to say just how stretched or unstretched things will get in wearing.

In the preface to the book, designer Cat Bordhi praises the Knit, Swirl! author Sandra McIver for her precision, mentioning that during the development of the swirl, McIver kept spreadsheets of fabric stretch ratios. When I was trying to figure out what was going on with my swirl — that is, why it wasn't swirling — I came across that note and it gave me a chill. McIver mentioned that the yarn she used for this particular pattern (Karabella 8) has a tendency to "grow". My yarn is Patons Classic Wool, and as you might guess from a name like that, it's a very versatile yarn that's on the springy side. The pattern just calls for worsted weight yarn that will meet the gauge. Interestingly, the manufacturers' descriptions for the two different yarns are very similar, but the fabric hand I got compared to how the sample looks in the book photos are poles apart.

Meanwhile, the armhole depth is low, very low, and no measurement/adjustment info was given in the pattern. The lower edge of the armhole is nearly at my waist. The sleeves are almost leg-o'-mutton, very generous to about the elbow and then stretched flat over the forearm. The entire torso shifts out of place when I raise an arm. I'd rather the standard armhole depth for set-in sleeves: low enough to be comfortable over a shirt, but not so low that the sides of the garment get pulled up when the wearer moves their arms.

The sleeve length was the only place where the pattern provides instructions on how to lengthen (though not shorten), but then no base sleeve length is given — only the cuff-to-cuff measurements across the back. To get an idea of sleeve length, the knitter would have to subtract off the cross-back measurements and then divide the remaining measurement in half. It's an odd measurement to omit, since the actual cross-back measurement in the pattern is pretty fixed by size. I didn't make any changes, and the length is fine, but there was no good way to tell that prior to the knitting-up. I could do some back-of-the-envelope math from the gauge and cross my fingers, but that was about it.

The only solution provided in the book for fixing the diameter/draping issues I mentioned is to go up a needle size and make a larger swirl, but, as the book goes on to warn, this increases all of the measurements, including that armhole depth that's way too generous. So I'd have to work in a bigger needle size and take a gamble with one of the other patterns in the book, one that has a higher armhole depth and bigger torso diameter. As I said before, both those dimensions are never given.

The book does a lot of hand-waving about fit. The garments are versatile, different parts of the jacket are "fitted" or "slightly tapered" or "flow around the body" (except they don't). It's maddening since A-line jackets tend to look good on me, if they close without visible strain at the fronts and have a flattering sleeve shape. The swirl fails here. And it would be all right if it failed, except there was no way to know until I'd knitted the whole thing. I've adjusted just about every sweater pattern I've ever knitted, going right back to lengthening the sleeves on the very first cardigan I knitted when I was thirteen, but because of the way swirls are constructed, a lot of the familiar adjustment-points are moved or missing. It would be nice to have them noted to give the knitter a fighting chance, instead of having to blindly follow a pattern which may be leading them down the wrong path.

I keep thinking that these swirls would make a lot more sense if they were knitted in reverse. Make the sleeves, then make the upper back. Cast on for the collar, and start working in the round to create the collar/lower back. Work two extra rounds for a border and then cast off when the desired diameter is reached.

I think I just talked myself into frogging this one, which is a pity, because I still like the intended shape, if not the shape I got. I still want to try other patterns from the book. It's just I'd much rather I had more control over the outcome before I knitted it. The way the book works, you're knitting blind far too much of the time. I'm going to have to reverse-engineer a few swirls before I can make one with any confidence. I'm not sure it's worth the bother.

knitted vampire squid by Katherine Hajer

My friends Cheshin and J-A both said that the last post about the swirl jacket made it look like a vampire squid. Right, even better than the black hole metaphor!

For reference, here's a video about vampire squid:

And here's the most recent photo of the jacket:

Just to explain what's going on with the jacket: the slot in the middle is the lower edge of the neck/lapels. The part that's still on the needles is the upper back and the beginning of the sleeves.

I had the jacket with me while J-A and I went to Word on the Street last Sunday, and she remarked that the jacket looked small. I think it looks small too, and have been nervously pulling at the fabric every time I'm sitting with it but not actually knitting. I'm heartened by how the fabric's own weight makes the welts stretch out, and by how I can stretch each section to well past what its official measurements are supposed to be. Still, it's a bit of a nail-biter. I've decided to press on, because even if I wind up ripping it all out again (still not beyond the realm of possibility), I'll have a better idea of how the engineering works. I've made a circle-shaped jacket before (by Annie Modesitt), but that one was worked from the inside out and had raglan sleeves knitted out from the body. This is a different sort of construction altogether.

I checked out other projects of the same pattern on Ravelry. It was good to see how the jacket looks on women who are not professional models, and there was a lot of constructive commentary about the pattern itself. So far I have two issues with this and all the rest of the patterns in the book: although many measurements are given for various parts of the swirls, the two crucial ones that are missing are a) the diameter when worn and b) the armhole height. I'm making one of the swirls in the "centred circle" section, just because they seemed to be the most basic shape and the best place to start. I would like to make an "off-centre oval" swirl, because I want wider fronts and narrower lapels. The problem is, all of the off-centre oval swirls have "slim, tapered sleeves", which sounds an awful lot like "won't fit anyone who isn't a living stick insect." How slim is slim? How tapered is tapered? How do I stop it from being tapered if I don't want that? Can I just follow the sleeve part for a non-slim, non-tapered sleeved swirl instead?

I'll have to knit on and find out.

knitted event horizons by Katherine Hajer

The swirl jacket has been in progress for two weeks now. As I write this, the original 609 stitches have now been reduced to 432. That might seem like it's still a lot, but after working 11 rounds of 608 stitches, it feels like things are moving at light speed. 

The swirl is the knitting equivalent of a black hole. At first you use up yarn quickly (a 100g skein in 12 rounds), but it seems like things are moving very slowly. Where I am now, just past halfway to the centre, the rounds are getting completed quickly but yarn consumption has slowed. Because so much yarn got used so quickly at the start, though, the work's already quite heavy — 400g.

This was the tricky part.

This was the tricky part.

The weight's an interesting factor. I'm counting on it to stretch the swirl out. Even though my gauge measured bang-on correct when I started (honest!), it's a little tight right now. Enough to make me worried, but not panicky. Each side of its octagon shape is supposed to be 43cm, but they're more like 40. I'm putting it down to being squished on the circular needle. Fingers crossed the fabric will relax to the right size (or slightly bigger) during blocking. 

I don't usually block non-lace items, but the construction method of the swirl seems to warrant it. For a pattern that's just knit/purl, increase/decrease, it does raise a lot of issues about knitting and geometry. 

another yule cardi done by Katherine Hajer

I finished the Yule cardigan for Niece the Younger last weekend. It's a combination of two different patterns (the cardigan and the panda chart) from the same Family Circle Knitting book that Jackie gave me, with the only mod being that I made full-length sleeves instead of three-quarters (because who wants to see a three-year-old with cold forearms?).

Pandas are Niece the Younger's absolute favourite animal. She has several panda dolls, and we have to stop and look at Telus ads with pandas in them if she spots one.

I thought I was going to do the cardigan in pink to match the other 90% of the nieces' wardrobes, but Niece the Younger informed me her favourite colour is "blue!", and so I bought the yarn while she was around to approve it.

The cardigan and the white of the panda are done in King Cole Baby DK, while the black is left over from the tiger jacket I made Niece the Elder a couple of years ago.

I like the cardigan's shape, and the shirt-style collar. I always picture Niece the Younger in 1960s-style clothes, but she's been very particular about dressing herself since she was two. I hope this cardigan makes it into the repetoire!

Meanwhile, I had a start-everything frenzy in the second half of the weekend.

First, I discovered a Nicky Epstein free pattern for an empire-waisted swing jacket. I'm not going to link to it until I have some photos of my own version done, but basically I'm doing the bodice as shown, and then changing the sleeve length (to long sleeves again — what's with giving loose, swingy wool jackets short sleeves?). I'm also changing the collar stitch and colour, but keeping its shape. Right now there's no photo because it just looks like a swath of green heathered yarn. More on that when it's recognisable.

Some projects, on the other hand, need to be photographed when they're not recognisable. Here's the other jacket I started last weekend:

Yes, that's a jacket, all three rows of 609 stitches each of it. I had it distributed over four circular needles so I could ensure the fabric wasn't twisted before I joined it for knitting in the round (that just happened a minute before I took this photo). It's going to be a swirl jacket. This is the second attempt — the first time, I added a half-twist the first time I worked it in the round to "fix" a twist that wasn't actually there, so I had to rip it all out and start again. This too is part of the process. The good news is I have now made it to the part of the pattern where I get to start decreasing. After the current round is completed, I'll be down to only 592 stitches! You have to take your victories where you can find them.

strawberry steampunk: halfway by Katherine Hajer

Yesterday I got to 47 hexagons done on the Strawberry Steampunk blanket — just over the halfway point towards the goal of 87 hexagons. I laid out what I had on the floor, guessing the gap to take the joining border into account, and it looked like this:

What I learned was:

  • The blanket will work as a shawl at this width, but not as a... blanket. If I can squeeze 10 more motifs out of the stash yarn, I really should.
  • I don't like the half-motif "notches" every other row, so I'm going to have to fill them in with half-hexes. Since it's going to take all the stash yarn I have to complete the motifs, probably these will be from the joining border (charcoal) yarn.
  • I like the different shades of pink! I think the variation will give it the antique look I was going for, and will be more interesting than if just three colours were used. Sometimes not having quite enough in one colour is a good thing.

I'm still aiming to get 10 motifs done per week, more if I can manage it.

serendipitous stash-busting by Katherine Hajer

One of my goals for this year was to use up the rest of the stash yarn I got when I was birthday yarn-bombed. I weighed the yarn, estimated the yardage (no ball band, so I'm not 100% sure what it is besides worsted acrylic), and decided there was enough there for something for Niece the Elder. She's 5 and likes anything "rainbow", so I knitted up a square and showed it to her. She said she Yes! she liked it, and Yes! she would like me to make something for Yule for her with it. I showed her a picture of the Flower Cardigan that J-A recommended to me, and Yes! Niece the Elder liked that too.

I must have caught her in a good mood. Still, I have buy-in for the present, and that's important. I don't like to work for hours and hours on something and then spring it on someone without being very certain they will like it.

The cardigan starts in the centre of that flower motif you can see in the photo above, and then expands from that point to create a raglan, cutaway cardigan. I don't have buttons for it yet, but here's the front:

This took me almost exactly two weeks to knit. Most of the discussion on Ravelry has praised the directions. Personally I found them a little overwritten, but that's the trend these days. I skipped some sections and just did what I thought made sense, and 90% of the time that's what the directions said to do anyhow — when they didn't, such as the button band/lower border rib, you can't tell I altered anything. The biggest alteration was that I was using worsted weight instead of the stipulated DK, so I made a size 4 in order to get size 6 results. I just followed the size 4 stitch counts and the size 6 measurements, and it all worked out.

There's an adult version available, which will be tempting to do at some point.

Best of all, it used up almost all the yarn!