crochet

Katherine Hajer

functional failures by Katherine Hajer

I've had an idea to make slippers which look like sneakers for a while. There are some patterns around, but the ones that don't look terrible you have to pay for. Maybe it's just me being cheap, but I've yet to see a slipper design that blew me away so much I wanted to pay for it.

Fortunately, I did find a free, multi-sized pattern for loafers at Whistle & Ivy. I used them for making the slippers for my chiropractor's office, and I used them again for the sneaker slippers.

The great thing about the Whistle & Ivy pattern is that the construction is very shoe-like. That means that you can keep the sole construction the same and play around with different uppers shapes. Although the blog claims the sole is supposed to be a little smaller than your foot, I find the sole comes out much smaller. The pattern makes it easy to make the sole bigger, though — I just make the measurements comparable with a pair of commercially-made ballet flats I own. This time I also made triple soles, instead of the double soles called for in the pattern. I figured the extra layer wasn't a bad thing, and it makes the side of the soles closer in thickness to those on actual sneakers.

I'm pleased with everything about the sneaker slippers except for the white toe box, which is far too big. Next time, I'm going to make it shorter, and start the rest of the upper sooner, and make the tongue longer.

These are entirely made of stash. The bottom sole uses the same black wool as the upper, and the middle sole is some variegated yarn left over from when I made felted slippers. The inside sole is made from turquoise dishcloth cotton so my feet will stay dry. The white parts of the uppers and the embellishments (outer rim of all the sole layers, toe box, star applique, laces, red striping) are all acrylic. Meh. I hand wash all my handmade stuff anyhow.

In all, these used up two and a half balls of stash yarn, plus a little red yarn. Next time I'll use up a little less white, but use a different colour for the bottom sole so that I have more black for the uppers. In the meantime these count as a functional failure, in that they are wearable, just not exactly what I was aiming for.

swimming against snobbery by Katherine Hajer

Handmade things get a lot of judgments thrown at them, both fair and unfair. Some people think that anything handmade is automatically misshapen, inferior, and cheap. Other people associate handmade with unique design, superior construction, and natural, high-quality materials.  

The truth, of course, is that both extremes are true, and all points of opinion in between too. It all depends on the person doing the crafting... and the project. 

 My nieces like to cuddle up on the couch under blankets, and they're outgrowing the ones they've had since they were toddlers. I found this free mermaid afghan pattern, got approval from the recipients, and bought the yarn right away because hey, it was on sale. 

It's an example of what I call "Red Heart crochet", because it uses up kilometres of yarn, and so may only be done inexpensively with Red Heart acrylic. It also uses a large-ish hook for worsted weight (6.5mm instead of the expected 4.5 or 5). In this case, that's a good thing — otherwise it would be too heavy and warm.

Since I took the photo above, I've got about twice as many rows done. I've also modified the pattern a bit. More on that next post.

superhero accessories by Katherine Hajer

both superheros.JPG

I finished the nieces' superhero knits a while ago, but I didn't get around to making the things that go with them until it was almost time to give them as presents. Niece the Younger very specifically asked for a cape to go with her Superman sweater ("so I can fly"). Niece the Elder didn't say she wanted a tiara like Wonder Woman, but she did want the Wonder Woman sweater, and if Niece the Younger was getting a cape accessory, I needed to balance things make something to go with the Wonder Woman theme. At least a tiara is canonically correct.

The cape is sewn, not knitted (it's lighter and less likely to stretch out that way), and I am terrified of sewing, so I did the tiara first:

There are lots of free crown patterns on the web, both in knit and crochet. I took this one and reduced the number of points to one, then embroidered the red star on. The yarn is leftovers from the Wonder Woman sweater itself, with the gold yarn worked double so it's stiff enough to hold its shape when worn.

The tiara only took part of one evening to make, which left me with absolutely no excuse to not start on the cape. I decided to just take it step by step: iron and cut the fabric one day, pin the next, sew the next, finish the day after that.

Olga from work is much better at sewing than I am, and kindly sketched out the shape I needed to cut on a spare piece of paper. I followed her sketch and what she'd given as instructions, measuring against the length of the finished sweater and its neck width to get the inner and outer curve measurements. I surprised myself by cutting straight the first time (I had more fabric ready if I messed up). The next morning, I pinned bias tape along the edges like my chiropractor had explained.

The sewing went better than I thought. I even remembered what my mum had taught me about stitch length. I did wind up having to redo the neck part, but that was okay, because as I was ripping off the original length of bias tape for the neck, I remembered that I should stay stitch the raw edge around the neck curve before applying the bias tape.

And yes, I needed advice from three experienced sewists to finish this thing, and I still felt anxious about it.

The last step was to sew buttons onto the tabs extending from the neckline, and create corresponding button loops on the wrong side of the sweater so Niece the Younger could attach and detach the cape as she liked.

cape button loop.jpg

The sweaters seem to have been well received, in that I've seen both nieces wear them more than once. The day after Yule, Niece the Younger put the Superman sweater on over her pajamas when she woke up in the morning:

silly superman.JPG

Niece the Elder wore her Wonder Woman sweater to school the first day back after New Year's.

Usually I just let people put their own feedback in the comments, but this time I'm going to let Niece the Elder have the last word, and quote the comment she put on Facebook when she used my mum's iPad to look at the photo at the top of this post:

It. Is awesomely. GOOD!

So there.


the week of crafting dangerously by Katherine Hajer

My youngest brother is getting married this August.

August in this part of the world tends to be very hot, and very humid. The first thing I said when I was told the wedding date was, “Congratulations! That’s fabulous! Is it all right if I don’t wear stockings?”

Besides not liking to have my legs encased in nylon mesh in 90% humidity, I also have sensitive skin which tends to get annoyed (read: itchy and painful) when metal gets next to it in warm, damp weather. Even metal arms on lawn chairs can set me off. Wearing fine jewelry (real gold or silver) should avoid it, but if there’s any nickel alloyed with it at all, I react. I seem to do better with silver, probably because of what it’s alloyed with.

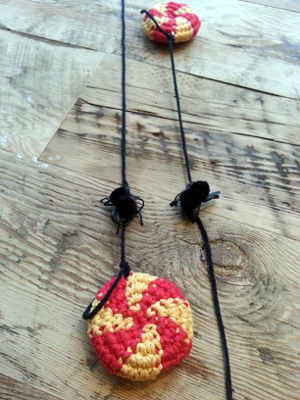
While I was out buying a dress to wear to the wedding, I noticed that the shop carried a modernist version of oya, which are strips of lace once made to edge head scarves, and now are used on their own as necklaces or bracelets. Wearing 100% cotton, thread-thin jewelry in Toronto’s August appeals very much.

It so happens that Interweave Crochet did a special article on oya a few issues back. I made the purple and black version shown above to go with the dress I bought.

Bonnie, the office manager at the wellness clinic I go to, asked for an oya of her own, and so I made up this cream, brown, and grey-beige version:

The lighter colours show the construction method better. The cream large flowers are made first, then the brown backgrounds are added. Then you make the grey-beige ribbon, attaching as you go. The cream fan shapes are added last.

It took me two weeks to make my oya, but only a week for Bonnie’s — partly because I already knew the pattern by that point and could work more efficiently, and partly because she wanted to take it with her on vacation, so I had a tight deadline to work to. For once I tried to track my time, and it worked out to about:

  • 45 minutes per large flower centre

  • 45 minutes per large flower background

  • 30-40 minutes per ribbon segment between large flowers

  • 90 minutes for the fan shapes, not counting darning in ends

There are 10 large flowers with 9 ribbon segments between them, for a total length of about two metres. You do the math.

I’ve only done a very limited amount of thread crochet before, so these projects were good learning experiences. One of things I learned is that if you hit the index finger on the hand holding the work enough times with the point of a 1.25mm steel crochet hook, you will break the skin. Two days later it’s almost completely healed, but I had to make a point of washing it with antibacterial soap because it was starting to fester. Ouch! Next time I do this sort of thing, I’m going to try putting a thimble on my left index finger to protect it.

In case anyone is wondering what happened to my stash-busting efforts, erm, both of these were made from 100% stash. I didn’t even know I owned the grey-beige thread until I found it, misfiled with my knitting yarn, while I was looking for something else. Thread-crochet purists will notice that the purples and the brown are perle cotton while the other threads are odds and ends of different stuff, but it all worked out. The purple large flowers might need some ironing, even a light blast of spray starch, to encourage them to stay flat and not crushed in half, but that’s about it.

#craftblogclub spring gift swap! by Katherine Hajer

The spring challenge for CraftBlogClub was to make thing for a gift swap, using only materials one already had on hand. Having materials on hand was not an issue for me [glances guiltily around the apartment at all the yarn]. Katie Gets Crafty organised us into swap pairs, and Zoe Roberts at Oodlesofcraft was my swap partner.

Zoe lists sewing, knitting, jewelry making, and card making as her crafts of choice on her blog, so I thought it best not to do any of those. I stuck with crochet, which seems to be my main method of using up yarn these days. Since I didn't want to make any assumption about what Zoe liked and get it wrong, I made a few small things, in the hopes that one of them would suit her:

Hairpin lace scarf:

This is more or less the same as the one I made a few months ago, except in three colours instead of one. This time around, I wasn't sure I had enough of one colour to make an entire scarf, so I went with long, vertical strips joined by a contrasting trim. As before, each strip of hairpin lace is 300 loops each side. The edging is sc, ch 1 to give it some weight without being too rigid.

Tawashi

I found out about these from Pinterest recently. By definition, they're small, crocheted or knitted items you can use for scrubbing dishes. The swirled stripes pattern I made is very popular, but there are also ones in the shapes of leaves, rectangles, cartoon characters... they're sort of like practical amigurumi. There are lots of different free patterns floating around for these, but I think this is the one I wound up using.

Tawashi are supposed to be made in cheap acrylic so that they can withstand the rigours of pot-scrubbing, but they're so small and cute I thought they might be nicer for washing one's face. I made them in dishcloth cotton so they could be used either way.

Coasters

Crocheted coasters seem to be having a moment. The day I got the ribbon and other packaging materials for the gift swap, I found some commercially-made ones for sale, and patterns for them seem to be proliferating. Summer's practically here, so I decided to make a set of four for the gift swap as well — the night before I had to mail everything off to make the deadline (oops). They were definitely a last-moment decision, but I made all four in one sitting (2-3 Doctor Who episodes watched on Netflix). They're made from the same dishcloth cotton as I made the tawashi from, and flattened out more after I took these photos. The pin I got the photo from leads to here, but the subsequent link seems to be dead — Etsy just displays a lot of "similar items" which aren't similar at all! I just had a good squint at the photo and figured out a facsimile from there. The pattern as I made it is after the photo:

Four stitch tr cluster: *yo, insert hook in next space, pull up a loop, yo, pull through two loops, repeat from * three more times (5 loops on hook in total), yo, pull through all 5 loops, chain 1 to secure. (US four stitch dc cluster)

round 1: chain 6. Join with slip stitch to form a ring.
round 2: 12 sc in round. Join with slip stitch.
round 3: chain four, *tr (US dc) in next stitch, chain two, repeat from * to end, join to original chain four with a slip stitch.
round 4: chain 2, * make one four stitch tr cluster, chain 2, repeat from * to end, join with slip stitch.
round 5: chain 3, *make one four stitch tr cluster, chain one, tr, chain one, repeat from * to end, join with slip stitch. Change to contrast colour if desired.
round 6: chain 1, 2sc in each chain 1 space and one sc over each stitch of previous round. Join with a slip stitch.
round 7: chain 1, sc 2, inc in next st, *sc 5, inc in next st, rep from * around, end with sc 3. Inc should be placed on top of row 5's cluster stitches. Finish off.

cut the yarn by Katherine Hajer

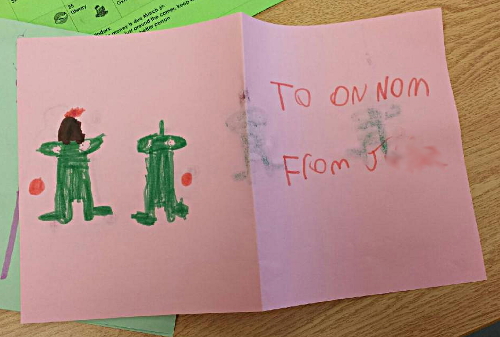
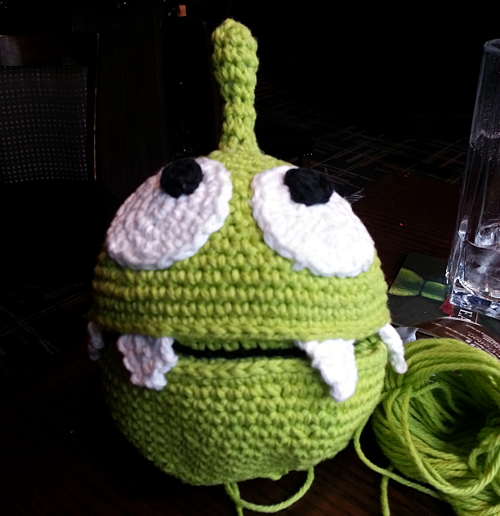
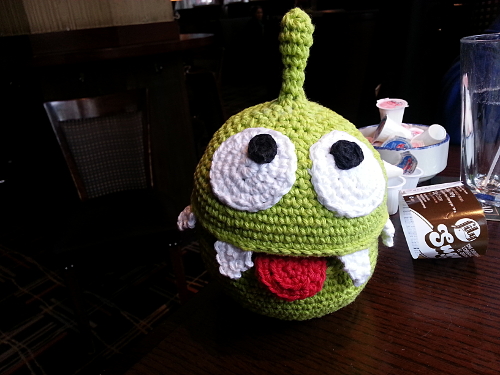
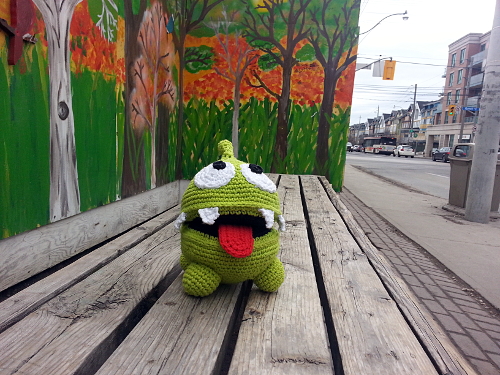
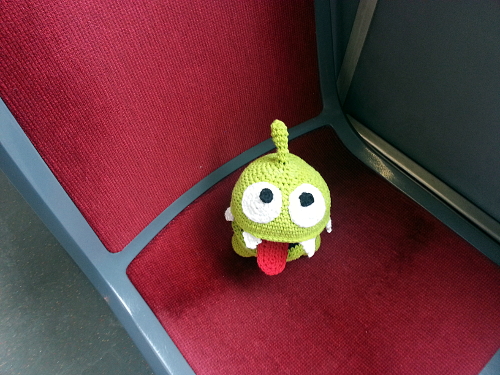
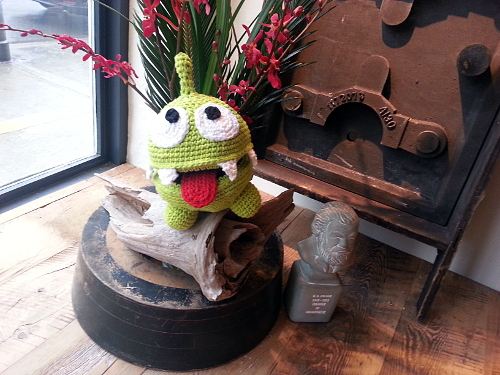
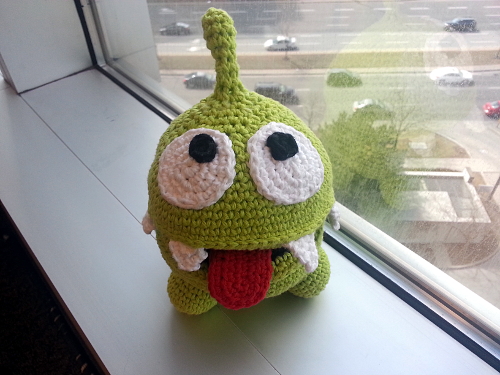
Niece the Elder has seriously gotten into the Cut the Rope game of late, and so asked for an Om Nom doll for Easter/spring equinox. Plushie versions can be had, but she wanted a handmade one so that it would fit her specifications: 10-15cm in diameter so he was big enough to cuddle, with a mouth that opened. He also had to have a candy to eat and a box to live in, just like in the game. In the game he doesn't have a blanket, but she thought he should have one so that he wouldn't get cold.

With a brief that specific, it wasn't difficult to get down to work. I checked Pinterest for Om Nom amigurumi and found a few examples, even some patterns for sale, but although one was close, none were exactly right. I'd checked out the game to get ideas — it's a great game, good use of physics and highly addictive if you can get past the ads — and I just didn't like the proportions on the dolls I saw, especially the eyes to head ratio.

So I sat down, came up with some math, found a crocheted sphere pattern calculator, and ordered Sugar 'n' Cream dishcloth cotton in the right colours. The blanket is one square of a nineteenth-century counterpane pattern and was made with some stash dishcloth cotton, so I got some stash-busting in too. The only things I didn't make were the boxes — those were bought at IKEA.

All of the stuffed pieces were stuffed with polyester batting, so everything is machine washable.

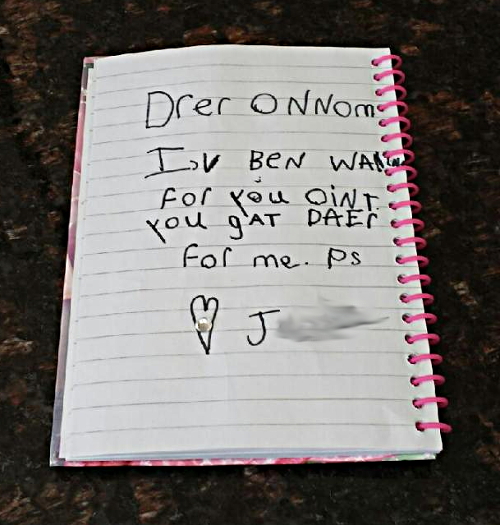
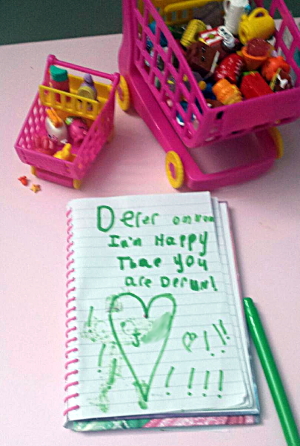
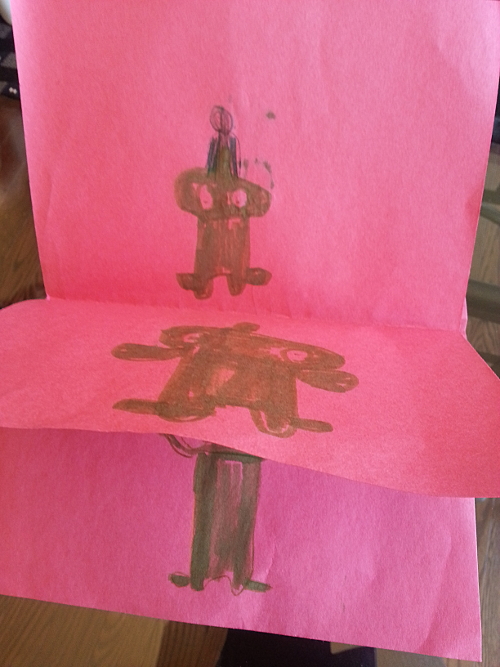
The whole three weeks I was putting together the two sets of Om Noms (two nieces means two dolls and two sets of accessories), Niece the Elder was writing letters to Om Nom and drawing picture books about him. Here's the construction/correspondence gallery:


#craftblogclub challenge: hairpin lace by Katherine Hajer

This month's challenge for #craftblogclub was to try out something new. I'd recently found all the pieces to my hairpin lace loom again (long story), and since I'd never actually made anything from hairpin lace, I thought it was about time that I did.

I pulled out some vintage 80s yarn from my stash — some Scheepjeswol Voluma I'd picked up at a fundraising sale for the Textile Museum of Canada — and started making loops. I guesstimated that three metres of loops would make a two-metre-long scarf.

That worked out to 600 loops per strip (300 to a side). This is hairpin lace at its most soothing, yet most unrewarding. The basic loop-making stitch is very simple, but you need guide yarn to keep the strip from tangling on itself, plus it's a good idea to tie at least one side of the loops into clusters of 50 so you can keep your count straight... it looks messy, and unwieldy, and like you're going to use up a lot of yarn just making a tangle.

But then all of the 600 loops are finally made, and it's time to do a joining pattern. I just used a simple fan pattern, which was included in the instruction booklet that came with the loom. The pattern is four groups of three loops, then one group of twelve loops. The pattern gets reversed on the other side of the strip. The loop joining went very quickly. It took less than a quarter of the time it took to make the loops in the first place. It is good after the discouragement of making the big mess of loops to obtain the final effect with relatively little effort.

I made two strips, then joined them together with small UK treble crochet (US double crochet) clusters. The result was a scarf which was, sure enough, about two metres long, and about fifteen centimetres wide.

The point of the exercise was to learn a new method and to decrease my stash by at least a little bit (the scarf used up about a ball and a half of the Voluma). I brought it in to show Bonnie, my chiropractor's office manager, and she liked the scarf so much that I gave it to her. So it was a win-win — I love it when that happens!

I like the look of hairpin lace when it's finished, but it's a bit of a one-trick pony. Certainly it's a good way to use up either ribbon yarn, or, as here, yarn with some fuzz to it — any type of yarn has some texture and interest to it on its own, so that it looks nice in those loops. I'd like to try making medallions (circles of loops) next time.

All of the scarf photos here, incidentally, are taken in the waiting area of the Beaches Wellness Centre's offices. I love how the wood planking looks behind the yarn!


crochet as decluttering by Katherine Hajer

upload.png

About three years ago, I got the Knit that Shit idea, which was intended to focus on both stash reduction and WIP reduction (erm, okay, make that UFO reduction). There have been some successfully finished objects, and some permanent unravellings too, but overall progress has been made. 

One of the items to be finished was a Kaffe Fassett Red Diamonds jacket:

This is one of my favourite Fassett colour patterns, and I had a lot of fun picking through the stash, finding colours that would work. But: in three years, I never made it past what is shown in the photo. Although the knitting is quicker than someone who's not into intarsia might think, I found every time I had to add new colours I wound up pausing for a very long time, getting lost in all of the possibilities and worrying I would have patches which were too dark or too light. I also worried that I wouldn't get a lot of wear out of the finished item. For my own personal tastes, I'd be more likely to get wear out of either a very large, swingy coat in this sort of patterned fabric (such as Fassett himself makes in different colourways and patterns), or else as a shawl. The boxy jacket I'd started wasn't the best fit with my wardrobe.

Add to that the general decluttering drive I've been on and... I decided to throw out the half-piece I had done (sniff) and use another favourite Fassett idea — random stripes — to use up the project yarn in a hurry. I had a lot of different odd balls of reddish and blueish colours set aside. So I did a row of foundation single crochet until I thought I had a nice width for a blanket, then started working rows.

The results thus far are in the large top photo. The idea to use granite stitch came from Erika Knight's Simple Crochet book. The stripe height is determined simply by how large each ball of yarn is — a 100g/200m skein makes about fifteen rows. The only rule I'm sticking to is that the reddish and blueish yarns alternate.

Granite stitch is often compared to knitted fabric. I don't quite agree — the density is still about the same as for single crochet — but it is far more flexible and drapey than regular single crochet, and not as gappy as, say, granny shells or double crochet in general. It looks the same on both sides, and makes a great blanket fabric. Just as well, because the granny square afghan I made less than two years ago is already showing signs of serious wear (and has been mended once). So much for acrylic yarn lasting longer.

rapid prototyping by Katherine Hajer

Toronto is in the middle of the annual "deep freeze" part of the winter — where air masses migrate south from the Arctic and make the local temperature very cold. We've been in the -10C to -15C range for a week, with the wind chill making it feel more like -30C. It's finally warmed up to around 0C today.

But that got me thinking of slippers. My hairdresser has a basket of slippers by the salon entrance so people can remove their wet, slush-covered boots at the door and wear a pair of dry, comfy slippers while they're getting their hair done. I mentioned it to my chiropractor, since her office has hardwood flooring, and proposed I make some slippers out of leftover yarn for the waiting room.

The criteria:

  • Use stash yarn only (so I clear more stuff out of my apartment — there's my selfish motivation in all this)
  • Unisex styles and colours
  • Durable (long lifecycle — I wanted to make them and then not have to worry about making replacements for a long time)
  • Machine washable
  • Last but not least, they had to appeal to people who are not necessarily into the whole "handmade" aesthetic. I didn't want anything that gave a first impression of, "ooh, saw something like that at a charity sale once. It was really ugly."

There are lots of slipper patterns around. Remarkably few of them meet the criteria, especially that last one. And while usually I'm all for vintage, a lot of these patterns were good reminders that not everything about the 1950s and 60s was chic and elegant.

My first attempt were some "ballet flat slippers" that came out looking like Archie Bunker's grandmother made them as something for someone to wear as punishment. Partly it was the colour scheme I chose, partly the textured stitches (which leave big holes between rows when worn).

Also, even though the slippers were entirely crocheted, they didn't feel very substantial. I could see the soles wearing out very quickly.

Bottom line was, I just didn't like them. So they got ripped out, and I went pattern hunting some more.

Eventually I found a pattern for crocheted loafers with two-layered soles and parts of their construction modelled after shoe-making. I thought the results were acceptable:

I like how the inner sole colour peeks out just below the upper. The pattern came in a wide range of sizes, and the results are shoe-like enough to calm everyone but the most pro-factory slipper-wearers.

Being crocheted, the yarn consumption is relatively high for the results. That's fine for the soles, which need the fabric density anyhow, but I wondered if there were other options for the uppers. I tried making a basic "kimono" upper, and was pleased with the results.

Funny thing: the inner sole and the stitching holding the two soles and the upper together are recovered yarn from those ugly slippers I started with. These got worked on in public a bit, and I got some nice compliments on the colour combination. Maybe it was the pattern all along, or maybe adding the red helps.

The nice thing about the knitted upper is that it's just a plain rectangle, and only about twenty rows high, including the border. Although I think this prototype worked, next time I make slippers like these (um, next Tuesday night, most likely), I'm going to make the uppers about four rows higher so that the overlap at the front is more pronounced and so that there is slightly more coverage at the back of the heel.

I made the knitted upper so that the stitch gauge was approximately the same as the stitch gauge on the crocheted soles. That way, when I was slip stitching everything together, I could count on matching one knit stitch to one inner sole stitch to one outer sole stitch. There was a little bit of easing when I got to the toe, but not much.

The completion of the first pair of kimono slippers led me back to loafers. In the original pattern, you are supposed to make the top part of the toe box as a separate piece and then slip stitch it to the upper, easing to fit. It felt awkward to do, and was a little tricky since the toe doesn't actually fit in place.

On my next pair of loafers, I experimented, working U-shaped rows and matching decreases to the increases used while making the soles. It took two tries, but I was able to finish the toe box without breaking the yarn. I think I'm going to make all the loafer-style slippers this way from now on:

In the meantime, while I was making all of these, it occurred to me that it would be good to provide a basket to put them all in. So I found a pattern on-line, grabbed four mismatched skeins of white acrylic yarn from my stash, and had at it. In about two and a half hours, I had crocheted as far as I could with the four skeins without running out of yarn:

Now I just have to make enough slippers to fill the basket!

crocheted doily rag rug by Katherine Hajer

I've wanted to make a rug for my home office for a while. The previous owner did the floor in stone and used the room as a dining room. That doesn't work for me, because the office is the only place in the apartment that can house bookshelves. The stone floor is still nice, but it can be uncomfortable when I want to sit on the floor and look at the knitting books on the bottom bookshelves.

I found a free pattern for a doily rag rug, and used a purpose-bought king-size sheet set torn into 2.5cm/1" strips for the yarn, crocheting loosely with a 10mm hook. Because I was using rags and not the strands of worsted yarn called for in the pattern, mine came out bigger, at 109cm/43" — which turned out to be the perfect size for the amount of available open floor space.

I had to improvise the last few rounds, simply because I was running out of yarn (see the leftover ball in the photo above). One thing I noticed about crocheting with rag yarn instead of the usual spun yarn is that the stitches come out a lot wider — a single stitch can easily fill a ch 2 or even ch 3 space.

One nice bonus is that the rug doesn't seem to slip around a lot on the floor, despite not having any non-slip backing. I think this might be from the texture of the stitches themselves. The other bonus is that since it's made from 100% cotton sheets, it's completely machine washable and dryable.

Edit: A lot of the patterns on-line mention this, and I'm going to mention it here — working at this gauge, on something this big, is very hard on one's hands and arms. I finished the rug in four days, not working more than a couple of rounds at a time before doing something else, and I still wound up with very inflamed arm muscles. Today is the third day after finishing the rug, and the first day I'm not in pain (although I still was a bit this morning). Take your time if you make one of these — finishing in a week is still plenty fast. 

how to make green poppies by Katherine Hajer

One tradition I adhere to very strictly is the wearing of a poppy pin on Remembrance Day. I know it surprises some people who know my politics, but let's just say I'm very big on the "Never Again" that is supposed to come right after the "Lest We Forget" part.

I stumbled across this wonderful free download on Ravelry by loopySue Designs. It has five different poppy patterns in it, all crocheted in worsted weight yarn. The notes say that they were made for an art installation, not to wear, but I used the tail from the centres to crochet a short chain (3 sts) and attach it to the other side on the back so I could pin it easily. Nothing wrong with wearing a handmade poppy — you can always drop some money in the donation boxes the Royal Legion circulates and not take one of the paper/plastic ones.

I just grabbed the first two balls of leftover yarn I had in the right colours and had at it. The two poppies in the photo took about ten minutes to make, each.

stacked hexagons by Katherine Hajer

I've been crocheting at least one Paperweight Granny/African flower a day since my last post about them. The photo above shows the lot — 24 completely done, plus 4 more that just need the ends darned in. If I've calculated my measurements right, I'll need at least 87 before I can think about joining.

The rule I've made is crochet 4, darn them all in, crochet some more. There are 6 ends per motif, which may seem like a lot, but the truth is the structure of the motif makes them very quick and easy to finish off. The one situation I do not want to wind up in is having me crying about "all those ends" when a little prudence can save a lot of angst.

Speaking of avoiding angst, I lucked out on Pinterest last night and found a fabulous tutorial about how to join hexagonal motifs in one continuous run — for the entire piece, not just a row or cluster at a time! I tried it last night on a few finished motifs, just to see if I understood the instructions, and it's remarkably easy once you get going. I unravelled the results because I'm not ready to join yet, but I am definitely using this for the assembly.

The only caveat is that the hexagons have to have the same colour on the last round to use the continuous join. Fair enough, given how it works. If you aren't using the same colour, there are other join-as-you-go options to choose from anyhow.

strawberry steampunk... and a sock by Katherine Hajer

Earlier this spring, I had an idea to use up some of the acrylic worsted I inherited from my grandmother, and make an afghan. Afghans themselves can be rather boring unless there's an interesting angle to them, and after some consideration I decided to try to make this one fit the steampunk aesthetic. Okay, mostly because I had a big skein of burgundy to use up, but hey, inspiration comes from everywhere.

I found a suitable spiky/gearsy block to make, and started off...

...only to figure out I really hated making this block. The grey-purple "floating" shells involve several two-colour rounds with some awkward hook manoeuvres, and produce elements which look like they need to be scraped off and checked under a microscope. The block itself took forever to do. Blech.

Lately there's been a lot of buzz around the African Flower/Paperweight Granny motif. I liked the look of it, and especially liked that you can hook up one in only four rounds (not counting the joining border). So I tried a bunch of different combinations, based on how much yarn I had in each colour:

Much better, in my humble opinion, and the long stitches on the final round still give it that gear effect when worked in these colours. (It seems like the big trend is to work it in bright, clear colours, which I am so not doing. Oh well. Still works.)

I joined some blocks together, just to get a sample big enough to calculate the final afghan size:

I like how the final round of the motif shows up when it's edged by the joining border.

If I've done the calculations right, I'll need 87 blocks to make a 45x150cm afghan. I'd like it to be more like 170cm, but I'll have to see how far I get before I run out of yarn.

Meanwhile, the socks I started before the Iceland trip are back in active rotation:

It'll be nice to get these done — this is still only the first sock.

It'll be nice to get everything done.

an act of spontaneous millinery by Katherine Hajer

The last few rows of the souvenir Icelandic shawl were hard to get through. Each row was taking upwards of fifteen minutes to complete.

Last Saturday my youngest brother had the family over for lunch, and I didn't want to be mucking with hundreds of stitches, on a streetcar, in a heat wave. So instead I crocheted a hat:

The pattern is the Zelda cloche from the Spring 2014 issue of Interweave Crochet. The hat is worked sideways, instead of the usual bottom-up or top-down, and it actually fits very well (see the previous link for a photo of a model wearing it).

The lace motif is only on one side, although it wouldn't take much to make it symmetrical and on both sides. The total working time was only something like four hours, which is pretty good considering over two-thirds of it is rows of single crochet.

As for the yarn... it's left over from a shawl I made my mum last year. It used up just over the half the yarn I had left, and was a good reminder that sometimes stash-busting happens one small item at a time. With the grey yarn left over from the Icelandic shawl, I'll have a new hat/scarf/glove set.